The original Dairy Queen ice cream cake debuted in the 1970s, blending the brand’s signature soft‑serve with a simple chocolate sponge. It quickly became a staple at birthday parties across America, celebrated for its effortless preparation and instantly recognizable taste. Over the decades, home cooks have sought to replicate that iconic swirl, and today we honor that history with a version that stays true to the creamy texture while offering a few gentle twists for home kitchens.
Why You'll Love It
-
- No special equipment needed, just a loaf pan
-
- Layers stay distinct yet meld together beautifully
-
- Uses everyday ingredients you likely have on hand
-
- Perfect for birthdays, celebrations, or a sweet surprise
"The cake turned out just as smooth and dreamy as the one from the store—my kids were thrilled!"
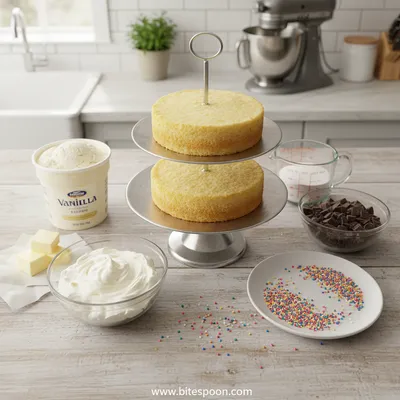
Essential Ingredient Guide
- Vanilla soft‑serve ice cream: Choose a high‑quality brand for a buttery texture; let it soften just enough to spread easily.
- Chocolate cake mix: A simple boxed mix works; bake in a 9×13 pan and let it cool completely before layering.
- Chocolate fudge sauce: Adds richness and a glossy finish; you can make it from cocoa powder, sugar, and butter.
- Whipped cream: Lightly sweetened whipped cream creates a fluffy topping that balances the dense cake.
- Sprinkles or crushed candy: A colorful garnish that adds a playful crunch and visual appeal.
- A pinch of sea salt: Enhances the chocolate flavor without being noticeable.
Complete Cooking Process
-
Ingredient Readiness:
Bake the chocolate cake, let it cool, and soften the ice cream; prepare fudge sauce and whipped cream.
-
Layer Assembly:
Spread a thin layer of ice cream over the cake base, then add another cake layer for depth.
-
Flavor Development:
Drizzle warm fudge sauce over the ice cream to create a glossy swirl that infuses sweet chocolate notes.
-
Finishing Touches:
Top with whipped cream, sprinkles, and a light dusting of sea salt for contrast.
-
Serving Timing:
Freeze the assembled cake for at least two hours before slicing for clean, firm pieces.
-
Use a springform pan for easy removal.
-
Freeze the cake on a flat tray to keep layers level.
-
Warm the fudge just until pourable for a smoother drizzle.
-
Slice with a warm knife for clean cuts.
Pro Tips
When the cake has set, take a moment to admire the glossy layers before you serve. I remember the first time I tried this at a family gathering—there was a hush as the frosting dripped, and then smiles all around. It’s those small, quiet moments that make a simple cake feel special.
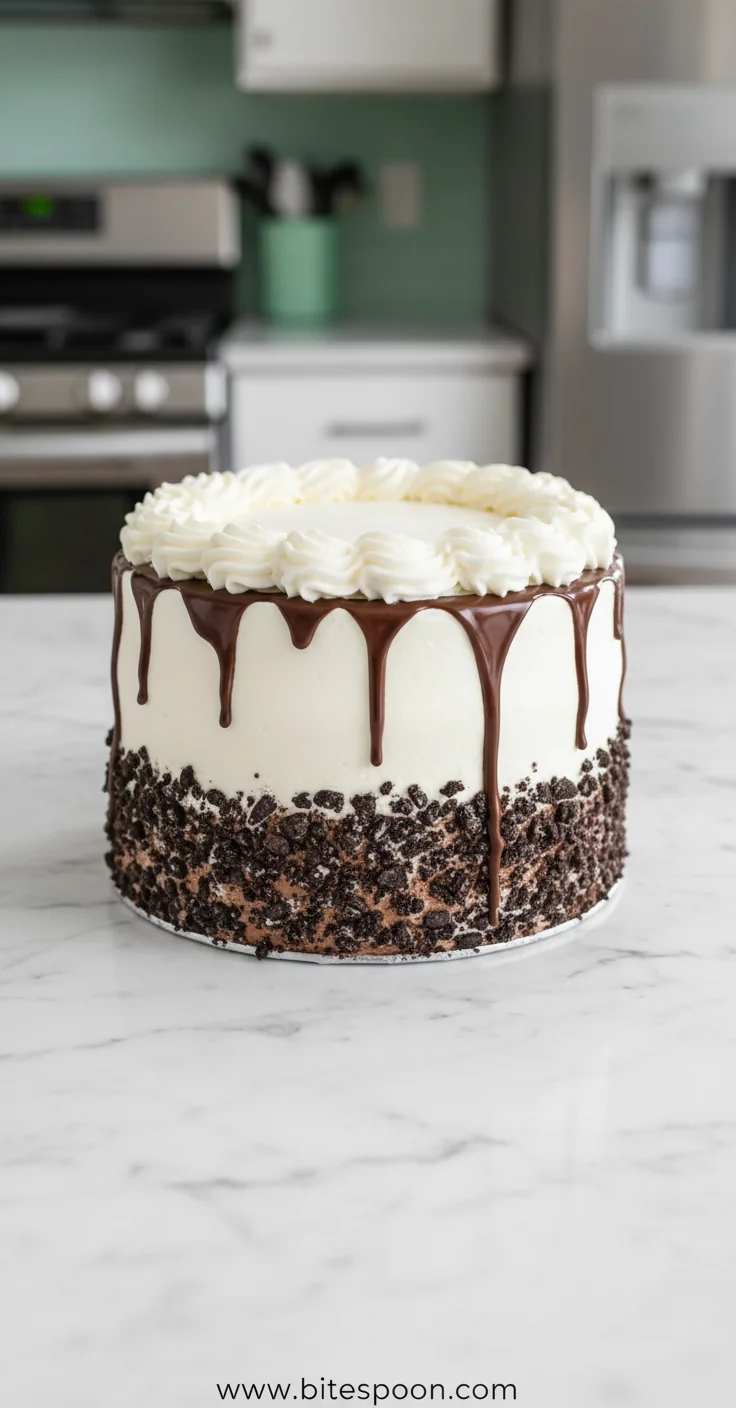
The essence of the dish:
A gentle union of soft‑serve vanilla ice cream and moist chocolate cake, framed by glossy fudge and a light whipped‑cream crown.
A fun fact or historical angle:
Did you know the original Dairy Queen cake was actually a seasonal offering, first appearing during the summer months when soft‑serve was at its peak?
Flavor or sensory focus:
Expect a cool, buttery mouthfeel from the ice cream, a sweet chocolate bite from the cake, and a silky, slightly salty finish from the fudge.
You Must Know
-
Keep the cake completely cold before serving.
-
Use a warm knife for clean slices.
-
Allow the frosting to set for two hours.
Frequently Asked Questions
→ Can I use homemade ice cream?
Absolutely—just make sure it’s softened enough to spread evenly.
→ What cake flavor works best?
Traditional chocolate is classic, but vanilla or red velvet add a fun twist.
→ Do I need a special pan?
A standard 9×13" loaf pan works fine; a springform pan makes removal easier.
→ How long can leftovers be stored?
Keep refrigerated for up to three days, or freeze for up to a month.
→ Can I add fruit to the layers?
Yes—strawberries or cherries pair nicely, just add them after the first ice‑cream layer.
→ Is this cake gluten‑free?
Use a certified gluten‑free cake mix and ensure all other ingredients are gluten‑free.
Nutrition Facts
per serving
420
Calories
6g
Protein
48g
Carbs
22g
Fat
Taste Profile
Richly sweet with a buttery vanilla finish
Ingredient Substitutions
Don't have an ingredient? Try these alternatives
Provides a tangier flavor and higher protein; adjust sweetness as needed.
Makes the dessert gluten‑free; may require a slightly longer bake time.
Recipe Variations
Try these delicious twists on the original
Spicy Version
Add a pinch of cayenne to the fudge sauce and sprinkle crushed pretzels for a sweet‑spicy surprise.
Mediterranean Style
Swap chocolate cake for a light lemon sponge and swirl in orange‑infused ice cream.
Common Mistakes to Avoid
Learn from others' mistakes for perfect results
- Skipping the cooling step and layering a warm cake, which melts the ice cream.
- Using too thick a layer of ice cream, resulting in a soggy texture.
- Not letting the fudge cool slightly before drizzling, causing it to run off the cake.
Meal Prep & Storage
Make Ahead Tips
You can bake the cake and prepare the fudge sauce a day ahead; keep them wrapped separately and assemble when ready.
Leftover Ideas
Store leftover slices in an airtight container in the freezer; thaw briefly before serving for a softer bite.
Perfect Pairings
Serve this with...
Cooking Timeline
Preheat oven, mix cake batter, and bake the chocolate cake.
Cool the cake completely while preparing the whipped cream.
Soften ice cream, warm fudge, and line the loaf pan.
Layer cake, ice cream, and fudge; top with remaining ice cream and whip.
Freeze the assembled cake for at least 2 hours before slicing.

Copycat Dairy Queen Ice Cream Cake – Creamy Birthday Treat
Enjoy a homemade copycat Dairy Queen ice cream cake, perfect for birthdays—creamy layers of ice cream and cake, easy to make at home.
Timing
Prep Time
20 Minutes
Cook Time
30 Minutes
Total Time
50 Minutes
Recipe Details
Ingredients
Cake Layers
-
01
1 box chocolate cake mix
-
02
3/4 cup water
-
03
1/3 cup oil
-
04
3 eggs
Ice Cream and Filling
-
01
1 (1½ qt) tub vanilla soft‑serve ice cream, softened
-
02
1/2 cup chocolate fudge sauce, warm
For the Frosting
-
01
1 cup heavy whipping cream
-
02
2 tbsp powdered sugar
-
03
1 tsp vanilla extract
-
04
Sprinkles or crushed candy for garnish
Instructions
Preheat oven to 350°F (175°C). Prepare the cake mix according to package directions and bake in a 9×13" pan; let cool completely.
While the cake cools, whip the heavy cream with powdered sugar and vanilla until soft peaks form; set aside.
Line a 9×13" loaf pan with parchment. Spread a thin layer of softened vanilla ice cream over the bottom, then place the cooled chocolate cake on top.
Drizzle warm chocolate fudge sauce over the ice cream, letting it swirl gently. Top with the remaining ice cream, spreading evenly.
Freeze the assembled cake for at least 2 hours, or until firm.
Remove from freezer, spread the whipped cream over the top, garnish with sprinkles, and slice with a warm knife.
Notes & Tips
-
1
For an extra glossy finish, re‑warm the fudge just before drizzling.
-
2
If the ice cream hardens too quickly, let it sit at room temperature for 5 minutes before spreading.
-
3
A light dusting of sea salt can heighten the chocolate flavor without being overpowering.
Tools You'll Need
-
9×13" baking pan
-
Loaf or springform pan
-
Mixing bowls
-
Electric mixer
-
Spatula
-
Warm knife for slicing
Must-Know Tips
-
Don’t rush the cooling step; a warm cake will melt the ice cream.
-
Spread ice cream in thin, even layers for consistent texture.
-
Freeze long enough to ensure clean, firm slices.
Professional Secrets
-
Use room‑temperature ice cream for smoother spreading.
-
Warm the fudge just until it’s pourable to avoid a grainy texture.
-
Freeze on a flat tray to keep layers level.

Recipe by
Alexa CarterFast food, but smarter 🔥🍽️ Bold flavors, simple steps, and meals that always hit the spot 😎
Get Delicious Recipes Weekly
Join 25,000+ home cooks getting our best recipes straight to their inbox.
Free forever • No spam • Unsubscribe anytime