
The original Reese’s was created in 1928, a simple blend of chocolate and peanut butter that became an American icon. Over the decades, home cooks have tried to replicate that magic, and now, with protein powder, we get a healthier twist. The story of this bar is less about invention and more about remembering the scent of melted chocolate on a Sunday afternoon, a memory that feels like a warm hug.
Why You'll Love It
-
- Simple pantry ingredients
-
- High protein, low sugar
-
- No oven needed, just a fridge
-
- Satisfying chew and crunch
"These bars are my go‑to after yoga – sweet, salty, and they keep me full!"
Essential Ingredient Guide
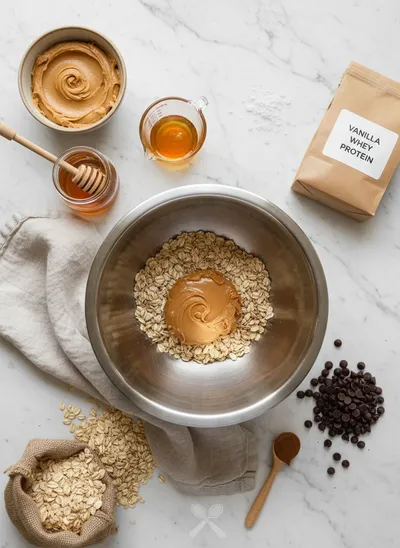
- Natural peanut butter: Choose a smooth, no‑salt version for a creamy base that blends easily.
- Whey protein powder: Unflavored works best to let the chocolate and peanut butter shine.
- Dark chocolate chips: Adds a bittersweet note that balances the sweet honey.
- Rolled oats: Provides texture and helps bind the bars without making them dense.
- Honey: A natural sweetener that also helps the bars set.
- Sea salt: Just a pinch enhances the chocolate‑peanut flavor.
Complete Cooking Process
-
Ingredient Readiness:
Measure and lightly toast the oats, then let everything come to room temperature so the honey mixes smoothly.
-
Flavor Development:
Melt chocolate with a splash of butter; the aroma deepens as the cocoa releases its richness.
-
Texture Control:
Stir in peanut butter and protein powder until the mixture thickens but stays spreadable.
-
Finishing Touches:
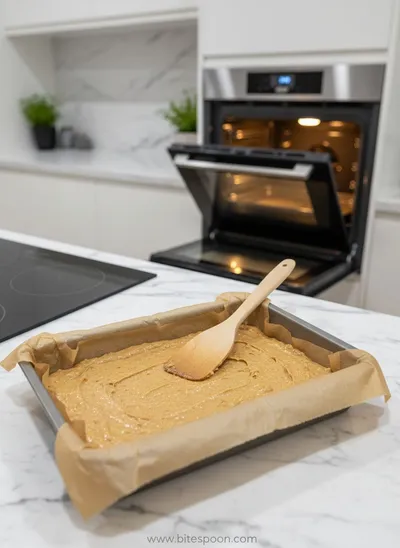
Press the mixture into a lined pan, drizzle the chocolate layer, and sprinkle a pinch of sea salt.
-
Serving Timing:
Chill for at least an hour so the bars set firm, then slice into bars.
-
Use a silicone mat for easy removal.
-
Don’t over‑heat the chocolate; it should be just melted.
-
Press the mixture firmly for uniform bars.
-
Store in the fridge for a chewy texture.
Pro Tips
Well, I’ve found that a gentle press with the back of a spoon creates a smooth top that looks professional. Also, if you like a little extra crunch, toss in some chopped peanuts at the end. It’s those tiny adjustments that make the bar feel personal, like a quiet moment you keep for yourself. So, give yourself permission to experiment a little; the base is forgiving.

The essence of the dish:
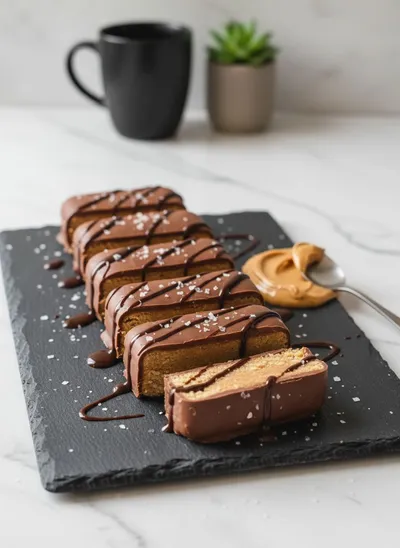
What makes these bars special is the balance of sweet honey, salty peanut butter, and a rich chocolate coating, all lifted by a scoop of protein powder.
A fun fact or historical angle:
Reese’s started as a humble candy in a Pennsylvania kitchen; today we honor that simplicity with a high‑protein spin.
Flavor or sensory focus:
You’ll notice the smooth melt of chocolate, the creamy whisper of peanut butter, and a satisfying bite that’s both chewy and slightly crunchy.
You Must Know
-
Keep the mixture cold for clean cuts.
-
Use a sturdy pan to avoid cracks.
-
Taste before adding extra honey.
Frequently Asked Questions
→ Can I use plant‑based protein?
Absolutely – pea or soy protein works fine, just keep an eye on the texture and add a bit more honey if needed.
→ How long do the bars keep?
Stored in an airtight container in the fridge, they stay fresh for up to a week.
→ Can I bake them?
You can, at 300°F for 10‑12 minutes, but the no‑bake version retains a softer, chewier feel.
→ What if I’m allergic to peanuts?
Swap peanut butter for almond or cashew butter; the flavor shifts but stays delicious.
→ Do I need a special pan?
A simple 8×8 inch pan lined with parchment works perfectly.
→ How many calories per bar?
Approximately 180‑200 calories, depending on the size you cut.
Nutrition Facts
per serving
190
Calories
9g
Protein
15g
Carbs
11g
Fat
Taste Profile
A sweet‑salty snack with a creamy peanut butter backdrop.
Ingredient Substitutions
Don't have an ingredient? Try these alternatives
Use the same amount; it will add a lighter flavor.
Maintains protein content while keeping it plant‑based.
Recipe Variations
Try these delicious twists on the original
Spicy Version
Add ½ tsp cayenne pepper to the base for a subtle heat that lifts the chocolate.
Mediterranean Style
Swap dark chocolate for white chocolate, add chopped pistachios, and drizzle with a little honey.
Common Mistakes to Avoid
Learn from others' mistakes for perfect results
- Over‑heating chocolate, which makes it grainy.
- Pressing the base too lightly, leading to crumbly bars.
- Skipping the chill step, resulting in a soft, messy finish.
Meal Prep & Storage
Make Ahead Tips
You can mix the base and keep it refrigerated for up to 24 hours; add the chocolate topping just before serving.
Leftover Ideas
Re‑chill any leftovers and slice again; they stay moist for a second day.
Perfect Pairings
Serve this with...
Cooking Timeline
Gather and measure all ingredients; toast oats if desired.
Combine base ingredients and press into pan.
Melt chocolate and spread over base.
Add toppings and sprinkle sea salt.
Chill, then slice into bars.
 Snacks, Appetizers & Fun Bites
Fruit Dip Recipe – Quick & Easy Snack
Quick, easy, and irresistibly tasty fruit dip for snacks or parties.
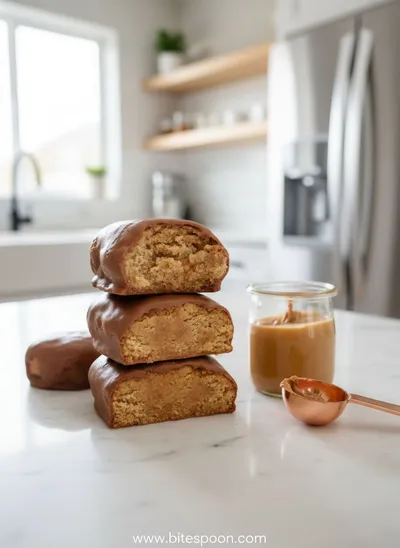
Copycat Reese’s Peanut Butter Protein Bars
A homemade take on Reese’s Peanut Butter Protein Bars that’s sweet, salty, and packed with protein – perfect for a quick, satisfying snack.
Timing
Prep Time
20 Minutes
Cook Time
0 Minutes
Total Time
35 Minutes
Recipe Details
Ingredients
Base
-
01
1 cup natural peanut butter
-
02
1/2 cup honey
-
03
1 cup rolled oats
-
04
1/2 cup whey protein powder (vanilla or unflavored)
-
05
1/4 tsp sea salt
Chocolate Topping
-
01
1 cup dark chocolate chips
-
02
1 tbsp coconut oil
-
03
Optional: 2 tbsp chopped peanuts for extra crunch
Instructions
In a medium bowl, combine the rolled oats and protein powder; give them a quick stir so they’re evenly mixed.
Warm the honey slightly in the microwave (10‑15 seconds) until it’s runny, then pour it over the oat mixture and add the peanut butter. Stir until a thick, glossy dough forms.
Press the dough firmly into a parchment‑lined 8×8 inch pan, smoothing the top with the back of a spoon.
Melt the dark chocolate chips with coconut oil in a double boiler, stirring until smooth. fudgy brownies inspired this glossy finish.
Spread the melted chocolate over the pressed base, then sprinkle a pinch of sea salt and optional chopped peanuts.
Refrigerate for at least one hour, then lift the bars out using the parchment and slice into 12 even pieces.
Notes & Tips
-
1
If the mixture feels too sticky, chill it for 5 minutes before pressing.
-
2
For a softer bar, add an extra tablespoon of honey.
-
3
Use a sharp knife warmed under hot water for clean cuts.
 Snacks, Appetizers & Fun Bites
Quick Cucumber Mozzarella Salad
A quick, crisp cucumber and mozzarella salad with a hint of sweet vinaigrette.
Tools You'll Need
-
8×8 inch baking pan
-
Parchment paper
-
Medium mixing bowl
-
Spatula
-
Microwave‑safe bowl
-
Double boiler (or microwave) for chocolate
Must-Know Tips
-
Don’t over‑mix the base; it can become gummy.
-
Press firmly to avoid crumbly edges.
-
Let the chocolate set before cutting.
Professional Secrets
-
Room temperature ingredients ensure even mixing.
-
A quick chill after pressing prevents spreading.
-
Using coconut oil gives the chocolate a glossy finish.

Recipe by
Mia CollinsSmall bites, big happiness 😋✨ Fun snacks, tasty treats, and flavor in every bite 🧆
Get Delicious Recipes Weekly
Join 25,000+ home cooks getting our best recipes straight to their inbox.
Free forever • No spam • Unsubscribe anytime