Chocolate ice cream traces its roots to the 17th‑century courts of Europe, where frozen desserts were a sign of luxury. Over time, the humble treat migrated to kitchens worldwide, becoming a staple of comfort and celebration. This recipe blends the classic dark chocolate richness with a sweet milk chocolate layer, offering a simple yet elegant nod to that storied past.
Why You'll Love It
-
- No fancy equipment needed, just two scoops of ice cream.
-
- Contrast of dark and milk chocolate creates depth.
-
- Serves beautifully for a quick dessert or a party treat.
-
- The glass presentation feels upscale without the fuss.
"The chocolate glasses turned my simple snack into a moment of pure joy. Everyone asked for the recipe!"
Essential Ingredient Guide
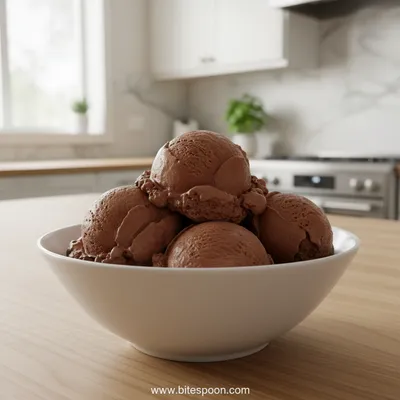
- Dark chocolate ice cream: Choose a high‑cocoa version for a deep, slightly bitter backbone.
- Milk chocolate ice cream: A sweeter, creamier counterpart that balances the darkness.
- Chocolate shavings: Adds texture and an extra burst of cocoa aroma.
- Sea salt flakes: A pinch at the finish lifts the flavors and adds subtle crunch.
- Fresh mint leaves: Optional garnish that adds a cooling scent.
- Whipped cream: A dollop provides a light, airy contrast if desired.
Complete Cooking Process
-
Ingredient Readiness:
Let both ice creams sit at room temperature for a few minutes so they soften just enough to scoop smoothly.
-
Flavor Development:
Layer the dark chocolate first, letting its richness settle before adding the milk chocolate.
-
Texture Control:
Gently press chocolate shavings into the top layer and sprinkle a pinch of sea salt for contrast.
-
Finishing Touches:
Add a whisper of mint or a swirl of whipped cream for a finishing flourish.
-
Serving Timing:
Serve immediately, while the glass is still cold and the ice cream is pleasantly firm.
-
Use chilled glasses for an extra cool sensation.
-
Do not over‑mix when adding shavings; keep the surface gentle.
-
If you like extra crunch, toast the shavings lightly before sprinkling.
-
A small drizzle of espresso can turn this into an affogato‑style treat.
Pro Tips
I find that a quiet moment at the kitchen counter, watching the chocolate melt just at the edges, makes the dessert feel like a personal celebration. It’s okay if the ice cream softens a bit—sometimes that extra softness adds a pleasing silkiness to each bite.

The essence of the dish:
It’s simply two kinds of chocolate ice cream, each offering its own texture and flavor, together in a glass that lets you see the dark and light layers mingle.
A fun fact or historical angle:
The first recorded chocolate ice cream appeared in a 1686 French cookbook, where it was served in crystal goblets for aristocrats.
Flavor or sensory focus:
Expect a cool, velvety mouthfeel, the bitterness of dark chocolate followed by the sweet silk of milk chocolate, finished with a faint hint of sea‑salted crunch.
You Must Know
-
Use high‑quality chocolate ice creams.
-
Serve in chilled glasses.
-
Add garnish just before serving.
Frequently Asked Questions
→ Can I use non‑dairy chocolate ice cream?
Absolutely, a coconut‑milk or almond‑milk chocolate ice cream works well; just follow the same layering method.
→ How long can I keep the glasses refrigerated?
The assembled glasses stay fresh for up to 2 hours in the fridge; after that the ice cream may melt.
→ Should I add any toppings?
A light sprinkle of cocoa powder or a few chocolate curls adds visual appeal without overwhelming the flavor.
→ What glass size is ideal?
A 8‑ounce highball glass provides enough room for both layers and a garnish.
→ Can I make this ahead of time?
You can pre‑scoop the ice creams into the glasses, then cover and freeze until ready to serve.
→ Is this suitable for a party?
Yes, prepare a tray of glasses in advance; they look striking and can be served individually.
Nutrition Facts
per serving
250
Calories
4g
Protein
28g
Carbs
14g
Fat
Taste Profile
Rich chocolate with a balanced sweet finish
Ingredient Substitutions
Don't have an ingredient? Try these alternatives
Provides a nutty depth while keeping the dark color.
Creates a lighter contrast, but adjust sweetness accordingly.
Recipe Variations
Try these delicious twists on the original
Spicy Version
Add a pinch of cayenne pepper to the milk chocolate layer for a gentle heat.
Mediterranean Style
Stir in finely chopped pistachios and a drizzle of honey for a nutty twist.
Common Mistakes to Avoid
Learn from others' mistakes for perfect results
- Letting the ice cream melt too much before layering.
- Using warm glasses that melt the ice cream quickly.
- Over‑garnishing which obscures the beautiful layers.
Meal Prep & Storage
Make Ahead Tips
You can scoop both ice creams into the glasses and freeze them up to 24 hours ahead; add garnish just before serving.
Leftover Ideas
Transfer any remaining ice cream to an airtight container and freeze; stir before using again.
Perfect Pairings
Serve this with...
Cooking Timeline
Remove ice creams from freezer, let soften slightly.
Prepare glasses and layer dark chocolate ice cream.
Add milk chocolate layer, garnish and serve.
 Snacks, Appetizers & Fun Bites
Fruit Dip Recipe – Quick & Easy Snack
Quick, easy, and irresistibly tasty fruit dip for snacks or parties.
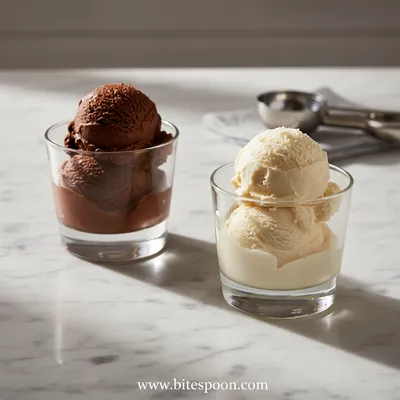
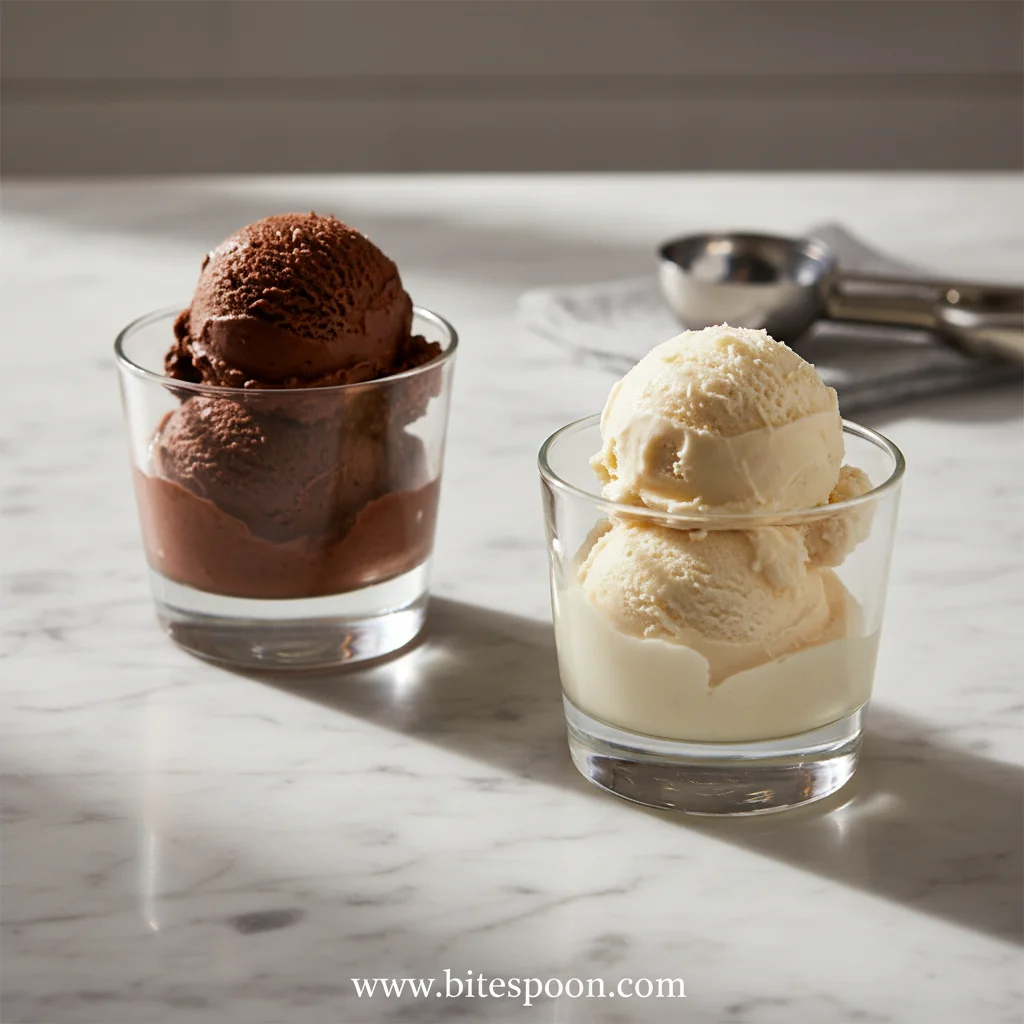
Duo of Chocolate Ice Cream Glasses
A cool, velvety duo of chocolate ice cream presented in elegant glasses, perfect for a sweet pause on any day.
Timing
Prep Time
10 Minutes
Cook Time
0 Minutes
Total Time
10 Minutes
Recipe Details
Ingredients
Main Ingredients
-
01
2 cups dark chocolate ice cream
-
02
2 cups milk chocolate ice cream
-
03
2 tbsp chocolate shavings
-
04
1 pinch sea salt flakes
-
05
Optional: mint leaves for garnish
Instructions
Let both ice creams sit out for 5 minutes so they soften just enough to scoop without melting.
Place chilled glasses on the counter, then spoon the dark chocolate ice cream into the bottom half, smoothing the surface gently.
Top with the milk chocolate ice cream, creating a clear contrast between the two layers.
Sprinkle chocolate shavings over the milk chocolate layer, then add a tiny pinch of sea salt.
Garnish with a mint leaf if desired, and serve immediately.
Notes & Tips
-
1
Use the highest quality chocolate ice cream you can find for the richest flavor.
-
2
If the ice cream becomes too soft, return the glasses to the freezer for a minute before serving.
-
3
Feel free to drizzle a tiny amount of espresso for an adult twist.
 Snacks, Appetizers & Fun Bites
Quick Cucumber Mozzarella Salad
A quick, crisp cucumber and mozzarella salad with a hint of sweet vinaigrette.
Tools You'll Need
-
Measuring cup
-
Ice cream scoop
-
Chilled highball glasses
-
Small spoon
-
Microplane for shavings
Must-Know Tips
-
Do not let the ice cream sit too long; it loses its structure quickly.
-
Keep the glasses chilled to maintain a pleasant temperature.
-
Taste the ice cream before layering to ensure the balance you desire.
Professional Secrets
-
Room temperature ice cream scoops more smoothly, preventing cracks.
-
A quick dip of the glass rim in melted chocolate adds an elegant border.
-
Layering from dark to light creates a visual gradient that pleases the eye.

Recipe by
Mia CollinsSmall bites, big happiness 😋✨ Fun snacks, tasty treats, and flavor in every bite 🧆
Get Delicious Recipes Weekly
Join 25,000+ home cooks getting our best recipes straight to their inbox.
Free forever • No spam • Unsubscribe anytime