
Cheesecake has traveled from ancient Greece, where it was a simple blend of cheese and honey, to modern kitchens where it becomes a canvas for flavors. The mini version emerged in the health‑focused era of the early 2000s, offering portion control without sacrificing richness. It’s a timeless dessert reimagined for today’s busy lives, honoring its creamy heritage while embracing nutritious ingredients.
Why You'll Love It
-
- Packed with protein to keep you satisfied
-
- Naturally gluten‑free and low‑sugar
-
- Easy to make with just a handful of ingredients
-
- Perfect for meal‑prep or an on‑the‑go snack
“These mini cheesecakes are the perfect balance of creamy and light—my family can’t get enough!”
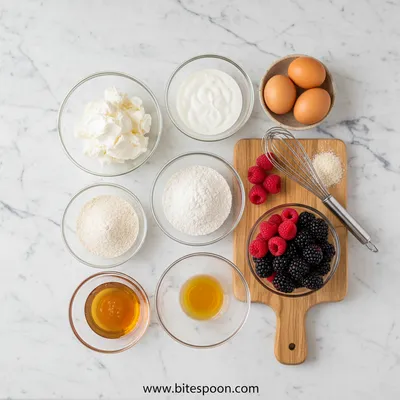
Essential Ingredient Guide
- Cream cheese: Choose full‑fat for the smoothest texture; let it soften at room temperature before mixing.
- Greek yogurt: Provides a tangy lift and boosts protein; use plain for a neutral base.
- Whey protein powder: Adds a punch of protein without altering flavor; vanilla works best.
- Almond flour: Creates a gentle crust; toast lightly for extra nuttiness.
- Lemon zest: Brightens the palate and balances richness with subtle citrus.
- Honey or maple syrup: A small amount adds natural sweetness without overwhelming the protein.
Complete Cooking Process
-
Ingredient Readiness:
Soften cream cheese, measure yogurt and protein, and zest the lemon while the oven warms.
-
Flavor Development:
Blend crust ingredients, press into molds, and let the cheesecake filling set with a gentle whisk.
-
Texture Control:
Bake just enough to firm the edges while keeping the center silky; avoid over‑baking.
-
Finishing Touches:
Cool the mini cheesecakes, then drizzle a whisper of honey and sprinkle a pinch of zest.
-
Serving Timing:
Serve chilled for a firmer bite or at room temperature for a creamier mouthfeel.
-
Use a water bath for even baking and to prevent cracks.
-
Tap the molds gently after baking to release any air bubbles.
-
Chill for at least two hours for best texture.
-
Swap almond flour for coconut flour for a tropical twist.
Pro Tips
Well, those little adjustments can make a big difference. I remember once forgetting the water bath, and the tops cracked like tiny islands—oops! Take a moment to set up the bain‑marie, and let the muffins settle. Then, when you finally take them out, the glossy surface will remind you of a calm pond after a light rain.
The essence of the dish:
A velvety bite that merges the classic cheesiness of a traditional cheesecake with the lean protein boost of Greek yogurt and whey. The crust adds a subtle almond crunch, while lemon zest lifts the overall profile.
A fun fact or historical angle:
Cheesecake was once considered a luxury in ancient Rome, often reserved for special celebrations. Today, mini handheld versions bring that indulgence to everyday snack time.
Flavor or sensory focus:
First, you’ll notice the cool, creamy mouthfeel, then a gentle zing of lemon that brightens the palate, followed by a faint nutty whisper from the crust.
You Must Know
-
Chill before serving for clean slices
-
Do not over‑mix; keep it airy
-
Use silicone molds for easy removal
Frequently Asked Questions
→ Can I use flavored protein powder?
Yes, a vanilla or unflavored powder works best; avoid strong fruit flavors that may clash with the lemon.
→ Is this recipe gluten‑free?
Absolutely—Almond flour replaces traditional wheat flour, keeping it safe for gluten sensitivities.
→ How long can they be stored?
Refrigerate in an airtight container for up to 4 days; they stay creamy and fresh.
→ Can I freeze the mini cheesecakes?
Yes, freeze individually wrapped for up to a month and thaw in the fridge before serving.
→ What can I use instead of honey?
Maple syrup or a sugar‑free sweetener works fine; adjust the amount to taste.
→ Do I need a water bath?
A gentle water bath helps prevent cracks and keeps the texture silky, though it’s optional.
Nutrition Facts
per serving
150
Calories
10g
Protein
12g
Carbs
8g
Fat
Taste Profile
Creamy with a gentle citrus brightness
Ingredient Substitutions
Don't have an ingredient? Try these alternatives
Lower fat but similar texture; may need a slightly longer mixing time.
Creates a dairy‑free version; adjust honey to maintain sweetness.
Recipe Variations
Try these delicious twists on the original
Spicy Version
Add a pinch of cayenne pepper to the crust and a swirl of chili‑infused honey on top.
Mediterranean Style
Stir chopped pistachios and a dash of orange zest into the crust, and top with a thin layer of honey‑yogurt drizzle.
Common Mistakes to Avoid
Learn from others' mistakes for perfect results
- Over‑mixing the filling, which makes it dense.
- Baking too long, causing cracks on the surface.
- Skipping the chill time, resulting in a loose texture.
Meal Prep & Storage
Make Ahead Tips
You can assemble the crusts and fill them up to 24 hours ahead; keep refrigerated and bake just before serving for the freshest texture.
Leftover Ideas
Reheat gently in a skillet over low heat with a splash of milk to restore creaminess, or enjoy chilled straight from the fridge.
Perfect Pairings
Serve this with...
Cooking Timeline
Gather and measure all ingredients; soften cream cheese.
Mix crust ingredients and press into molds.
Blend filling, spoon into crusts, and bake.
Cool, refrigerate, and add optional toppings.
 Snacks, Appetizers & Fun Bites
Fruit Dip Recipe – Quick & Easy Snack
Quick, easy, and irresistibly tasty fruit dip for snacks or parties.

Mini Protein Cheesecake Recipe
Enjoy these creamy mini protein cheesecakes—healthy, gluten‑free bites perfect for a quick snack or dessert.
Timing
Prep Time
15 Minutes
Cook Time
20 Minutes
Total Time
35 Minutes
Recipe Details
Ingredients
Crust
-
01
1 cup almond flour
-
02
2 tbsp melted coconut oil
-
03
1 tbsp honey
Filling
-
01
8 oz cream cheese, softened
-
02
1 cup Greek yogurt (plain)
-
03
1/2 cup vanilla whey protein powder
-
04
2 tbsp honey or maple syrup
-
05
Zest of 1 lemon
-
06
1 tsp vanilla extract
Topping (optional)
-
01
Fresh berries
-
02
A drizzle of honey
-
03
A sprinkle of lemon zest
Instructions
Preheat the oven to 325°F (160°C). In a bowl, combine almond flour, melted coconut oil, and honey; mix until crumbly.
Press the crust mixture evenly into the bottom of silicone mini cheesecake molds, creating a thin layer.
In a large mixing bowl, beat cream cheese until smooth, then fold in Greek yogurt, protein powder, honey, lemon zest, and vanilla extract until just combined.
Spoon the filling over the crusts, smoothing the tops gently. Place the molds on a baking sheet.
Bake for 15‑18 minutes, or until the edges are set but the center still has a slight wobble; then remove and let cool on a wire rack.
Refrigerate the mini cheesecakes for at least 2 hours. Before serving, top with fresh berries, a drizzle of honey, and a pinch of lemon zest.
Notes & Tips
-
1
If the filling seems too thick, add a tablespoon of milk to loosen it.
-
2
Use a gentle hand when mixing to keep the cheesecake airy.
-
3
For a chocolate twist, melt a few dark chocolate chips and swirl into the filling before baking.
 Snacks, Appetizers & Fun Bites
Quick Cucumber Mozzarella Salad
A quick, crisp cucumber and mozzarella salad with a hint of sweet vinaigrette.
Tools You'll Need
-
Silicone mini cheesecake molds
-
Mixing bowls
-
Hand mixer or whisk
-
Measuring cups and spoons
-
Baking sheet
-
Spatula
Must-Know Tips
-
Don't over‑mix the filling; air pockets keep it light.
-
Let the cream cheese come to room temperature to avoid lumps.
-
Cool the crust before adding the filling to prevent melting.
Professional Secrets
-
Room temperature ingredients ensure a silky batter.
-
A water bath (bain‑marie) prevents cracks and gives even heat.
-
Gentle baking preserves the delicate protein structure.

Recipe by
Mia CollinsSmall bites, big happiness 😋✨ Fun snacks, tasty treats, and flavor in every bite 🧆
Get Delicious Recipes Weekly
Join 25,000+ home cooks getting our best recipes straight to their inbox.
Free forever • No spam • Unsubscribe anytime