Ice cream, a dessert with origins tracing back to ancient China, evolved through royal courts before landing on kitchen tables worldwide. This particular no‑cook version sidesteps the need for churners, echoing the resourceful spirit of early home cooks who turned milk, sugar, and flavor into comfort with whatever tools they had. The method is timeless, yet perfectly suited to today’s quick‑living kitchens.
Why You'll Love It
-
- No freezer required, perfect for summer heat
-
- Minimal ingredients, pantry friendly
-
- Gentle sweetness that isn’t overwhelming
-
- Versatile base for endless flavor twists
"I never believed I could make ice cream without an ice bath—this is magic in a bowl!"
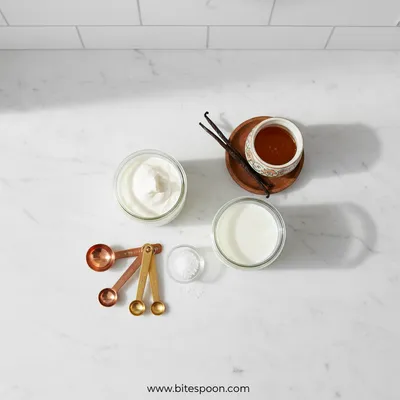
Essential Ingredient Guide
- Heavy cream: Choose a cream with at least 35% fat for a velvety mouthfeel; let it sit at room temperature before whisking.
- Whole milk: Provides balance to the richness of the cream; use fresh milk for the cleanest taste.
- Granulated sugar: Dissolves more easily when whisked vigorously; adjust a spoon less for less sweetness.
- Vanilla extract: A splash brings warmth and depth; the aroma is soothing, like a quiet sunrise.
- Lemon juice: A tiny dash brightens the mixture, balancing the fat and enhancing the creaminess.
- Pinch of sea salt: Elevates flavor, making the sweetness sing without being cloying.
Complete Cooking Process
-
Ingredient Readiness:
Measure all components, let the cream and milk come to room temperature, and have your whisk at hand.
-
Flavor Development:
As you whisk, the sugar dissolves and the vanilla mingles, creating a fragrant perfume that fills the kitchen.
-
Texture Control:
Continue whisking until the mixture thickens and holds soft peaks, a sign of airy incorporation.
-
Finishing Touches:
A final splash of lemon juice and a pinch of salt seal the flavor, then you pour into a container.
-
Serving Timing:
Let the bowl rest for ten minutes; the ice cream will firm slightly, perfect for a quick scoop.
-
Whisk in a chilled bowl for faster thickening
-
Use a handheld frother for a fluffier texture
-
Cover tightly to prevent ice crystals from forming
-
Add fresh fruit or nuts just before serving for crunch
Pro Tips
Well, I find that the quiet moment while the mixture rests is a lovely pause—look, the kitchen smells like sweet vanilla and a hint of citrus. It's a gentle reminder that good things come together without rush. So, when you finally scoop, notice the smooth glide of the spoon—yeah, that silky texture is the reward for your calm effort.
The essence of the dish:
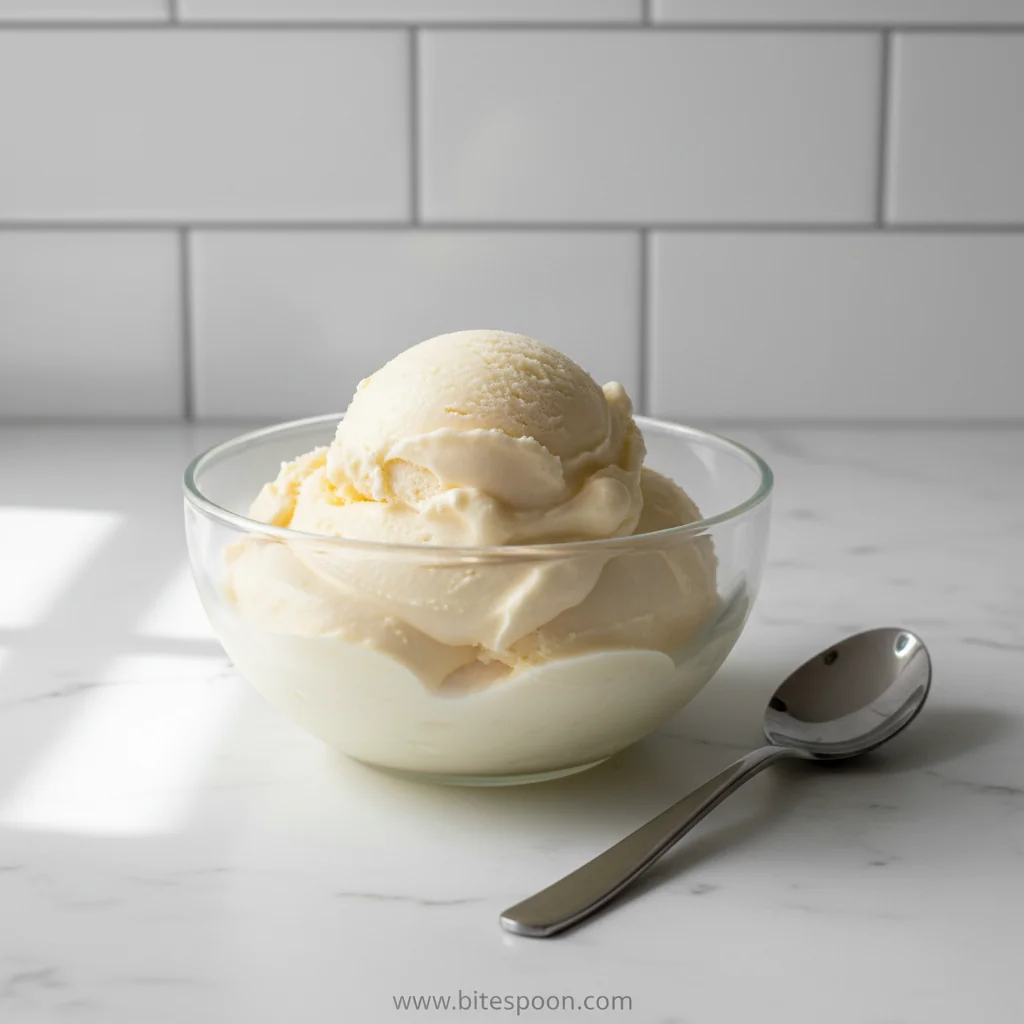
A simple blend of cream, milk, sugar, and vanilla that, when whisked, transforms into a cloud‑soft ice cream without ever touching ice.
A fun fact or historical angle:
The earliest frozen desserts were iced shaved snow flavored with honey; modern no‑cook methods echo that original simplicity.
Flavor or sensory focus:
Expect a mellow vanilla scent, a gentle sweet bite, and a cool, creamy mouthfeel that melts slowly, leaving a whisper of citrus.
You Must Know
-
Room temperature ingredients blend more easily
-
Whisk until soft peaks form
-
Cover tightly to keep texture smooth
Frequently Asked Questions
→ Can I use coconut milk instead of dairy?
Yes, coconut milk works well, but it adds a subtle coconut flavor and may be thinner; you might add a bit more cream to maintain richness.
→ How long will the ice cream keep?
Store in an airtight container in the freezer for up to 3 days; give it a quick stir before serving if it hardens.
→ Do I need an electric mixer?
A sturdy whisk or a handheld frother does the job; the key is vigorous whipping to incorporate air.
→ Can I add fruit purees?
Absolutely—fold in strawberry puree or mango after the base thickens for a lovely swirl.
→ What if the mixture is too thin?
Chill the bowl before whisking or add a tablespoon of instant pudding mix to help thicken.
→ Is this recipe keto‑friendly?
Swap sugar for a keto‑approved sweetener like erythritol and keep the dairy full‑fat for texture.
Nutrition Facts
per serving
210
Calories
3g
Protein
18g
Carbs
14g
Fat
Taste Profile
Creamy sweet with a subtle citrus lift
Ingredient Substitutions
Don't have an ingredient? Try these alternatives
Creates a dairy‑free version; may add a faint coconut flavor.
Keeps it keto‑friendly; adjust sweetness to taste.
Recipe Variations
Try these delicious twists on the original
Spicy Version
Add a pinch of cayenne and swirl in mint chocolate chip for a cool heat contrast.
Mediterranean Style
Fold in chopped pistachios, a drizzle of honey, and a hint of orange zest for a sun‑kissed twist.
Common Mistakes to Avoid
Learn from others' mistakes for perfect results
- Using cold dairy which hampers air incorporation.
- Over‑whisking, leading to a watery texture.
- Neglecting to cover tightly, causing ice crystals.
Meal Prep & Storage
Make Ahead Tips
You can whisk the base up to 24 hours ahead and store it in the fridge; give it a quick whisk before serving.
Leftover Ideas
Transfer any leftovers to a sealed container and keep in the freezer; let soften slightly before scooping.
Perfect Pairings
Serve this with...
Cooking Timeline
Gather and measure all ingredients; let dairy sit at room temperature.
Whisk cream, milk, and sugar until dissolved and slightly frothy.
Add vanilla, lemon juice, and salt; continue whisking to soft peaks.
Fold in optional mix‑ins, cover, and let rest or chill briefly.

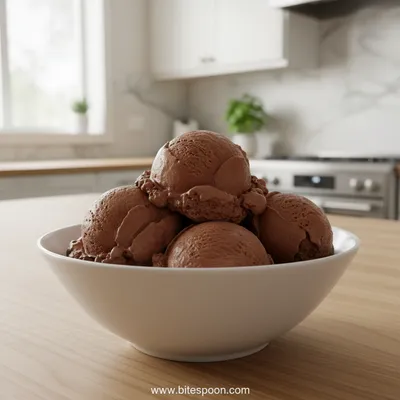
No-Cook Homemade Ice Cream Recipe
A whisper‑soft, dreamy ice cream you can make without ever turning on the freezer. Just a few pantry staples, a whisk, and a moment of patience blend into a refreshing treat that feels like summer in a bowl.
Timing
Prep Time
10 Minutes
Cook Time
0 Minutes
Total Time
15 Minutes
Recipe Details
Ingredients
Base
-
01
1 cup heavy cream
-
02
1 cup whole milk
-
03
1/3 cup granulated sugar
-
04
2 tsp vanilla extract
-
05
1 tsp freshly squeezed lemon juice
-
06
pinch of sea salt
Optional Mix‑ins
-
01
Fresh berries
-
02
Chopped toasted nuts
-
03
Chocolate chips
-
04
Caramel drizzle
Instructions
In a large bowl, combine the heavy cream, whole milk, and sugar. I remember the first time I did this, the sugar looked like tiny snowflakes, and I thought, "well, let's whisk it into something smooth."
Whisk vigorously for about 2‑3 minutes until the sugar dissolves and the mixture becomes slightly frothy. If you have a handheld frother, now’s the moment to bring it out.
Add vanilla extract, lemon juice, and a pinch of sea salt. The aroma will start to fill the kitchen—kind of like a quiet promise of summer.
Continue whisking until the mixture thickens enough to hold soft peaks, roughly another 3‑4 minutes. The texture should feel light, almost like a cloud.
Fold in any optional mix‑ins if you like. For a fruity twist, try a spoonful of strawberry ice cream puree.
Transfer the mixture to a shallow container, smooth the top, and cover tightly. Let it sit for ten minutes at room temperature, or pop it into the freezer for a firmer texture.
Notes & Tips
-
1
If the mixture seems too thin, chill the bowl before whisking.
-
2
For a richer flavor, use a splash more vanilla.
-
3
You can double the recipe for a larger gathering; just keep the whisking thorough.
Tools You'll Need
-
Large mixing bowl
-
Whisk or handheld frother
-
Measuring cups and spoons
-
Spatula
-
Shallow container with lid
Must-Know Tips
-
Don’t over‑whisk, or the mixture may become too airy and collapse.
-
Cover tightly to avoid ice crystals forming.
-
Taste before adding mix‑ins to balance sweetness.
Professional Secrets
-
Room temperature dairy integrates air more easily.
-
A brief chill of the bowl speeds up thickening.
-
A dash of lemon juice brightens the overall flavor.

Recipe by
Alexa CarterFast food, but smarter 🔥🍽️ Bold flavors, simple steps, and meals that always hit the spot 😎
Get Delicious Recipes Weekly
Join 25,000+ home cooks getting our best recipes straight to their inbox.
Free forever • No spam • Unsubscribe anytime