The Oreo cookie, born in 1912, quickly became an American icon, and its pairing with cheesecake dates back to mid‑century home kitchens where no‑bake desserts saved time and energy. This recipe draws on that classic convenience, marrying the cookie’s crisp chocolate wafer with the luxurious tang of cream cheese, all without turning on the oven. It’s a timeless treat that remains beloved across generations.
Why You'll Love It
-
- No oven needed, perfect for summer evenings
-
- Simple 5‑ingredient base keeps it approachable
-
- Portable cups make serving easy and elegant
-
- Creamy texture balanced by crunchy Oreo crumbs
"These little cups are a hit every time – smooth, crunchy, pure joy!"
Essential Ingredient Guide
- Oreo cookies: Use full‑size Oreos for true chocolate‑cream contrast; twist them fine for a uniform crust.
- Cream cheese: Room‑temperature cheese blends smoothly, preventing lumps in the filling.
- Heavy cream: Whipped to soft peaks, it lightens the filling while keeping it rich.
- Granulated sugar: Just a touch to sweeten; adjust if you like extra sweetness.
- Vanilla extract: A splash deepens the aromatic profile without overpowering the Oreo flavor.
- Whipped topping (optional): Adds an airy finish and a decorative swirl on top.
 Snacks, Appetizers & Fun Bites
Quick Cucumber Mozzarella Salad
A quick, crisp cucumber and mozzarella salad with a hint of sweet vinaigrette.
Complete Cooking Process
-
Ingredient Readiness:
Gather all components, crush Oreos, soften cream cheese, and chill the mixing bowl.
-
Flavor Development:
Whisk cream cheese with sugar and vanilla, then fold in whipped cream for a silky mousse.
-
Texture Control:
Press the crushed Oreo base firmly into cups so it holds without crumbling.
-
Finishing Touches:
Top each cup with a dollop of whipped topping and a garnish of chopped Oreos.
-
Serving Timing:
Let the cups chill for at least one hour; serve cold for the best contrast.
-
Use a food processor for uniform Oreo crumbs – it saves time.
-
Add a pinch of salt to the filling to brighten the sweetness.
-
If the filling looks too soft, chill it a few minutes before spooning.
-
Garnish with a drizzle of melted chocolate for extra decadence.
Pro Tips
Well, I find that a little extra chill does wonders for the texture – it becomes firm enough to hold its shape without being dense. Also, don’t rush the crust press; a gentle, even press gives a neat edge that looks as good as it tastes. When you finally spoon the silky mixture, you’ll notice how the creaminess meets the crunchy base in a harmonious bite.
The essence of the dish:
A balance of creamy cheesecake mingling with the nostalgic crunch of Oreo crumbs, finished with a whisper of vanilla.
A fun fact or historical angle:
Oreo cookies were originally called “Oreo Biscuit” and became a staple during World War II, when home cooks loved its durability for layered desserts.
Flavor or sensory focus:
Expect a cool, buttery mouthfeel contrasted by the chocolatey snap of the cookie base, all tied together with a faint vanilla perfume.
You Must Know
-
Set the filling in a chilled bowl to keep it firm
-
Press the crust firmly but not too hard
-
Serve straight from the fridge for optimal texture
Frequently Asked Questions
→ Can I make these ahead of time?
Yes, assemble the cups and keep them refrigerated up to 24 hours; the texture stays lovely.
→ What can I substitute for heavy cream?
Coconut cream works well for a dairy‑free version, giving a subtle tropical note.
→ Do I need a special pan for the crust?
A simple muffin tin or even small glass jars work perfectly; just press the crumbs into each.
→ How long should I chill the cups?
At least one hour; longer chilling yields a firmer slice.
→ Can I add chocolate to the filling?
Absolutely – swirl in melted dark chocolate or sprinkle cocoa nibs before chilling.
→ Is this recipe gluten‑free?
Use gluten‑free cookie alternatives; the method stays the same.
Nutrition Facts
per serving
320
Calories
6g
Protein
30g
Carbs
18g
Fat
Taste Profile
Richly sweet with a subtle chocolate backdrop
Ingredient Substitutions
Don't have an ingredient? Try these alternatives
Use a brand that melts well; chill the substitute before mixing.
Provides a dairy‑free richness; whip until thick.
Recipe Variations
Try these delicious twists on the original
Chocolate Swirl
Fold in melted dark chocolate into the filling for a marbled effect.
Mint Fresh
Add a few drops of peppermint extract and garnish with crushed mint chocolate.
Common Mistakes to Avoid
Learn from others' mistakes for perfect results
- Over‑mixing the filling, which can make it dense.
- Not pressing the crust firmly, leading to crumbling.
- Skipping the chill time, resulting in a loose texture.
Meal Prep & Storage
Make Ahead Tips
You can prepare the crust and fill the cups up to 24 hours ahead; keep them covered and refrigerate.
Leftover Ideas
Re‑serve chilled; if texture softens, give the cup a quick stir before enjoying.
Perfect Pairings
Serve this with...
Cooking Timeline
Prepare crust: crush Oreos, melt butter, press into cups.
Beat cream cheese, sugar, and vanilla until smooth.
Fold whipped cream into the cheese mixture.
Spoon filling into crusts and smooth tops.
Chill cups in refrigerator; add garnish before serving.
 Snacks, Appetizers & Fun Bites
Winter Fruit Salad With Lime Dressing
Seasonal winter fruits with a zingy lime vinaigrette.

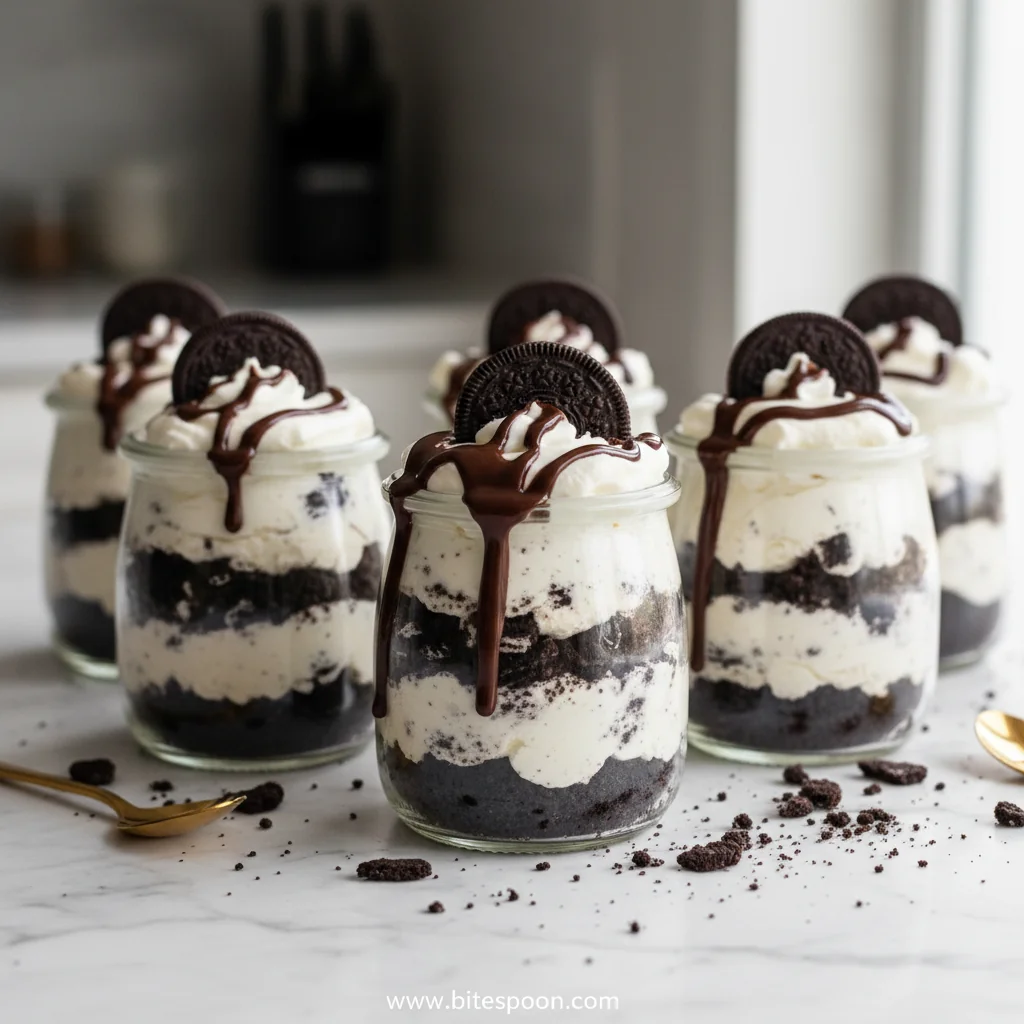
Oreo No-Bake Cheesecake Cups
Creamy Oreo No-Bake Cheesecake Cups are a breezy, indulgent treat that melt in your mouth, perfect for gatherings or a quiet night in.
Timing
Prep Time
15 Minutes
Cook Time
0 Minutes
Total Time
1 Hour 15 Minutes
Recipe Details
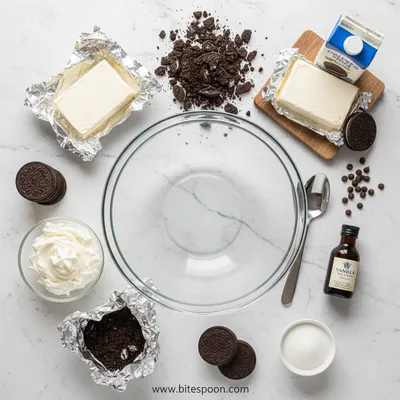
Ingredients
Crust
-
01
1 ½ cups Oreo cookies, finely crushed
-
02
2 tbsp melted butter
Filling
-
01
8 oz cream cheese, softened
-
02
¼ cup granulated sugar
-
03
½ tsp vanilla extract
-
04
½ cup heavy cream, whipped to soft peaks
-
05
12 Oreo cookies, coarsely chopped (for topping)
Instructions
Combine crushed Oreos with melted butter; press the mixture into the bottom of 8‑oz cups, creating an even layer.
In a mixing bowl, beat cream cheese, sugar, and vanilla until smooth; fold in whipped cream gently.
Spoon the creamy filling over the crusts, smoothing the tops with a spatula.
Refrigerate the cups for at least one hour, then garnish with chopped Oreo pieces before serving.
Notes & Tips
-
1
If the crust feels dry, add a splash more melted butter.
-
2
For extra shine, drizzle melted chocolate over the garnish.
-
3
Keep the cups well‑covered to prevent freezer burn.
 Snacks, Appetizers & Fun Bites
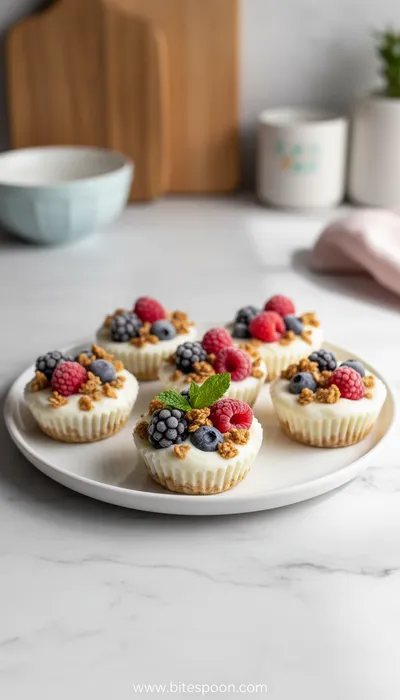
Frozen Yogurt Granola Cups
Crisp granola shells cradling cool, creamy frozen yogurt for a wholesome snack.
Tools You'll Need
-
Food processor or zip‑top bag and rolling pin
-
Muffin tin or small glass jars
-
Mixing bowls
-
Hand mixer
-
Spatula
Must-Know Tips
-
Don’t over‑mix the filling; it stays light and airy.
-
Press the crust firmly but evenly for a stable base.
-
Cover cups with plastic wrap while chilling to avoid odors.
Professional Secrets
-
Room‑temperature cream cheese prevents grainy texture.
-
Whipping the cream to soft peaks adds airy lift without collapsing.
-
A quick chill after filling sets the structure without hardening.

Recipe by
Mia CollinsSmall bites, big happiness 😋✨ Fun snacks, tasty treats, and flavor in every bite 🧆
Get Delicious Recipes Weekly
Join 25,000+ home cooks getting our best recipes straight to their inbox.
Free forever • No spam • Unsubscribe anytime