
Vanilla, originally cultivated by the Totonac people of present-day Mexico, has traveled centuries to become a beloved flavor worldwide. Its subtle, aromatic profile made it a staple in early European kitchens, and today it remains a cornerstone of desserts. The Ninja Creami builds on this legacy, offering home cooks a modern way to capture that classic vanilla richness without the labor of traditional churners.
Why You'll Love It
-
- Incredibly smooth texture with minimal effort
-
- Pure vanilla flavor shines without additives
-
- Quick turnaround—ready in under an hour
-
- Perfectly compatible with the Ninja Creami’s easy‑freeze system
"The smoothness is unreal—my kids think I bought it from a shop!"
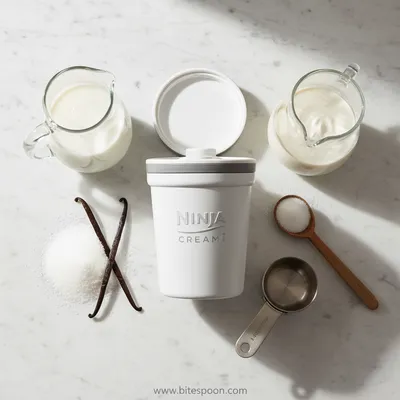
Essential Ingredient Guide
- Heavy cream: Provides richness and a velvety mouthfeel; use fresh, cold cream for best results
- Whole milk: Balances the cream's richness; choose low‑temperature milk to avoid graininess
- Pure vanilla extract: The star of the show—look for a deep, fragrant extract, not imitation
- Granulated sugar: Sweetens gently; dissolve fully to keep the base silky
- Egg yolk (optional): Adds extra custard depth; whisk well to avoid lumps
- Pinch of salt: Enhances the vanilla’s sweetness and rounds the flavor

Complete Cooking Process
-
Ingredient Readiness:
Measure and chill all dairy components; whisk sugar and vanilla together until fully dissolved.
-
Flavor Development:
Allow the mixture to rest for a few minutes so the vanilla aroma can bloom before freezing.
-
Texture Control:
Use the Ninja Creami’s “Ice Cream” setting to churn; this creates those tiny air pockets that make the scoop airy yet creamy.
-
Finishing Touches:
After the spin, fold in a splash of vanilla extract for an extra fragrance boost.
-
Serving Timing:
Serve immediately for a soft‑serve feel, or refreeze for a firmer scoop later.
-
Chill the freezer bowl for at least 24 hours for optimal hardness
-
Avoid over‑filling the container—leave space for expansion
-
If you prefer a richer texture, replace half the milk with cream
-
Add a dash of vanilla bean seeds for a speckled visual
Pro Tips
These little adjustments can turn a good batch into a truly memorable one. I’ve found that letting the bowl sit a bit after the first spin lets any ice crystals melt, so a quick re‑spin yields an even smoother finish. Yep, that extra step is worth it.
The essence of the dish:
It’s the simplicity of sweetened cream infused with vanilla that makes this ice cream so comforting. The Creami captures that essence, turning a liquid base into a buttery softness.
A fun fact or historical angle:
Did you know that vanilla beans were once so rare that they were used as a form of currency? Today, a single teaspoon of extract can carry that legacy of luxury.
Flavor or sensory focus:
The first bite releases a fragrant, floral vanilla scent that mingles with a creamy, melt‑in‑your‑mouth texture. It’s cool, smooth, and a touch sweet—just enough to let the vanilla shine.
You Must Know
-
Use real vanilla extract, not imitation
-
Keep the mixture cold before freezing
-
Don’t over‑mix—gentle whisking preserves air pockets
Frequently Asked Questions
→ Can I make this dairy‑free?
Yes—swap the heavy cream and milk for coconut cream and almond milk, and use a plant‑based vanilla extract.
→ How long can the ice cream be stored?
Transfer to an airtight container and keep frozen for up to two weeks for best texture.
→ Do I need to use egg yolk?
Egg yolk adds custard richness but isn’t required; the Creami works well without it.
→ What if my mixture is too liquid before freezing?
Add a tablespoon more heavy cream or a pinch of cornstarch dissolved in cold milk to thicken.
→ Can I add mix‑ins like chocolate chips?
Absolutely—fold them in after the final spin so they stay crunchy.
→ Is the Ninja Creami necessary?
While you can use a traditional ice cream maker, the Creami gives a uniquely smooth texture in less time.
Nutrition Facts
per serving
280
Calories
4g
Protein
22g
Carbs
20g
Fat
Taste Profile
Creamy vanilla with a gentle sweetness
Ingredient Substitutions
Don't have an ingredient? Try these alternatives
Provides similar richness; may add a mild coconut note.
Offers speckled seeds and deeper flavor; use slightly less.
Recipe Variations
Try these delicious twists on the original
Spicy Version
Add a pinch of cayenne pepper and a dash of maple syrup for a subtle heat kick.
Mediterranean Style
Stir in chopped pistachios and a drizzle of honey just before serving.
Common Mistakes to Avoid
Learn from others' mistakes for perfect results
- Over‑filling the pint, which leads to overflow during spin.
- Using warm ingredients, causing ice crystals to form.
- Skipping the rest period after the first spin, resulting in a grainy texture.
Meal Prep & Storage
Make Ahead Tips
Prepare the base mixture up to step 2, cover, and refrigerate for up to 24 hours before freezing in the Creami container.
Leftover Ideas
Scoop directly from the freezer; if too hard, let sit at room temperature for 5 minutes before serving.
Perfect Pairings
Serve this with...
Cooking Timeline
Whisk sugar, salt, and vanilla; combine with chilled dairy.
Add optional egg yolk, temper, and mix thoroughly.
Transfer mixture into Ninja Creami pint, seal, and place in freezer.
Freeze the pint container for at least 24 hours.
Spin in the Creami, scoop, and serve.
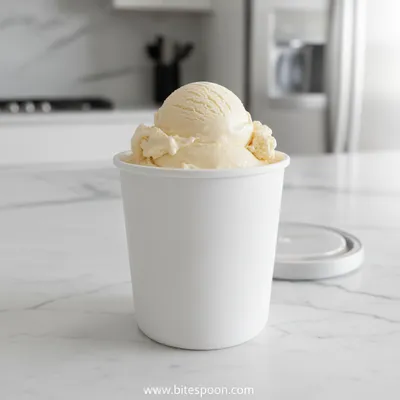
Best Ninja Creami Vanilla Ice Cream
A silky, smooth vanilla ice cream that comes together in minutes with your Ninja Creami. I remember the first time I tasted a homemade scoop—there was a gentle aroma of vanilla that filled the kitchen, a whisper of sweetness, and a creamy texture that melted softly on the tongue. Honestly, this recipe is simple, comforting, and perfect for a quick indulgence. Pair it with fresh berries or a drizzle of caramel for an extra touch of love.
Timing
Prep Time
10 Minutes
Cook Time
0 Minutes
Total Time
45 Minutes (including freezing)
Recipe Details
Ingredients
Base
-
01
2 cups heavy cream
-
02
1 cup whole milk
-
03
3/4 cup granulated sugar
-
04
2 teaspoons pure vanilla extract
-
05
Pinch of fine sea salt
Optional Enhancements
-
01
1 egg yolk (for custard richness)
-
02
1 teaspoon vanilla bean seeds
Instructions
In a mixing bowl, whisk together the sugar, salt, and vanilla extract until the sugar begins to dissolve.
Slowly pour in the heavy cream and milk, whisking gently to keep the mixture smooth and cool.
If using, whisk the egg yolk in a separate bowl, then temper it with a spoonful of the warm dairy mixture before folding it back in.
Transfer the prepared base into the Ninja Creami’s pint container, seal tightly, and place in the freezer for at least 24 hours.
After freezing, install the pint in the Creami, select the ‘Ice Cream’ program, and let it spin until creamy. Scoop, serve, and enjoy.
Notes & Tips
-
1
For a richer taste, replace half of the milk with additional heavy cream.
-
2
If the ice cream is too firm after the spin, add a splash of milk and re‑spin.
-
3
Serve with fresh berries or a drizzle of caramel for extra indulgence.
Tools You'll Need
-
Ninja Creami machine
-
Pint container with lid
-
Whisk
-
Measuring cups and spoons
-
Mixing bowl
Must-Know Tips
-
Don’t over‑fill the pint—leave room for expansion.
-
Chill the container for at least 24 hours for a firm base.
-
Taste the base before freezing; adjust sweetness if needed.
Professional Secrets
-
Room temperature ingredients ensure even freezing.
-
High‑speed spin creates micro‑air bubbles for silkiness.
-
A brief rest after spinning lets any tiny ice crystals melt.

Recipe by
Alexa CarterFast food, but smarter 🔥🍽️ Bold flavors, simple steps, and meals that always hit the spot 😎
Get Delicious Recipes Weekly
Join 25,000+ home cooks getting our best recipes straight to their inbox.
Free forever • No spam • Unsubscribe anytime