
Long before it became a staple in modern kitchens, chicken broth was the foundation of nourishment across countless cultures. In ancient times, simmering bones and vegetables in water was a practical way to extract every bit of nutrition, creating a healing and versatile liquid. This tradition evolved into a cornerstone of cuisines worldwide, from the restorative Jewish penicillin to the base of French consommé. Homemade broth connects us to this history of making the most of what we have, transforming simple scraps into something deeply flavorful and sustaining.
Why You'll Love It
-
The flavor is richer and cleaner than anything from a box.
-
You control the salt and ingredients completely.
-
It makes your entire house smell like a warm, comforting home.
-
It’s incredibly economical and reduces food waste.
'I'll never buy store-bought broth again. The flavor difference is incredible, and my chicken pasta has never tasted better.'
Essential Ingredient Guide
- Chicken Bones: The soul of the broth. Use a leftover carcass from a roasted chicken, or ask your butcher for backs and necks. They’re packed with collagen, which gives the broth body and richness.
- Onion: Adds a sweet, foundational depth. No need to peel it perfectly; just quarter it. The papery skin will give the broth a beautiful golden color.
- Carrots: Bring a subtle sweetness and earthiness. Just give them a rough chop; they’ll soften and release their flavor slowly into the liquid.
- Celery: Offers a fresh, herbaceous note that balances the richness of the chicken. Include the leafy tops if you have them for extra flavor.
- Black Peppercorns: A gentle warmth, not spice. They infuse the broth with a background note that lifts all the other flavors.
- Bay Leaf: A single leaf adds a subtle, almost floral complexity. It’s a quiet secret that makes the broth taste complete.

Complete Cooking Process
-
Ingredient Readiness:
Gather your chicken bones and vegetables. There's no fancy chopping needed here. Just break the onion into quarters, chop the carrots and celery into a few big chunks. Honestly, it's one of the best parts – it's forgiving.
-
Flavor Development:
This happens during the long, gentle simmer. The heat coaxes the flavors from the bones and vegetables, mingling together into the water. It's a slow transformation you can smell as the hours pass.
-
Texture Control:
The key is a bare simmer, not a rolling boil. A vigorous boil can make the broth cloudy and sometimes a bit bitter. We want clarity and clean flavor, which comes from patience.
-
Finishing Touches:
Straining is the most important step. You want to remove all the solids, leaving behind a clear, golden liquid. Let it cool a bit before you handle it, though. Hot broth demands respect.
-
Serving Timing:
Broth is best after it's had time to chill. The flavor seems to settle and become even more pronounced. Use it right away, or let it cool completely for storing.
-
Don't add salt until the end. The broth reduces as it cooks, and salting early can make it too intense.
-
A splash of apple cider vinegar helps pull minerals from the bones.
-
Skim off any foam that rises in the first 20 minutes for a clearer broth.
-
If you're short on time, using a pressure cooker can cut the cooking time down significantly.
Pro Tips
I remember the first time I made broth and saw that layer of golden fat solidify on top after it cooled. I felt like I'd unlocked some kind of kitchen magic. It’s such a simple act, but it feels profoundly resourceful.
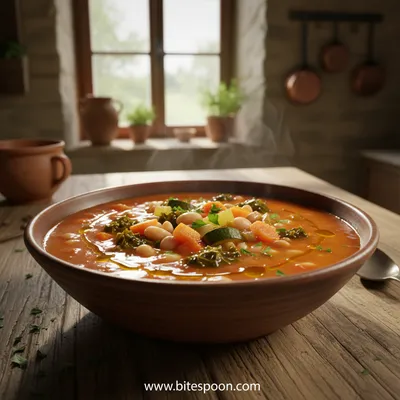
This broth becomes the starting point for so many things. It’s the base for a hearty soup, the liquid for cooking grains, or the secret to a more flavorful homemade sauce. It gives even simple dishes a sense of depth and care.
The essence of the dish:
This broth is about building a foundation. It’s the quiet background note that makes all your other cooking sing. It’s not about being the star of the show, but about making everything else better.
A fun fact or historical angle:
Before refrigeration, making broth was a way to preserve the nutritional value of meat for longer. The simmering process made it safe to consume and easy to digest, a true food of necessity that became a food of comfort.
Flavor or sensory focus:
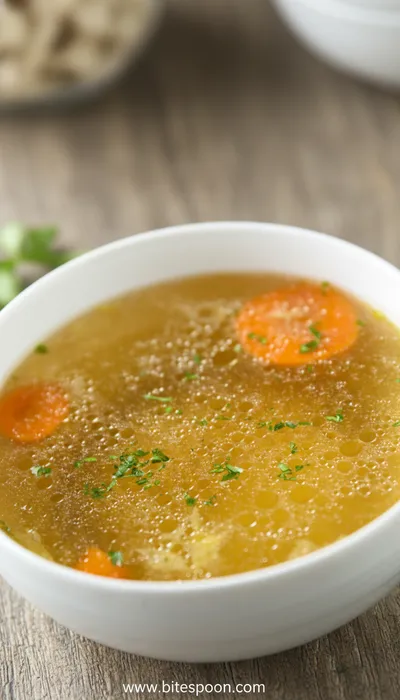
The first thing you’ll notice is the aroma – savory, warm, and deeply comforting. The flavor is clean and rich, with a silky mouthfeel from the rendered collagen. It tastes like care.
You Must Know
-
A slow simmer is non-negotiable for clear, flavorful broth.
-
Always strain the broth through a fine-mesh sieve or cheesecloth.
-
Let the broth cool to room temperature before refrigerating.
-
The fat that rises to the top is great for cooking, or you can discard it for a leaner broth.
Frequently Asked Questions
→ Can I use raw chicken instead of a carcass?
Absolutely. Chicken wings or legs work great. You might get a slightly different flavor profile, but it will still be delicious. Just brown them a bit in the pot first for extra depth.
→ How long can I store homemade broth?
In the refrigerator, it will keep for about 4-5 days. For longer storage, freeze it. I pour it into ice cube trays for small portions, or into larger containers. It freezes beautifully for up to 3 months.
→ Why is my broth cloudy?
Cloudiness usually comes from boiling too aggressively. A gentle simmer is the key. Also, avoid stirring it too much once it's cooking. Don't worry, it still tastes great, it's just an aesthetic thing.
→ Can I add other vegetables?
Of course. Leeks, mushrooms, or garlic cloves are wonderful additions. Just avoid starchy vegetables like potatoes, as they can make the broth murky. Greens are best added at the very end if you want to use them.
→ What's the white stuff that rises to the top?
That's protein and impurities foaming up. Just skim it off with a spoon in the first 20 minutes of simmering. It helps create a clearer broth, but it's harmless if a little is left behind.
→ Can I make this in a slow cooker?
Yes, a slow cooker is perfect for broth. Combine all ingredients, cover with water, and cook on low for 8-10 hours. It’s a wonderfully hands-off method.
Nutrition Facts
per serving
25
Calories
2g
Protein
2g
Carbs
1g
Fat
Taste Profile
Savory, rich, and deeply comforting with a clean finish.
Ingredient Substitutions
Don't have an ingredient? Try these alternatives
The acidity is what's important for extracting minerals from the bones.
This will alter the flavor profile slightly, adding warmth or a hint of heat.
Recipe Variations
Try these delicious twists on the original
Roasted Chicken Broth
Roast the chicken bones and vegetables in a 400°F (200°C) oven until golden brown before simmering. This adds a deeper, more complex flavor.
Ginger-Turmeric Broth
Add a 2-inch piece of fresh ginger (sliced) and a 1-inch piece of fresh turmeric (sliced) for an anti-inflammatory boost and a warm, aromatic flavor.
Common Mistakes to Avoid
Learn from others' mistakes for perfect results
- Boiling the broth too vigorously, which makes it cloudy.
- Adding salt at the beginning, which can lead to an overly salty final product.
- Not skimming the initial foam, which can affect the clarity and flavor.
- Using spoiled or old chicken bones, which will ruin the entire batch.
Meal Prep & Storage
Make Ahead Tips
Broth is the ultimate make-ahead ingredient. Make a large batch on a weekend and freeze it in portions for easy use throughout the month.
Leftover Ideas
Reheat leftover broth gently on the stovetop. Use it to cook grains, steam vegetables, or as the liquid for a quick weeknight skillet.
Perfect Pairings
Serve this with...
Cooking Timeline
Prep and combine all ingredients in the stockpot.
Bring to a boil, then reduce to a simmer. Skim off any initial foam.
Maintain a gentle simmer, partially covered. The house will begin to smell wonderful.
Remove from heat and carefully strain the broth into a large bowl.
Season with salt to taste and allow the broth to cool before storing.

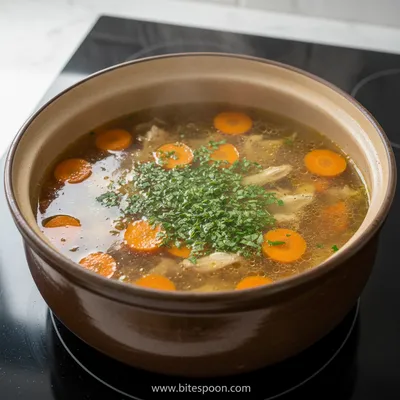
Chicken Broth Recipe - Quick and Easy Homemade
A simple, flavorful homemade chicken broth that transforms basic ingredients into liquid gold, perfect for soups, stews, and adding depth to everyday cooking.
Timing
Prep Time
10 Minutes
Cook Time
3 Hours
Total Time
3 Hours 10 Minutes
Recipe Details
Ingredients
Main Ingredients
-
01
1 leftover chicken carcass (from a 3-4 lb roasted chicken) or 2 lbs chicken backs/necks
-
02
1 large yellow onion, quartered (skin on is fine)
-
03
2 large carrots, roughly chopped
-
04
3 celery stalks, including leafy tops, roughly chopped
-
05
3 cloves garlic, smashed
Aromatics
-
01
1 tablespoon black peppercorns
-
02
2 bay leaves
-
03
1 tablespoon apple cider vinegar
-
04
Cold water, to cover (about 10-12 cups)
-
05
Sea salt, to taste (added after cooking)
Instructions
Place the chicken carcass or bones, onion, carrots, celery, and garlic into a large stockpot. Honestly, just toss them in. No need for precision.
Add the peppercorns, bay leaves, and apple cider vinegar. Pour in enough cold water to cover everything by about an inch. The vinegar helps extract minerals from the bones.
Bring the pot to a gentle boil over high heat. Then, immediately reduce the heat to low to maintain a very gentle simmer. You should see small bubbles occasionally rising to the surface. Skim off any foam that collects on top with a spoon.
Partially cover the pot and let it simmer gently for at least 3 hours, and up to 6 hours for a richer flavor. If the water level drops below the ingredients, add a bit more hot water. Go fold some laundry, read a book. Let it do its thing.
After simmering, carefully remove the pot from the heat. Place a fine-mesh strainer or a colander lined with cheesecloth over a large bowl. Ladle the broth through the strainer, discarding the solids.
Let the broth cool for about 30 minutes. Then, season with salt to taste. Start with a teaspoon and go from there. Allow it to cool completely before storing it in airtight containers in the refrigerator or freezer.
Notes & Tips
-
1
The broth will have a layer of fat solidify on top once chilled. You can skim this off for a leaner broth, or leave it for extra flavor.
-
2
This broth is your blank canvas. Use it as a base for creamy pasta dishes, soups, or to cook rice and grains.
-
3
For a richer, more gelatinous broth, simmer for the full 6 hours. The longer cook time extracts more collagen from the bones.

Tools You'll Need
-
Large stockpot (8-quart or larger)
-
Fine-mesh strainer or cheesecloth
-
Large heatproof bowl for straining
-
Ladle
-
Airtight containers for storage
Must-Know Tips
-
Low and slow is the rule. A rolling boil makes broth cloudy and can impart bitterness.
-
Taste for salt only after straining and cooling slightly. The flavor concentrates as it reduces.
-
Don't overcrowd the pot, but make sure ingredients are fully submerged for even extraction.
Professional Secrets
-
Roast the chicken bones in the oven before simmering for a deeper, richer flavor and color.
-
A splash of vinegar is the key to unlocking minerals and collagen from the bones.
-
Let the broth cool naturally before refrigerating to maintain its clear, golden appearance.

Recipe by
Alexa CarterFast food, but smarter 🔥🍽️ Bold flavors, simple steps, and meals that always hit the spot 😎
Get Delicious Recipes Weekly
Join 25,000+ home cooks getting our best recipes straight to their inbox.
Free forever • No spam • Unsubscribe anytime