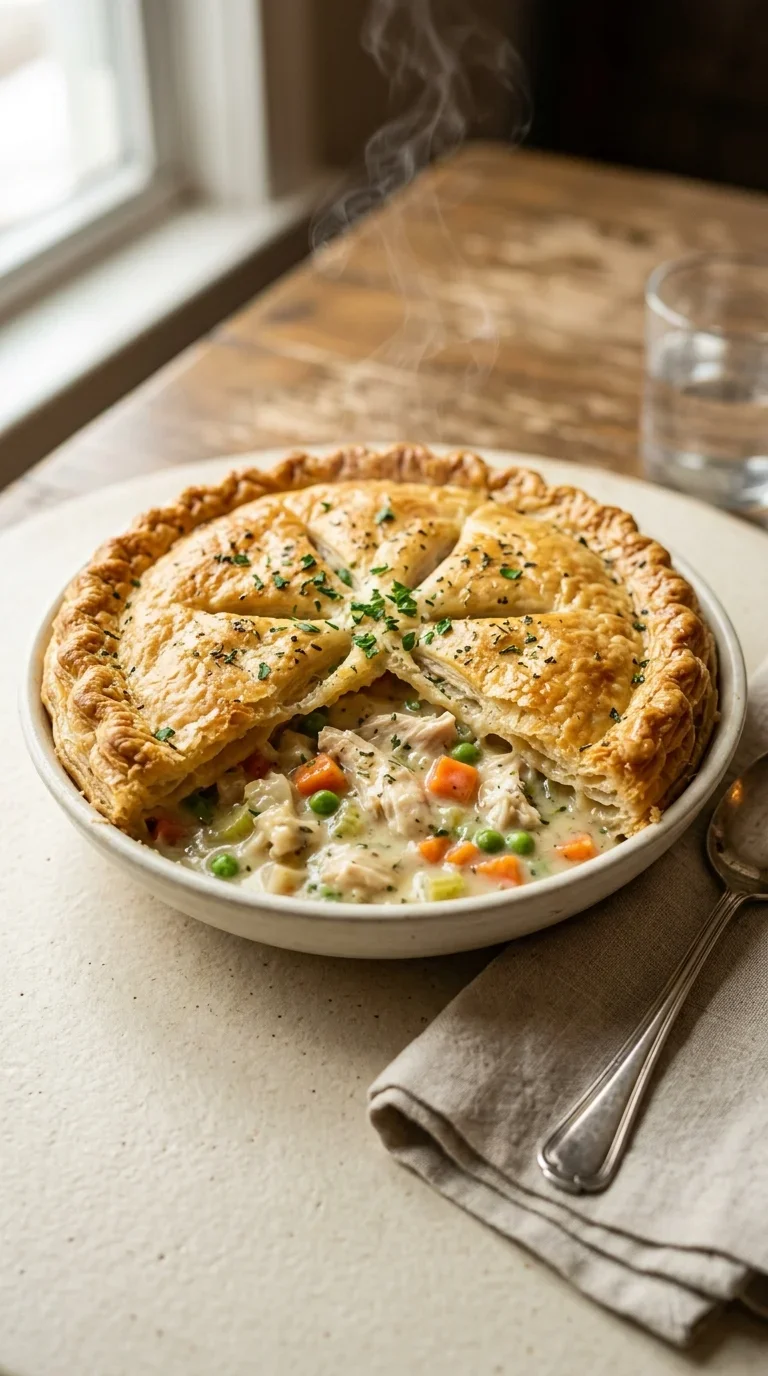
The concept of the savory pie is a timeless piece of culinary history, tracing back to the ancient Romans and the hearty meat pies of medieval England. Originally, these "coffyns" were thick pastry shells designed more as storage vessels to preserve the meat inside than as something meant to be eaten. Over centuries, the crust evolved from a hard utility shell into the delicate, buttery layers we cherish today.
In American homes, the classic chicken pot pie with flaky crust became a symbol of rural comfort and domestic warmth. It utilized the staples of the farmhouse pantry: root vegetables, cream, and poultry. The addition of a bottom crust transformed it from a simple stew into a formal meal, creating a contrast between the soft, savory filling and the crisp exterior.
Today, the dish represents a bridge between generations. While modern shortcuts like using pre-cooked chicken have made it more accessible for busy families, the core essence remains the same. It is a dish defined by its ability to provide sustenance and emotional warmth, turning simple ingredients into a lasting memory of home.
Why You'll Love It
-
- Honestly, there is nothing like the smell of a buttery crust baking in the oven to make a house feel like a home. It just feels like a warm hug on a rainy day.
-
- I love that we use 2 cups cooked rotisserie chicken, shredded; it's such a clever little shortcut that doesn't sacrifice that slow-cooked taste, yeah.
-
- That combination of 1 cup heavy cream and a pinch of 1/4 teaspoon ground nutmeg creates this velvety, nostalgic filling that just melts in your mouth.
-
- Look, the contrast between the flaky, golden top and the bubbling, creamy center is just... wow, it's pure comfort in every single bite.
"It tasted just like my grandmother used to make. The crust was so light and buttery—my family finished the whole thing!"
Essential Ingredient Guide
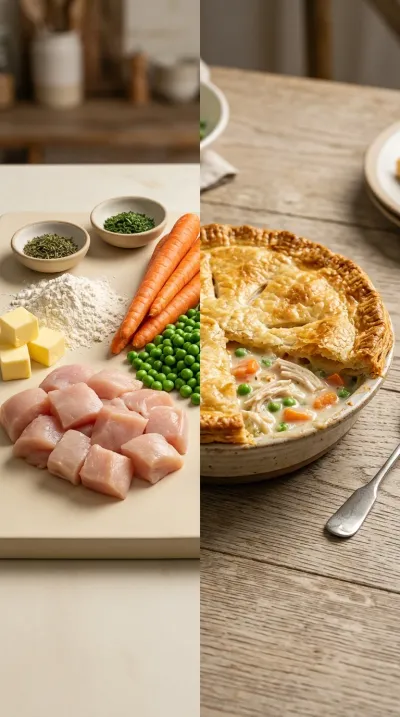
- 2 cups cooked rotisserie chicken, shredded: I always find using a store-bought bird makes this so much easier. Just make sure it's shredded into bite-sized pieces so you get a bit of chicken in every spoonful.
- 1 cup (2 sticks) cold unsalted butter, diced: The secret here is keeping it truly cold, almost icy. When those little cubes melt slowly in the oven, that's how you get those beautiful, flaky layers.
- 1/2 cup shredded cheddar cheese (optional): Now, this is just a little something extra if you're feeling indulgent. It adds a lovely sharp note and a bit of gooeyness that the kids usually adore.
- 1/2 teaspoon dried thyme: This little herb adds such a grounded, earthy scent to the filling. I like to let it simmer for a few minutes so the flavor really wakes up.
- 1 cup low‑sodium chicken broth: This provides the savory base for our sauce. I prefer low-sodium so the natural flavors of the 2 carrots, diced and 2 celery stalks, diced can really shine.
- 1/4 cup ice water: Just a splash, a tablespoon at a time, to bring the dough together. Be gentle—if you overwork it, the crust won't be nearly as light and crisp.

Complete Cooking Process
-
Getting Ready:
Start by getting your cold unsalted butter, diced and ready. It's so important to chill the dough for at least 30 minutes, or the crust just won't have that snap I love.
-
Building the Flavor:
Sautéing the 1 medium onion, diced along with the carrots and celery lets the sweetness develop. Then, whisking in the 1 cup low‑sodium chicken broth creates a rich, savory foundation.
-
Perfecting the Texture:
Stirring in the 1 cup heavy cream and 2 tablespoons all-purpose flour ensures the filling is thick and luscious. The magic happens when it simmers just enough to coat the chicken.
-
The Final Touch:
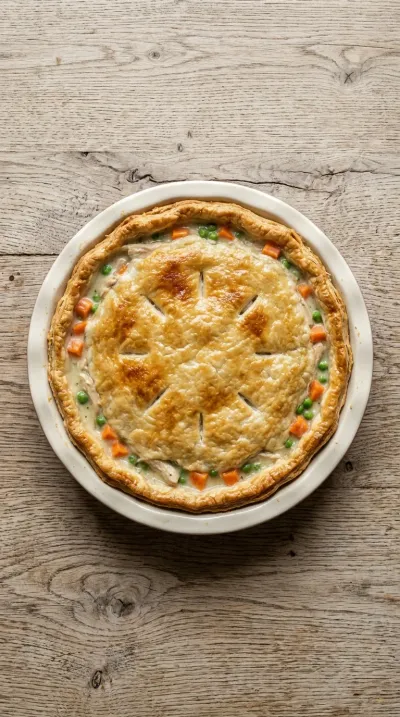
Crimp those edges tight with your fingers and cut a few slits in the top. A little splash of milk on top gives it that professional, glossy glow we're after.
-
Patience is Key:
Wait a full 10 minutes after it comes out of the oven. I know it's tempting, but letting it rest prevents a soggy bottom and keeps the filling from running.
-
For an even flakier crust, try adding 2 tablespoons heavy cream to the dough before chilling.
-
If you're using a pre-made crust, pre-bake the bottom for 5 minutes to keep it crisp.
-
When reheating, a splash of milk or broth helps the leftovers stay creamy.
-
Always use ice water for the dough to keep the butter from melting too soon.
Pro Tips
You've got this, just take your time and enjoy the process!

Better For You Treats
To keep things a bit lighter, you can use reduced-fat cheese instead of the 1/2 cup shredded cheddar cheese and swap the heavy cream for a light version. It's still wonderfully comforting, just a bit more mindful for a weekday dinner.
Ways to Make it Your Own
I sometimes swap the carrots for sliced mushrooms and add a bit of Parmesan for a wood-smoked feel. Or, if you're feeling bold, stir in 1 cup frozen corn kernels and some cooked turkey ham for a mid-western twist.
Serving Suggestions
I love serving this with a crisp green bean almondine for a bit of crunch. A little drizzle of lemon-y Dijon mustard on the side adds a bright, tangy contrast to the rich filling.
Frequently Asked Questions
→ Can I freeze the pot pie for later?
Yes, absolutely! Just wrap it tightly in foil and it'll keep for 3 months; just remember to thaw it in the fridge overnight before baking.
→ My crust isn't browning, what should I do?
Oops, that happens! Make sure you brush the top with an egg wash or milk, and don't be afraid to leave it in for another 5 minutes at 375°F.
→ What if my filling seems too thin?
Well, just let it simmer a few minutes longer after adding the 1 cup heavy cream. The 2 tablespoons all-purpose flour will do its job and thicken it right up.
Nutrition Facts
per serving
420
Calories
22g
Protein
36g
Carbs
26g
Fat
Taste Profile
A rich, savory blend of creamy chicken and aromatic herbs with a buttery finish.
Ingredient Substitutions
Don't have an ingredient? Try these alternatives
Will be slightly less rich but still creamy.
Ensure it is shredded and cooked through.
Blanch them quickly first for the best color.
Recipe Variations
Try these delicious twists on the original
Herb–Rich Mushroom Chicken Pot Pie
For a wood–smoked flavor, swap some carrots for sliced fresh mushrooms, add 1 tablespoon fresh thyme, and finish with a sprinkle of grated Parmesan cheese.
Cheesy Turkey Ham & Corn Chicken Pot Pie
A savory mid–western twist: add 1/2 cup cooked turkey ham crumbles and 1 cup frozen corn kernels to the filling, topped with shredded Monterey Jack.
Common Mistakes to Avoid
Learn from others' mistakes for perfect results
- Overworking the dough, which makes the crust tough instead of flaky.
- Adding water too quickly to the crust, making it sticky.
- Slicing the pie immediately after baking, causing the filling to run.
Meal Prep & Storage
Make Ahead Tips
You can prepare the dough and filling in advance. The pie can be assembled and kept in the fridge, or frozen completely for up to 3 months.
Leftover Ideas
Store in an airtight container in the fridge. When reheating, add a splash of milk or broth and cover to trap the steam, keeping the crust from drying out.
Perfect Pairings
Serve this with...
Cooking Timeline
Mix the flour, salt, and butter for the crust.
Add ice water to dough and refrigerate.
Saute vegetables and build the creamy sauce.
Roll dough, assemble the pie, and begin baking.
Finish baking and let the pie rest.
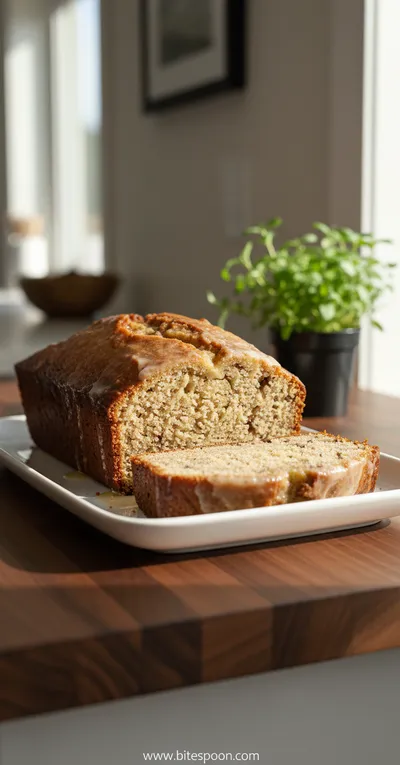

Classic Chicken Pot Pie with Flaky Crust
Warm up your kitchen with a classic chicken pot pie with flaky crust, filled with a creamy blend of 2 cups cooked rotisserie chicken, shredded and garden veggies. It is the kind of meal that feels like a hug on a rainy afternoon.
Timing
Prep Time
20 Minutes
Cook Time
40 Minutes
Total Time
60 Minutes
Recipe Details
Ingredients
Homemade Flaky Crust
-
01
2 cups all-purpose flour
-
02
1 teaspoon salt
-
03
1 cup (2 sticks) cold unsalted butter, diced
-
04
1/4 cup ice water
Creamy Filling
-
01
4 tablespoons unsalted butter
-
02
1 medium onion, diced
-
03
2 carrots, diced
-
04
2 celery stalks, diced
-
05
1 cup frozen peas
-
06
2 cloves garlic, minced
-
07
2 tablespoons all-purpose flour
-
08
1 cup low -sodium chicken broth
-
09
1 cup heavy cream
-
10
2 cups cooked rotisserie chicken, shredded
Seasoning & Optional
-
01
1/2 teaspoon dried thyme
-
02
1/2 teaspoon dried rosemary
-
03
1/4 teaspoon ground nutmeg
-
04
1/2 teaspoon salt
-
05
1/4 teaspoon black pepper
-
06
1/2 cup shredded cheddar cheese (optional)
Instructions
First, we'll start the crust. Combine your 2 cups all-purpose flour and 1 teaspoon salt in a large bowl. Now, add those cold butter cubes; use a pastry cutter or just your fingertips to blend it all until it looks like coarse crumbs. Gradually stir in the 1/4 cup ice water, just a tablespoon at a time, until the dough finally comes together.
Turn the dough onto a lightly floured surface and gently shape it into a disk. Wrap it up in plastic and let it relax in the refrigerator for at least 30 minutes. Honestly, this patience is key for the texture.
While that chills, let's make the heart of the pie. In a large skillet over medium heat, melt 4 tablespoons unsalted butter. Toss in the diced onion, 2 carrots, and 2 celery stalks; cook them, stirring occasionally, for 5–7 minutes until they've softened up nicely.
Stir in the 2 cloves garlic, minced, and 2 tablespoons all-purpose flour. Cook for just 1 minute—we just want to get rid of that raw flour taste. Then, whisk in 1 cup low -sodium chicken broth and bring it to a gentle simmer until it thickens slightly.
Reduce your heat to low. Now stir in the 1 cup heavy cream, 1/2 teaspoon dried thyme, 1/2 teaspoon dried rosemary, 1/4 teaspoon ground nutmeg, 1/2 teaspoon salt, 1/4 teaspoon black pepper, 1 cup frozen peas, and those 2 cups cooked rotisserie chicken, shredded. Cook it uncovered for 3–4 minutes so the flavors can really meld together.
Preheat your oven to 425°F (220°C). On a floured surface, roll out your chilled dough into a circle large enough to cover your 9–inch pie dish. Gently lift the dough into the dish and trim any extra edges.
Pour that hot filling right into the crusted dish. If you're feeling like it, sprinkle 1/2 cup shredded cheddar cheese over the top. Roll another dough circle and lay it over the filling; seal the edges by crimping them with a fork or your fingers. Cut a few slits in the top for steam to escape and brush with egg wash or milk for a lovely glossy finish.
Bake in the preheated oven for 25 minutes. Then, reduce the heat to 375°F (190°C) and bake for another 15 minutes. You're looking for a golden brown crust and a bubbling filling.
Take the pie out and let it rest for 10 minutes before you slice into it. Trust me, resting allows the filling to set so you don't end up with a soggy bottom.
Serve it warm, maybe with a simple green salad or some crusty bread. It's just pure comfort on a plate.
Notes & Tips
-
1
Using rotisserie chicken is a wonderful shortcut that saves so much time.
-
2
The resting period after baking is essential for the pie's structural integrity.
-
3
Crimping the edges by hand gives the pie a lovely, rustic home-cooked look.
Tools You'll Need
-
9–inch pie dish for baking the pie
-
Rolling pin for flattening the dough
-
Mixing bowls for combining crust ingredients
-
Saucepan or skillet for the creamy filling
-
Whisk for smoothing the sauce
-
Measuring cups and spoons for accuracy
-
Knife and cutting board for chopping vegetables
-
Pastry brush for the glossy finish
Must-Know Tips
-
Flakier Crust, add 2 tablespoons heavy cream to the dough before chilling to keep butter from drying out.
-
Prevent Sogginess, if using pre–made crust, pre–bake the bottom for 5 minutes first.
-
Reheating Secret, add a splash of milk or broth before microwaving leftovers to maintain a moist crumb.
Professional Secrets
-
The 'coarse crumbs' stage of the butter and flour is what creates the layers in a flaky crust.
-
Cooking the flour for a minute before adding broth ensures a smooth, professional-tasting sauce without a floury aftertaste.
-
The two-stage baking temperature (425°F then 375°F) sets the crust quickly while ensuring the filling cooks through without burning the top.
What readers are saying
Community reviews from home cooks like you
This exceeded my expectations. I really liked how the 2 cups all-purpose flour and 1 teaspoon salt came together. Perfect as written.
Perfect for a busy weeknight. I really liked how the 2 cups all-purpose flour and 1 teaspoon salt came together. My kids even asked for seconds.
This exceeded my expectations. I really liked how the 2 cups all-purpose flour and 1 teaspoon salt came together. Thanks for sharing this one!
Good, but not amazing. The flour flavor was nice, but i swapped one ingredient and it still worked. I might try it again with some adjustments.
This exceeded my expectations. I really liked how the 2 cups all-purpose flour and 1 teaspoon salt came together. Thanks for sharing this one!
Will definitely make this again. I really liked how the 2 cups all-purpose flour and 1 teaspoon salt came together. My kids even asked for seconds.
Will definitely make this again. I really liked how the 2 cups all-purpose flour and 1 teaspoon salt came together. Saving this for later.
Good, but not amazing. The flour flavor was nice, but i added a bit more seasoning next time. I might try it again with some adjustments.
The flavors were spot on. I really liked how the 2 cups all-purpose flour and 1 teaspoon salt came together. It took slightly longer than the recipe said. Perfect as written.
This was a hit with my family. I really liked how the 2 cups all-purpose flour and 1 teaspoon salt came together. Already shared it with a friend.
This was a hit with my family. I really liked how the 2 cups all-purpose flour and 1 teaspoon salt came together. I added a bit more seasoning next time. Perfect as written.
The flavors were spot on. I really liked how the 2 cups all-purpose flour and 1 teaspoon salt came together. Already shared it with a friend.
Pretty good overall. The flour flavor was nice, but i would reduce the salt a little. I might try it again with some adjustments.
Can't believe how simple this was. I really liked how the 2 cups all-purpose flour and 1 teaspoon salt came together. Highly recommend giving it a try.
This was a hit with my family. I really liked how the 2 cups all-purpose flour and 1 teaspoon salt came together. My kids even asked for seconds.

Recipe by
Alexa CarterFast food, but smarter 🔥🍽️ Bold flavors, simple steps, and meals that always hit the spot 😎
Get Delicious Recipes Weekly
Join 25,000+ home cooks getting our best recipes straight to their inbox.
Free forever • No spam • Unsubscribe anytime