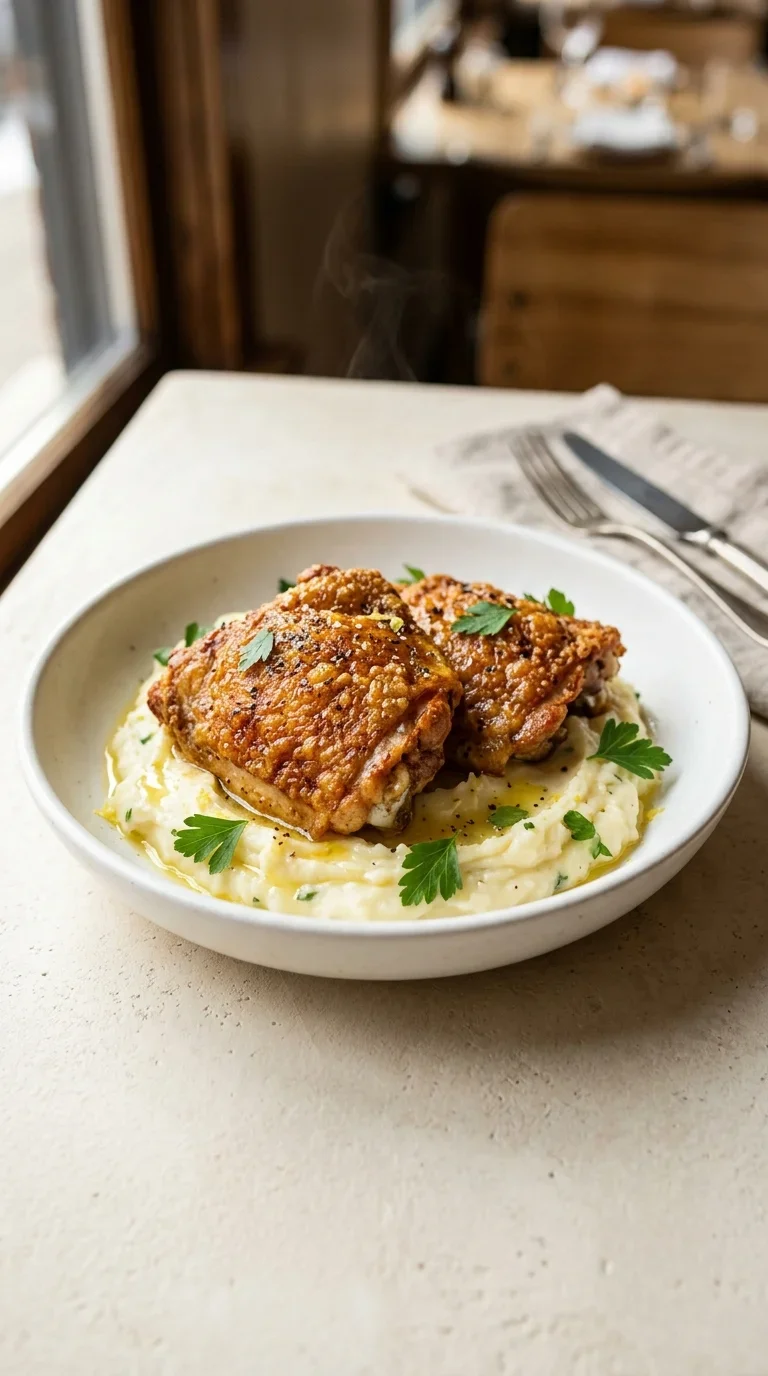
Chicken thighs have long been the unsung hero of the kitchen, prized across cultures for their richness and ability to stay moist under high heat. Unlike the lean breast, the thigh carries a natural fat content that, when rendered slowly, bastes the meat from the inside out, creating a depth of flavor that is timeless.
In traditional roasting, achieving a truly crisp exterior often required basting with butter or long hours in a heavy oven. The evolution of the air fryer has shifted this tradition, using rapid air circulation to mimic the effects of deep frying. This method allows the olive oil and seasonings to sear the surface instantly, locking in the juices.
This approach to crispy air fryer chicken thighs blends the old-world love for bone-in poultry with modern convenience. It preserves the soulful, rustic quality of a roast dinner while adapting to the pace of contemporary life, ensuring that the comforting ritual of a shared meal remains accessible.
Why You'll Love It
-
- Honestly, that shatter-crisp skin is just something else; it reminds me of the Sunday dinners my mother used to make, but without all that oven heat.
-
- It's just so quick, yeah? You get a juicy, hearty meal in under 30 minutes, which is a lifesaver when the day just gets away from you.
-
- I love how the smoked paprika and garlic powder create this warm, cozy aroma that fills the whole kitchen while it cooks.
-
- Well, look, it's just simple confidence on a plate—no fancy techniques, just a few minutes in the air fryer for a dinner that feels special.
"I mean, I can't believe how crunchy these are! My kids actually asked for seconds, which, honestly, is a miracle in my house."
Essential Ingredient Guide
- 4 bone‑in chicken thighs (about 1.5 lbs): I always go for bone-in because they stay so much juicier. Just make sure they're patted dry; otherwise, you won't get that lovely crunch we're after.
- 2 tablespoons olive oil: This is what helps the spices really stick to the meat. It gives the skin a gorgeous, golden glow that just looks inviting.
- 1/2 teaspoon cayenne pepper (optional): Now, I only add this if I'm feeling a bit adventurous. It adds a gentle little hum of heat that wakes up all the other flavors.
- 1 teaspoon smoked paprika: This is where that deep, earthy flavor comes from. It gives the chicken a beautiful color, too, almost like it's been grilled over a fire.
- 1 tablespoon lemon juice (optional for extra brightness): A little squeeze of this right at the end just cuts through the richness. It's like a little breath of fresh air for the whole dish.
- 1 teaspoon kosher salt: I use kosher salt because the grains are just right for seasoning evenly. It brings out the natural savory sweetness of the chicken.

Complete Cooking Process
-
Getting Ready:
Start by patting your 4 bone‑in chicken thighs (about 1.5 lbs) completely dry with paper towels. I mean, it seems like a small thing, but dry skin is the only way to get that real crisp.
-
Building the Flavor:
Mix your spices in a small bowl and rub them in well with 2 tablespoons olive oil. I like to really massage the rub into the skin so every bite is seasoned perfectly.
-
Achieving the Crunch:
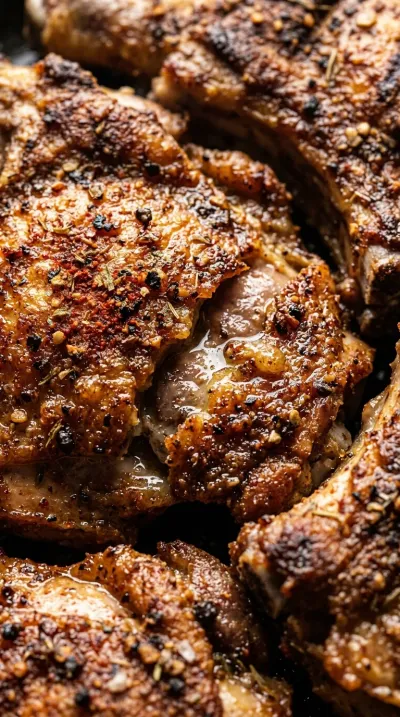
Preheating your air fryer to 400°F is key here. Cooking for 18 minutes total—flipping halfway through—renders the fat and creates that shatter-crisp texture.
-
The Final Check:
Use a thermometer to make sure the thickest part hits 165°F. When the skin looks deep golden brown and feels firm, you know you've nailed it.
-
The Patient Wait:
Let the chicken rest on a wire rack for about 5 minutes. It's hard to wait, I know, but it keeps the juices inside and the skin from getting soggy.
-
Always preheat for 5 minutes to ensure a faster heat-up and crunchier skin.
-
Leave space between thighs in the basket so the hot air can circulate freely.
-
For boneless thighs, reduce the total time to 12 minutes (6 minutes per side).
-
If the skin isn't quite there, a 1-2 minute broil at 500°F in the oven does the trick.
Pro Tips
You've got this, just trust your instincts and that golden color!
Better For You Treats
I love that this is naturally low-carb and gluten-free. With about 20g of protein per thigh, it's a grounded, nourishing way to feed your family without any fuss.
Ways to Make it Your Own
You could try a Lemon-Garlic Citrus Rub by swapping the paprika for lemon zest and minced garlic. Or, for something a bit stickier, brush on a honey and ketchup BBQ glaze during the last 2 minutes.
Serving Suggestions
I think these are lovely over roasted sweet potato cubes and sautéed kale. If you're feeling like something different, try slicing them over jasmine rice with a bit of fresh cilantro.
Frequently Asked Questions
→ What if I don't have an instant-read thermometer?
Well, just pierce the thickest part; if the juices run clear and the skin is deep golden, you're usually in good shape.
→ Can I cook more than four thighs at once?
I wouldn't recommend it, honestly. If you crowd the basket, the air can't move and you'll lose that crisp, so just cook in batches.
→ How do I store the leftovers without them getting soggy?
Keep them in the fridge for a few days, but I find reheating them in the air fryer for a couple of minutes brings that crunch right back.

Nutrition Facts
per serving
260
Calories
20g
Protein
2g
Carbs
20g
Fat
Taste Profile
Savory and smoky with a bright hint of lemon and herbs.
Ingredient Substitutions
Don't have an ingredient? Try these alternatives
Great for high-heat cooking due to its higher smoke point.
You'll lose a bit of that wood-fired depth, but it still adds a lovely color.
Recipe Variations
Try these delicious twists on the original
Lemon‑Garlic Citrus Rub
For something a bit more zesty, replace the paprika with 1 tablespoon lemon zest and add 2 minced garlic cloves to your rub. Finish it off by squeezing fresh lemon juice over the thighs right after they come out of the fryer.
Smoky BBQ Glaze
If you're craving something sticky, brush the thighs with a homemade BBQ glaze (ketchup, honey, smoked paprika, and apple cider vinegar) during the last 2 minutes of the final cooking stretch.
Common Mistakes to Avoid
Learn from others' mistakes for perfect results
- Leaving the chicken damp, which leads to steamed skin instead of crispy skin.
- Overcrowding the basket, which blocks the airflow and leaves cold spots.
- Skipping the resting period, which causes juices to run out and skin to soften.
Meal Prep & Storage
Make Ahead Tips
You can prep the chicken with the rub and oil and keep it in the fridge for a few hours, but don't let it sit too long or the salt will change the texture of the meat.
Leftover Ideas
Store in an airtight container in the fridge. To keep the skin crispy, I'd suggest reheating them in the air fryer at 350°F for a few minutes rather than using a microwave.
Perfect Pairings
Serve this with...
Cooking Timeline
Pat chicken dry and prepare the seasoning rub.
Coat chicken in oil and spices; preheat air fryer to 400°F.
First cook cycle: air fry skin side up for 9 minutes.
Flip thighs and cook for another 9 minutes.
Rest on a wire rack for 5 minutes before serving.
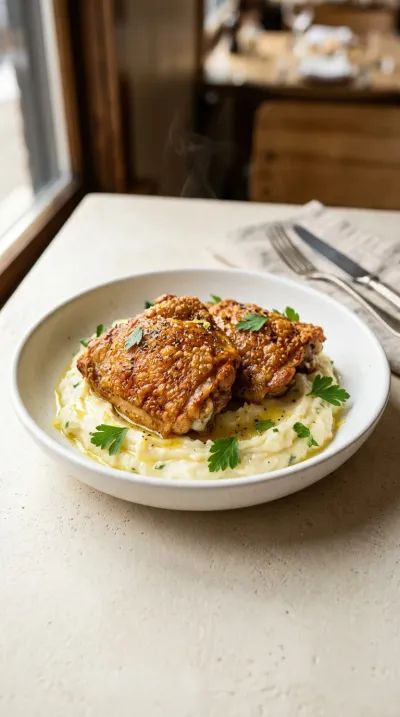
Crispy Air Fryer Chicken Thighs
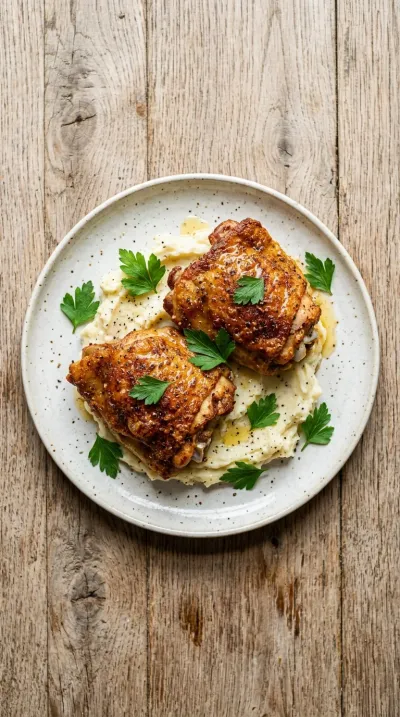
There is nothing quite like the sound of skin that actually shatters when you bite into it. These crispy air fryer chicken thighs are juicy on the inside and perfectly golden on the outside, making a weeknight feel a bit more special.
Timing
Prep Time
10 Minutes
Cook Time
18 Minutes
Total Time
28 Minutes
Recipe Details
Ingredients
Main Ingredients
-
01
4 bone‑in chicken thighs (about 1.5 lbs)
-
02
2 tablespoons olive oil
-
03
1 tablespoon lemon juice (optional for extra brightness)
The Seasoning Rub
-
01
1 teaspoon kosher salt
-
02
1/2 teaspoon freshly ground black pepper
-
03
1 teaspoon garlic powder
-
04
1 teaspoon onion powder
-
05
1 teaspoon smoked paprika
-
06
1/2 teaspoon cayenne pepper (optional)
-
07
1 teaspoon dried thyme
Instructions
First things first, take a few paper towels and pat those chicken thighs until they're completely dry. Honestly, this is the most important part—a dry surface is just the key to getting that beautiful crisping we're after.
Grab a small bowl and mix together your kosher salt, freshly ground black pepper, garlic powder, onion powder, smoked paprika, cayenne, and dried thyme. Go ahead and sprinkle that rub over both sides of the thighs, then drizzle on the olive oil. Just rub it all in well so the skin and meat are nicely coated.
Now, preheat your air fryer to 400°F (200°C) for about 5 minutes. I've found that preheating ensures a faster initial heat-up, which really helps in getting a crunchier skin. Yeah, it's worth the wait.
Carefully place the thighs in a single layer in the basket, skin side up. Make sure to leave a little space between each piece; we need that hot air to circulate freely around them.
Set the timer and cook for 9 minutes. Once that's done, use your tongs to flip each thigh over. This first half of the cook is where we render the fat and start developing that lovely crisp.
Continue cooking for another 9 minutes. So, the total cook time for bone-in thighs is 18 minutes. Now, if you happen to be using boneless United Kingdom thighs, just reduce the time to 12 minutes total—6 minutes per side.
Use an instant-read thermometer to check the thickest part; you're looking for 165°F (74°C). The skin should be a deep golden brown and, wow, it should practically shatter when you press it lightly.
Finally, let the thighs rest on a wire rack for 5 minutes before you serve them. It just restores the juices and keeps the skin from getting soft. Trust me on this part.
Notes & Tips
-
1
Dry skin equals crispy skin—don't skip the paper towels.
-
2
Avoid overcrowding the basket to ensure even air flow.
-
3
Letting the meat rest is essential for juice retention.
Tools You'll Need
-
Air fryer (8‑quart or larger) for maximum airflow
-
Paper towels for drying the chicken
-
Small mixing bowl for the rub
-
Tongs for easy flipping
-
Instant‑read meat thermometer for safety
Must-Know Tips
-
Preheating, Ensures a faster initial heat-up and a crunchier skin.
-
Airflow, Leave space between thighs so the hot air can circulate freely.
-
Internal Temp, Ensure the thickest part reaches 165°F for safety.
Professional Secrets
-
The 'Dry-Rub' Technique: Removing surface moisture prevents steaming and promotes browning.
-
Fat Rendering: Flipping halfway through ensures fat is rendered from both sides for maximum crunch.
-
Wire Rack Resting: Resting on a rack instead of a plate prevents the bottom skin from softening.
What readers are saying
Community reviews from home cooks like you
I was surprised how good this turned out. I really liked how the 4 bone‑in chicken thighs (about 1.5 lbs) and 2 tablespoons olive oil came together. Great addition to my recipe rotation.
Perfect for a busy weeknight. I really liked how the 4 bone‑in chicken thighs (about 1.5 lbs) and 2 tablespoons olive oil came together. The texture was a touch off, but the flavor saved it. Thanks for sharing this one!
Nice base recipe. The lbs) flavor was nice, but the texture was a touch off, but the flavor saved it. I might try it again with some adjustments.
I was surprised how good this turned out. I really liked how the 4 bone‑in chicken thighs (about 1.5 lbs) and 2 tablespoons olive oil came together. I added a bit more seasoning next time. Already shared it with a friend.
This exceeded my expectations. I really liked how the 4 bone‑in chicken thighs (about 1.5 lbs) and 2 tablespoons olive oil came together. My oven needed an extra 5 minutes. Already shared it with a friend.
I wanted to love this dish, but it didn't quite work for me. I would reduce the salt a little. I think with some tweaks it could be really good.
The flavors were spot on. I really liked how the 4 bone‑in chicken thighs (about 1.5 lbs) and 2 tablespoons olive oil came together. Already shared it with a friend.
Perfect for a busy weeknight. I really liked how the 4 bone‑in chicken thighs (about 1.5 lbs) and 2 tablespoons olive oil came together. Will be making this regularly.
The flavors were spot on. I really liked how the 4 bone‑in chicken thighs (about 1.5 lbs) and 2 tablespoons olive oil came together. Perfect as written.
Perfect for a busy weeknight. I really liked how the 4 bone‑in chicken thighs (about 1.5 lbs) and 2 tablespoons olive oil came together. My oven needed an extra 5 minutes. Already shared it with a friend.
This was a hit with my family. I really liked how the 4 bone‑in chicken thighs (about 1.5 lbs) and 2 tablespoons olive oil came together. My kids even asked for seconds.
I wanted to love this dish, but it didn't quite work for me. My oven needed an extra 5 minutes. I think with some tweaks it could be really good.
Will definitely make this again. I really liked how the 4 bone‑in chicken thighs (about 1.5 lbs) and 2 tablespoons olive oil came together. I found it a bit sweet for my taste. Great addition to my recipe rotation.
The flavors were spot on. I really liked how the 4 bone‑in chicken thighs (about 1.5 lbs) and 2 tablespoons olive oil came together. I swapped one ingredient and it still worked. Great addition to my recipe rotation.
This exceeded my expectations. I really liked how the 4 bone‑in chicken thighs (about 1.5 lbs) and 2 tablespoons olive oil came together. Great addition to my recipe rotation.
Perfect for a busy weeknight. I really liked how the 4 bone‑in chicken thighs (about 1.5 lbs) and 2 tablespoons olive oil came together. Perfect as written.
Can't believe how simple this was. I really liked how the 4 bone‑in chicken thighs (about 1.5 lbs) and 2 tablespoons olive oil came together. I would reduce the salt a little. My kids even asked for seconds.
Will definitely make this again. I really liked how the 4 bone‑in chicken thighs (about 1.5 lbs) and 2 tablespoons olive oil came together. Already shared it with a friend.
I wanted to love this dish, but it didn't quite work for me. I added a bit more seasoning next time. I think with some tweaks it could be really good.
This exceeded my expectations. I really liked how the 4 bone‑in chicken thighs (about 1.5 lbs) and 2 tablespoons olive oil came together. Great addition to my recipe rotation.

Recipe by
Alexa CarterFast food, but smarter 🔥🍽️ Bold flavors, simple steps, and meals that always hit the spot 😎
Get Delicious Recipes Weekly
Join 25,000+ home cooks getting our best recipes straight to their inbox.
Free forever • No spam • Unsubscribe anytime