
Pizza has always been more than just a meal; it's a communal ritual born from the streets of Naples. The marriage of sourdough fermentation and pizza dough is a nod to the ancient ways of baking, where wild yeast provided the lift and the characteristic sour note that defines authentic European breads. This slow process allows the gluten to develop and the flavors to deepen, creating a complexity that commercial yeast simply cannot match.
In traditional sourdough baking, the fermentation period isn't just for rise—it's for digestion. The wild yeast and bacteria break down the starches, making the final crust easier on the stomach and giving it those beautiful, irregular air bubbles. This easy sourdough pizza dough honors that tradition while adapting it for the modern home kitchen.
From the rustic hearths of old Italy to the sleek baking steels of today, the goal remains the same: a crust that provides a sturdy yet light foundation for fresh toppings. It is a timeless cycle of flour, water, and salt, evolved over centuries to bring people together around a shared table.
Why You'll Love It
-
- Honestly, there is nothing like the smell of sourdough baking in the oven; it just makes the whole house feel warm and safe.
-
- I love that you can use 1 cup active sourdough starter or even just your discard, so nothing goes to waste in my kitchen.
-
- Well, that crispy crust is just wonderful, and it has that slight tang that makes a homemade pizza feel so much more special than takeout.
-
- It is just a simple, grounded way to spend an afternoon, and wow, the kids always love helping me stretch the dough by hand.
"I mean, wow... I've tried a lot of crusts, but this one is just special. So crispy and’ perfectly tangy!"
Essential Ingredient Guide
- 1 cup active sourdough starter (or discard): This is the heart of the recipe, really. Whether it is bubbly and active or just discard from the fridge, it gives the crust that lovely, nostalgic sourdough flavor.
- 2 cups bread flour (≈ 240 g): I use this for the strength of the dough. It helps create those nice, chewy bubbles in the crust that we all look for in a good pizza.
- 1 cup all‑purpose flour (≈ 120 g): Adding this helps soften things up a bit. It ensures the crust isn't too tough, so it just melts in your mouth.
- 1 tsp fine sea salt: Don't skip this, or the dough will taste a bit flat. I find the fine sea salt blends in so smoothly without leaving any gritty bits.
- 1 tbsp olive oil: This adds a little richness and helps the dough feel supple. It also helps the crust get that golden, glistening look in the oven.
- 1 tsp granulated sugar: Just a pinch, really. It helps the yeast along and gives the crust a beautiful brown color that looks so professional.
Complete Cooking Process
-
Getting Ready:
Start by making sure your 3/4 cup warm water is just right—about 80°F—so you don't scare the starter. I like to get my flour measured out first so I'm not rushing once the mixing begins.
-
Developing the Flavor:
The magic happens during that first 20-25 minute sit and the long bulk ferment. That is when the sourdough really wakes up and creates those deep, complex flavors we love.
-
Managing the Texture:
Kneading for about 8 minutes is where the dough becomes smooth and elastic. If you feel it sticking too much, just add a tiny bit more flour, but keep it soft.
-
The Final Touch:
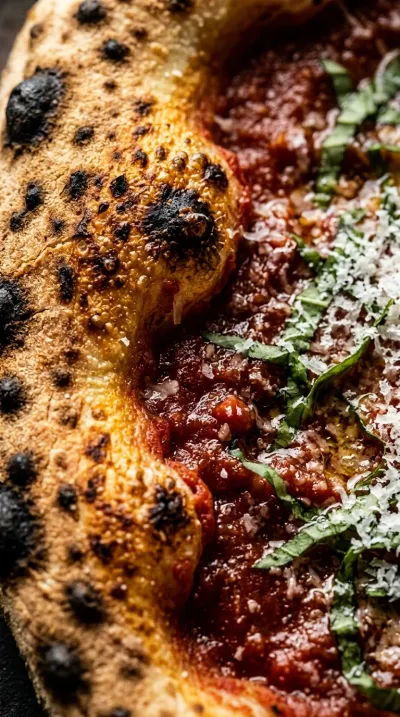
Before it hits the oven, I like to stretch the dough to a 12-inch diameter and leave a nice thick edge. Brushing the crust with a bit of olive oil makes it extra crisp.
-
The Perfect Serve:
Once it's out, just let it rest for 3 minutes. It is hard to wait, I know, but it lets the cheese set so it doesn't slide off when you slice it.
-
Brush the raw crust edges with a little olive oil for an extra crisp finish.
-
If your kitchen is cooler, let the bulk rise go for 3-4 hours so the dough has time to double.
-
Use a silicone mat or parchment paper during the second rise to keep things dry.
-
Rotate your pizza halfway through the 10-12 minute bake for an even, golden brown crust.
Pro Tips
Just take your time with it, and it'll turn out beautifully.

Better For You Treats
I appreciate that this crust uses simple, real ingredients. It's a more mindful way to enjoy pizza, and you can easily make it gluten-free by swapping the flours and starter.
Ways to Make it Your Own
You could try an Herb-Infused version by kneading in 1 tsp dried oregano and 1 tsp dried basil. Or, for something heartier, replace 1 cup of bread flour with whole-wheat flour for a nuttier taste.
Serving Suggestions
I love serving this with a fresh arugula salad with lemon vinaigrette to cut through the richness. A little drizzle of truffle oil or some fresh basil on top makes it feel like a real treat.
Frequently Asked Questions
→ Can I really use sourdough discard for this?
Oh, absolutely. It still tastes wonderful, though it might rise a tiny bit slower than using an active starter.
→ What if my dough isn't doubling in size?
Don't worry, your house might just be a bit chilly. Just give it another hour or two in a warm spot and it'll get there.
→ How do I store the extra dough ball?
Just pop it in the fridge for up to 3 days. I usually let mine sit on the counter for 30 minutes before I shape it again.

Nutrition Facts
per serving
420
Calories
14g
Protein
78g
Carbs
6g
Fat
Taste Profile
A balanced, tangy sourdough flavor with a savory finish.
Ingredient Substitutions
Don't have an ingredient? Try these alternatives
The crust will be softer and less chewy.
Adds a slightly different sweetness and helps with browning.
A neutral oil that works just as well for the dough texture.
Recipe Variations
Try these delicious twists on the original
Herb‑Infused Sourdough Pizza Dough
For a Mediterranean twist, just stir in 1 tsp dried oregano and 1 tsp dried basil while you're kneading the dough.
Whole‑Wheat Sourdough Pizza Dough
If you want something nuttier and a bit denser, swap out 1 cup of the bread flour for whole‑wheat flour.
Common Mistakes to Avoid
Learn from others' mistakes for perfect results
- Over-proofing the dough in a very warm kitchen, which can make it collapse.
- Forgetting to preheat the pizza stone, resulting in a soggy bottom.
- Adding too much flour during kneading, which makes the crust tough.
Meal Prep & Storage
Make Ahead Tips
You can make the dough balls ahead of time and keep them in the refrigerator for up to 3 days. Just let them warm up for 30 minutes before you shape them.
Leftover Ideas
Any leftover baked pizza is great cold, or you can reheat it in a skillet to bring back that crispiness.
Perfect Pairings
Serve this with...
Cooking Timeline
Mixing the shaggy dough
Autolyse rest period
Adding remaining flour and kneading
Bulk fermentation rise
Dividing and second puff rise

Easy Sourdough Pizza Dough – Simple Crispy Crust
Enjoy a golden, crackly crust that smells like a professional bakery right in your own kitchen. This easy sourdough pizza dough brings a gentle tang and a satisfying crunch to every single slice.
Timing
Prep Time
15 Minutes
Cook Time
12 Minutes
Total Time
27 Minutes
Recipe Details
Ingredients
Dough Ingredients
-
01
1 cup active sourdough starter (or discard)
-
02
2 cups bread flour (≈ 240 g)
-
03
1 cup all‑purpose flour (≈ 120 g)
-
04
1 tsp fine sea salt
-
05
1 tsp granulated sugar
-
06
1 tbsp olive oil
-
07
3/4 cup warm water (80°F/27°C)
Instructions
In a large bowl, go ahead and mix the 1 cup active sourdough starter (or discard), 3/4 cup warm water (80°F/27°C), olive oil, sugar, and 3/4 cup flour. Just stir it until a shaggy dough forms—it's a bit messy, and that's okay. Now, just let the mixture sit for 20‑25 minutes to autolyse; it gives the flour a chance to really get to know the water.
Now, stir in the remaining 1 1/2 cups bread flour and all‑purpose flour, and the 1 tsp fine sea salt. Keep mixing until the dough starts pulling away from the sides of the bowl. Turn it out onto a lightly floured surface and knead for about 8 minutes. You're looking for it to feel smooth and elastic under your hands.
Shape your dough into a nice, round ball and pop it back into the bowl. Cover it with a damp cloth or plastic wrap—we want to keep it cozy. Let it bulk ferment at room temperature (70°F/21°C) for 2 hours. Wow, it should roughly double in size by the time you're done.
Gently deflate the dough—don't be too rough with it. Divide it into two equal portions (about 10 oz/280 g each). Shape each into a tight ball and place them on a parchment‑lined tray. Cover them up and let them have a second rise for 1 hour, or until they look visibly puffy.
Preheat your oven to 475°F (245°C) with your pizza stone or baking steel already inside. When you're ready to bake, carefully transfer one dough ball onto a pizza peel that you've dusted with a bit of flour or cornmeal.
Stretch the dough by hand—or use a rolling pin if that's easier—to a roughly 12‑inch diameter. I like to leave the edges a bit thicker for a good crust. Add your favorite sauce, cheese, and toppings, then slide it right onto that hot stone.
Bake for 10‑12 minutes. Keep an eye on it; you want the crust edges to be golden brown and the cheese bubbling away. Oh, and remember to rotate the pizza halfway through so it bakes evenly.
Remove it from the oven and, as hard as it is, let it rest for 3 minutes. Then just slice it up and serve it while it's hot.
Notes & Tips
-
1
If your kitchen is a bit chilly, you might need to let that bulk rise go for 3‑4 hours.
-
2
In a warmer kitchen, you can probably shorten the bulk rise to 1.5‑2 hours.
-
3
Using a silicone mat or parchment paper during the second rise helps keep the surface dry for an easier transfer.

Tools You'll Need
-
Large mixing bowl for combining the dough
-
Spatula or dough scraper to handle the sticky bits
-
Plastic wrap or a clean kitchen towel for covering
-
Silk or parchment paper to prevent sticking
-
Pizza stone or baking steel for a professional crisp
-
Oven for high-heat baking
-
Pizza peel or a flat baking sheet for transferring
-
Measuring cups & spoons for accuracy
-
Digital kitchen scale (optional but helpful)
Must-Know Tips
-
Olive Oil Brush, brush the raw crust edges with a little olive oil before baking for an extra crisp finish.
-
Temperature Adjustment, adjust rise times based on your room temperature to ensure the dough doubles.
-
Surface Management, use parchment paper under the dough during the second rise to facilitate the transfer to the peel.
Professional Secrets
-
Autolyse Phase, letting the shaggy dough rest for 20-25 minutes improves the final structure and elasticity.
-
Thermal Mass, preheating the stone or steel at 475°F is the secret to that bakery-style bottom crust.
-
Controlled Fermentation, dividing the dough and allowing a second puff rise ensures a lighter, airier crust.
What readers are saying
Community reviews from home cooks like you
This was a hit with my family. I really liked how the 1 cup active sourdough starter (or discard) and 2 cups bread flour (≈ 240 g) came together. Already shared it with a friend.
Decent result for the effort. The discard) flavor was nice, but i swapped one ingredient and it still worked. I might try it again with some adjustments.
Will definitely make this again. I really liked how the 1 cup active sourdough starter (or discard) and 2 cups bread flour (≈ 240 g) came together. I added a bit more seasoning next time. Great addition to my recipe rotation.
Perfect for a busy weeknight. I really liked how the 1 cup active sourdough starter (or discard) and 2 cups bread flour (≈ 240 g) came together. I would reduce the salt a little. Highly recommend giving it a try.
Absolutely loved this recipe! I really liked how the 1 cup active sourdough starter (or discard) and 2 cups bread flour (≈ 240 g) came together. My kids even asked for seconds.
Good, but not amazing. The discard) flavor was nice, but the texture was a touch off, but the flavor saved it. I might try it again with some adjustments.
I was surprised how good this turned out. I really liked how the 1 cup active sourdough starter (or discard) and 2 cups bread flour (≈ 240 g) came together. Perfect as written.
This was a hit with my family. I really liked how the 1 cup active sourdough starter (or discard) and 2 cups bread flour (≈ 240 g) came together. Thanks for sharing this one!
Will definitely make this again. I really liked how the 1 cup active sourdough starter (or discard) and 2 cups bread flour (≈ 240 g) came together. I would reduce the salt a little. Perfect as written.
Nice base recipe. The discard) flavor was nice, but i added a bit more seasoning next time. I might try it again with some adjustments.
Decent result for the effort. The discard) flavor was nice, but i found it a bit sweet for my taste. I might try it again with some adjustments.
Will definitely make this again. I really liked how the 1 cup active sourdough starter (or discard) and 2 cups bread flour (≈ 240 g) came together. Thanks for sharing this one!
I was surprised how good this turned out. I really liked how the 1 cup active sourdough starter (or discard) and 2 cups bread flour (≈ 240 g) came together. Will be making this regularly.
Can't believe how simple this was. I really liked how the 1 cup active sourdough starter (or discard) and 2 cups bread flour (≈ 240 g) came together. The texture was a touch off, but the flavor saved it. Will be making this regularly.

Recipe by
Sofia RiveraExploring the world through food 🌍🍲 Rich flavors, exciting dishes, and endless culinary inspiration ✨
Get Delicious Recipes Weekly
Join 25,000+ home cooks getting our best recipes straight to their inbox.
Free forever • No spam • Unsubscribe anytime