
The bite‑size burger, a staple of American ballparks, dates back to the early 20th century when vendors needed something easy to eat between innings. Over time, the concept evolved into the modern sliders and bomb‑style snacks we enjoy today. This recipe draws on that heritage, marrying the classic beef patty with a garlic‑parmesan crust that adds a luxurious touch without losing the down‑home feel. It’s a nod to tradition while inviting a fresh, flavorful twist.
Why You'll Love It
-
- Easy to make in a single pan
-
- Crispy exterior with a juicy interior
-
- Bold garlic‑parmesan flavor that sings
-
- Perfect finger food for any crowd
"These bombs were the star of our game night—everyone kept asking for the recipe!"
Essential Ingredient Guide
- Ground beef: Choose 80/20 for flavor and juiciness; it stays moist during cooking.
- Parmesan cheese: Freshly grated gives a nutty depth and helps create that golden crust.
- Garlic: Minced fine so its aroma spreads through the batter without any raw bite.
- Cheddar cheese: Sharp cheddar melts into the center, adding richness and a bit of tang.
- Butter: Adds richness to the coating and helps the crust turn beautiful amber.
- Egg: Acts as a binder so the coating adheres without falling off.
Complete Cooking Process
-
Ingredient Readiness:
Gather and measure everything, then whisk the egg and set the cheese‑bread mixture aside.
-
Flavor Development:
Sear the beef balls quickly to lock in juices before coating.
-
Texture Control:
Fry the coated bites over medium‑high heat to achieve a crisp, buttery crust.
-
Finishing Touches:
Toss the hot bombs with a drizzle of melted butter and a sprinkle of extra Parmesan.
-
Serving Timing:
Serve immediately while the crust is still warm and the cheese inside is melty.
-
Pat the beef balls dry before coating to avoid soggy crust.
-
Use a thermometer to keep oil at 350°F for consistent crispness.
-
Work in batches so the pan doesn’t cool down too much.
-
Finish with a pinch of flaky sea salt for extra crunch.
Pro Tips
Honestly, a little extra care at each stage makes the difference between good and unforgettable. When you pause to let the oil heat up, you hear a gentle sizzle that tells you the bombs are about to turn golden. And yeah, that final sprinkle of sea salt? It’s the quiet applause you give yourself for a job well done.
The essence of the dish:
A juicy beef core, wrapped in a buttery, garlicky Parmesan crust that crackles under the teeth, delivering a comforting yet elevated snack.
A fun fact or historical angle:
During the 1930s, baseball stadiums sold "meatballs" as a quick snack—our bombs are a modern, gourmet homage.
Flavor or sensory focus:
First you notice the warm, aromatic garlic, then the nutty parmesan, and finally the rich, umami beef with melted cheddar.
You Must Know
-
Keep the oil temperature steady
-
Don’t over‑mix the coating
-
Serve hot for maximum crunch
Frequently Asked Questions
→ Can I make these ahead of time?
Yes, shape the beef balls and keep them refrigerated for up to 24 hours before coating and frying.
→ What cheese works best?
A combination of sharp cheddar and Parmesan yields the best melt and crust flavor.
→ Do I need a deep fryer?
A sturdy skillet filled with enough oil to come halfway up the bombs works just fine.
→ How do I keep them from getting soggy?
Make sure the oil is hot before adding, and drain on a wire rack after frying.
→ Can I freeze the cooked bombs?
Absolutely—reheat in a hot oven for a crisp finish.
→ What side dishes pair well?
Try them with cheesy garlic potatoes or a fresh cucumber salad.
Nutrition Facts
per serving
420
Calories
22g
Protein
18g
Carbs
28g
Fat
Taste Profile
Savory with a buttery, garlicky richness
Ingredient Substitutions
Don't have an ingredient? Try these alternatives
If using tofu, press well and crumble; adjust cooking time to 3‑4 minutes per side.
Gives an extra airy crunch, reduce butter slightly.
Recipe Variations
Try these delicious twists on the original
Spicy Version
Add a pinch of red pepper flakes to the coating and serve with sriracha mayo for a gentle kick.
Mediterranean Style
Swap cheddar for feta, fold in chopped olives, and finish with a drizzle of lemon‑herb oil.
Common Mistakes to Avoid
Learn from others' mistakes for perfect results
- Overcrowding the pan, which drops oil temperature and leads to soggy crust.
- Skipping the dry‑pat step, causing the coating to slip.
- Frying at too low heat, resulting in greasy bombs.
Meal Prep & Storage
Make Ahead Tips
You can shape the beef balls and keep them refrigerated, uncovered, for up to 24 hours before coating and frying.
Leftover Ideas
Reheat gently in a hot skillet or oven at 375°F until the crust crisps again, about 5 minutes.
Perfect Pairings
Serve this with...
Cooking Timeline
Gather and measure all ingredients; whisk egg and prep coating.
Form and season beef balls, then coat in egg and breadcrumb mixture.
Heat oil, fry bombs in batches until golden, turning gently.
Drain on wire rack, sprinkle with sea salt and parsley.
Serve immediately while hot, or keep warm in a low oven.
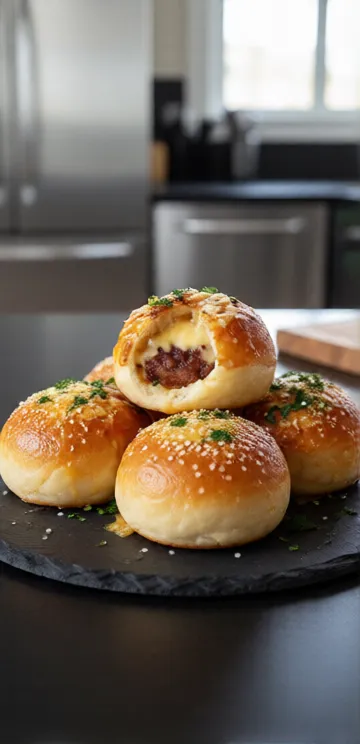
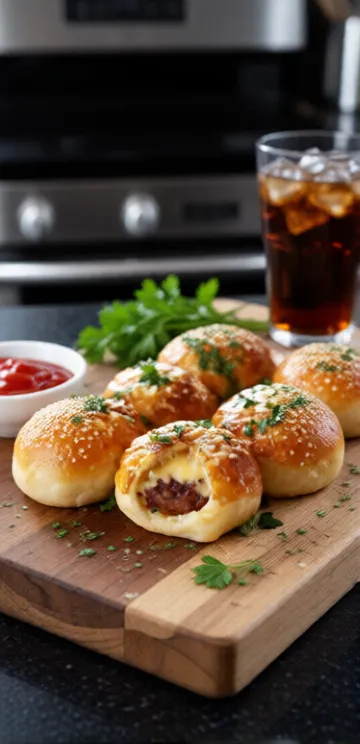
Garlic Parmesan Cheeseburger Bombs – Game Day Snack
Crispy, golden‑browned bites that pack a juicy beef center, melted cheese, and a fragrant garlic‑parmesan crust—perfect for game day gatherings or any casual get‑together.
Timing
Prep Time
20 Minutes
Cook Time
15 Minutes
Total Time
35 Minutes
Recipe Details
Ingredients
Main Ingredients
-
01
1 lb ground beef (80/20)
-
02
1 cup shredded sharp cheddar cheese
-
03
1/2 cup grated Parmesan cheese
-
04
2 cloves garlic, minced
-
05
1 large egg
-
06
1/2 cup panko breadcrumbs
-
07
2 tbsp melted butter
-
08
Salt and pepper to taste
-
09
Vegetable oil for frying
Optional Garnish
-
01
Fresh parsley, chopped
-
02
Flaky sea salt
Instructions
In a bowl, combine ground beef, minced garlic, cheddar, salt, and pepper; mix gently and form into 12 even balls.
In a shallow dish, whisk the egg; in another dish, mix panko with grated Parmesan and melted butter.
Roll each beef ball in the egg, then coat thoroughly with the Parmesan‑panko mixture, pressing lightly to adhere.
Heat oil in a large skillet over medium‑high heat until shimmering (about 350°F). Fry the coated balls in batches, turning gently, until golden brown, about 3‑4 minutes per side.
Remove to a wire rack, sprinkle with flaky sea salt and chopped parsley, then serve hot with your favorite dipping sauce.
Notes & Tips
-
1
Pat the beef balls dry before coating to prevent slipping.
-
2
Do not overcrowd the pan; this keeps the temperature steady.
-
3
A pinch of extra Parmesan after frying adds a final flavor boost.
Tools You'll Need
-
Large skillet
-
Mixing bowls
-
Measuring cups and spoons
-
Wire rack
-
Tongs
-
Spatula
Must-Know Tips
-
Don't overcrowd the pan, Cook in batches to keep oil temperature consistent.
-
Let meat rest briefly after shaping, Allows juices to settle.
-
Taste the coating before frying, Adjust seasoning if needed.
Professional Secrets
-
Room temperature meat cooks evenly, Ensures uniform browning
-
High heat sears the crust, Creates a satisfying crunch
-
Deglaze the pan with a splash of broth, Captures all the flavor

Recipe by
Mia CollinsSmall bites, big happiness 😋✨ Fun snacks, tasty treats, and flavor in every bite 🧆
Get Delicious Recipes Weekly
Join 25,000+ home cooks getting our best recipes straight to their inbox.
Free forever • No spam • Unsubscribe anytime