
The origin of cheeseburger bites traces back to early American diners, where patrons loved the handheld version of the classic burger. Over time, cooks added garlic and parmesan for a richer, aromatic profile, turning a simple snack into a crowd‑pleaser. This evolution reflects a love for bold, comforting flavors that stay close to home cooking traditions.
Why You'll Love It
-
- Easy to hand‑roll and bake, no frying needed
-
- Bold garlic‑parmesan crust that sings with each bite
-
- Juicy ground beef stays tender inside the cheese pocket
-
- Perfect for parties, game nights, or a quick snack
“These bombs are addictive — the perfect balance of crisp and juicy!”
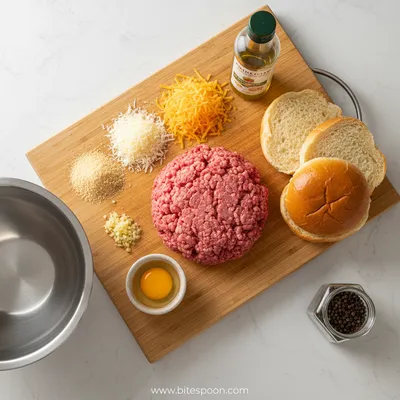
Essential Ingredient Guide
- Ground beef: Choose 80/20 lean‑to‑fat ratio for juicy bombs; keep it cold before shaping.
- Parmesan cheese: Freshly grated adds a nutty aroma and helps form the crispy crust.
- Mozzarella cheese: Provides that gooey melt that pulls apart when you bite.
- Garlic powder: A pinch gives depth without overwhelming the meat.
- Lemon zest: A tiny amount brightens the savory richness.
- Honey: Just a drizzle balances the salty cheese with a hint of sweetness.
Complete Cooking Process
-
Ingredient Readiness:
Gather ground beef, cheeses, and seasonings; keep the meat chilled and the cheeses grated.
-
Flavor Development:
Mix beef with garlic, lemon zest, and a touch of honey, then form around cheese cubes.
-
Texture Control:
Roll each bomb in grated parmesan and a sprinkle of garlic powder before baking.
-
Finishing Touches:
Bake until golden, then drizzle a little extra melted butter for shine.
-
Serving Timing:
Serve hot straight from the oven; they’re best while the crust is crisp.
-
Keep the beef cold—helps the bombs hold shape.
-
Don’t over‑bake; watch for a light golden hue.
-
Use a wire rack to let excess fat drip off.
-
Serve with a cool ranch dip for extra contrast.
Pro Tips
Well, I’ve found that a quick dip of cool ranch or a simple aioli balances the richness nicely. It’s those little pairings that turn a snack into a memorable bite, especially when you’re gathering around the table and everyone is reaching for another.
The essence of the dish:
A juicy beef core wrapped in a blanket of mozzarella, then kissed by a crisp garlic‑parmesan crust. The contrast of textures—soft interior, crunchy exterior—makes each bite a little celebration.
A fun fact or historical angle:
Did you know the original cheeseburger sliders were inspired by the 1950s drive‑in culture? They were meant to be eaten on the go, which is why these bite‑size versions feel so familiar.
Flavor or sensory focus:
The first thing you notice is the nutty aroma of browned parmesan mingling with warm garlic, followed by the savory, meaty sigh of the beef, and finally the stretchy melt of mozzarella.
You Must Know
-
Make sure the cheese stays frozen until you shape the bombs.
-
Season the beef lightly before adding more salt.
-
Rest the formed bombs 10 minutes before baking.
Frequently Asked Questions
→ Can I use turkey instead of beef?
Yes, ground turkey works fine; just add a bit more butter or oil to keep it juicy.
→ How do I keep the bombs from falling apart?
Keep the meat chilled and handle gently. A light flour dusting on your hands helps.
→ What dip pairs best?
A cool ranch, garlic aioli, or even a spicy sriracha mayo complements the richness.
→ Can I freeze the unbaked bombs?
Absolutely. Place them on a tray, freeze solid, then transfer to a bag. Bake from frozen, adding a few extra minutes.
→ Are these bombs gluten‑free?
Yes, as long as you use a gluten‑free parmesan or omit breadcrumbs.
→ What’s a good side for a party?
Serve with cheesy garlic potatoes or a crisp salad.
Nutrition Facts
per serving
320
Calories
22g
Protein
4g
Carbs
22g
Fat
Taste Profile
Savory with a hint of sweet and aromatic garlic
Ingredient Substitutions
Don't have an ingredient? Try these alternatives
Adjust cooking time for tofu – press well first.
Offers a sharper bite; use the same amount.
Recipe Variations
Try these delicious twists on the original
Spicy Version
Add ½ tsp red pepper flakes to the meat mixture and serve with sriracha mayo.
Mediterranean Style
Mix chopped sun‑dried tomatoes and feta into the beef, and finish with a drizzle of olive oil.
Common Mistakes to Avoid
Learn from others' mistakes for perfect results
- Over‑mixing the meat, which makes bombs tough.
- Baking at too low a temperature, resulting in soggy crust.
- Adding cheese too early, causing it to melt out during baking.
Meal Prep & Storage
Make Ahead Tips
You can mix the seasoned beef and keep it refrigerated for up to 24 hours; form the bombs right before baking.
Leftover Ideas
Reheat gently in a skillet over medium heat; add a splash of broth to keep them moist.
Perfect Pairings
Serve this with...
Cooking Timeline
Gather and prep all ingredients; chill the beef.
Mix beef with seasonings and honey.
Form bombs, coat in Parmesan, and arrange on sheet.
Bake until golden, then let rest briefly.
Serve warm with chosen dip and enjoy.

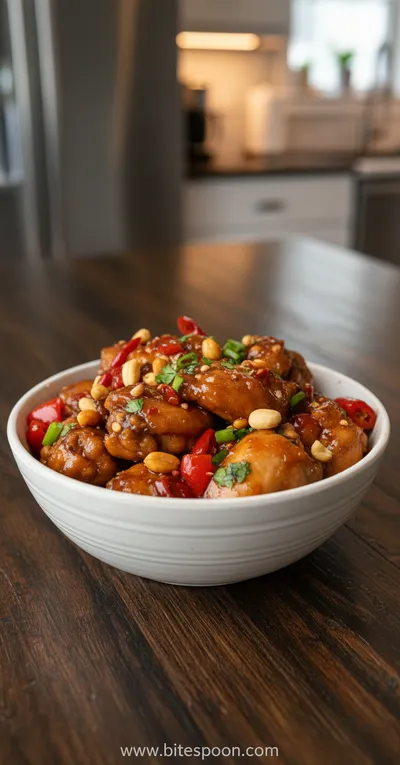
Garlic Parmesan Cheeseburger Bombs – Quick & Easy Snack
Crispy garlic parmesan cheeseburger bombs are the perfect bite-sized snack, packed with juicy beef, cheese, and bold flavor for any occasion.
Timing
Prep Time
15 Minutes
Cook Time
20 Minutes
Total Time
35 Minutes
Recipe Details
Ingredients
Main Ingredients
-
01
1 lb ground beef (80/20)
-
02
1 cup shredded mozzarella cheese
-
03
1/2 cup grated Parmesan cheese
-
04
1 tsp garlic powder
-
05
1 tsp lemon zest
-
06
1 tbsp honey
-
07
2 tbsp olive oil
Optional Dipping Sauce
-
01
1/2 cup ranch dressing
-
02
1 tsp chopped fresh chives
Instructions
Preheat the oven to 400°F (200°C) and line a baking sheet with parchment.
In a bowl, combine ground beef, garlic powder, lemon zest, honey, and a pinch of salt; mix gently.
Take a small scoop of meat, flatten, place a cube of mozzarella in the center, then wrap the meat around, sealing the cheese.
Roll each bomb in grated Parmesan, then place on the prepared sheet. Drizzle with olive oil.
Bake 15‑18 minutes, until the crust is golden and the cheese is melted. Serve warm with your favorite dip.
Notes & Tips
-
1
Make sure the mozzarella stays frozen until you assemble to prevent leakage.
-
2
If you like extra crunch, sprinkle a pinch of panko before baking.
-
3
For a spicy twist, add a dash of cayenne to the garlic powder.
Tools You'll Need
-
Mixing bowl
-
Measuring spoons
-
Baking sheet
-
Parchment paper
-
Small ice cream scoop
Must-Know Tips
-
Don't overcrowd the pan, cook in batches to keep the crust crisp.
-
Let the bombs rest for a minute after baking; the cheese settles nicely.
-
Taste the seasoned beef before forming to adjust salt if needed.
Professional Secrets
-
Room temperature beef ensures even cooking.
-
High heat creates a perfect Parmesan crust.
-
A quick spray of oil prevents sticking and adds shine.

Recipe by
Mia CollinsSmall bites, big happiness 😋✨ Fun snacks, tasty treats, and flavor in every bite 🧆
Get Delicious Recipes Weekly
Join 25,000+ home cooks getting our best recipes straight to their inbox.
Free forever • No spam • Unsubscribe anytime