
The concept of the slider dates back to the early 20th century, when the White Castle restaurant chain popularized small, square burgers that were easy to 'slide' down your throat. This clever, bite-sized format was perfect for quick, satisfying meals. Applying that same principle to ham and cheese created a party staple that has been warming up gatherings and simplifying weeknights for generations. The combination of soft bread, savory meat, and melted cheese is a timeless pleasure.
Why You'll Love It
-
Incredibly easy to assemble with minimal prep work.
-
Perfect for feeding a crowd – no one gets left out.
-
The buttery, savory flavor is downright addictive.
-
You can customize them with your favorite cheeses and spreads.
"My kids beg me to make these every weekend. They're the first thing to go at any potluck!" – Sarah J.
Essential Ingredient Guide
- Hawaiian Rolls: These sweet, soft rolls are the secret. Their slight sweetness balances the saltiness of the turkey ham perfectly. Look for a fresh, soft pack where the rolls are still connected.
- Turkey Ham: A great alternative that provides that classic savory, salty flavor. Choose thinly sliced varieties for easy layering and even distribution in every bite.
- Swiss Cheese: Its mild, nutty flavor melts beautifully without overpowering the other ingredients. You can also use provolone or a sharp cheddar for a different twist.
- Butter: Unsalted butter lets you control the salt level. Mixing it with a few seasonings creates that golden, crispy, flavorful top crust that makes these sliders so special.
- Dijon Mustard: Just a hint adds a wonderful tangy depth that cuts through the richness. It's the little detail that makes a big difference.
- Poppy Seeds: Optional, but they add a subtle crunch and a lovely visual appeal. They toast up nicely in the oven.


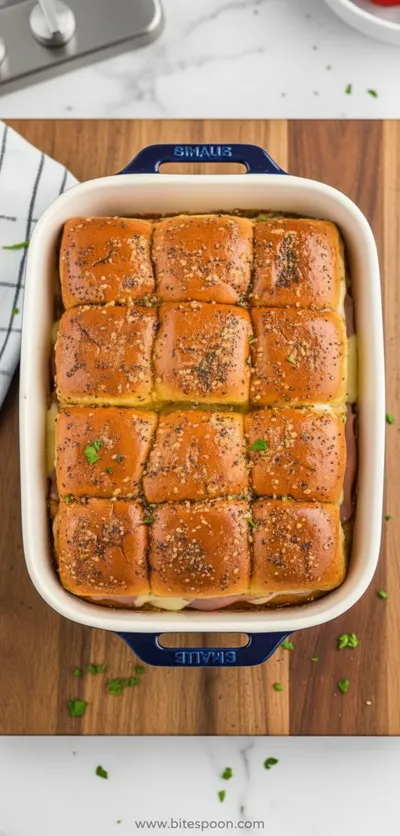
Complete Cooking Process
-
Ingredient Readiness:
Having everything sliced and measured beforehand makes the assembly flow so smoothly. It feels less like a chore and more like a quiet, satisfying ritual.
-
Flavor Development:
The magic really happens when the butter soaks into the top of the rolls and the whole tray goes into the oven. That's when the aromas of baking bread and melting cheese start to fill the kitchen.
-
Texture Control:
The key is covering the sliders for the first part of baking. This allows the cheese to melt completely and the rolls to steam and warm through without the tops getting too dark too quickly.
-
Finishing Touches:
Uncovering the sliders for the last few minutes of baking is what gives them that perfect, irresistible golden-brown, slightly crisp top.
-
Serving Timing:
Serve these warm, right out of the oven. The cheese will be at its most gloriously stretchy state, and the buttery aroma will be at its peak.
-
Don't separate the rolls! Slice the whole sheet of rolls horizontally to create a top and bottom layer – it's a huge time-saver.
-
Press down gently after adding the filling so the sliders hold together neatly.
-
Let them rest for just 5 minutes after baking. It makes them easier to pull apart without the cheese gushing out.
-
For an extra flavor boost, add a sprinkle of garlic powder or onion powder to the butter mixture.
Pro Tips
You know, I’ve made these so many times I could probably do it in my sleep. But I still love the process. It’s meditative, slicing the rolls, layering the turkey ham and cheese, brushing on that buttery topping. It feels like you’re building a little edible present for everyone.
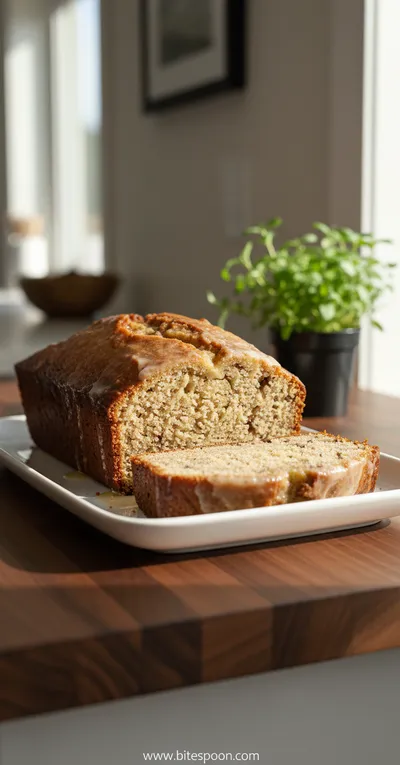
And the best part is the versatility. Sometimes I'll serve them alongside a warm, spiced zucchini apple bread for a real comfort food spread. The sweet and savory combination is just wonderful on a cool evening.
The essence of the dish:
It’s all about that perfect, warm, melty bite. The softness of the bread, the savory saltiness of the turkey ham, and the gooey stretch of the cheese all come together in a way that feels like a hug from the inside.
A fun fact or historical angle:
While sliders are famously associated with burgers, their simple, shareable format was a natural fit for other classic fillings, making them a staple at everything from church suppers to Super Bowl parties for decades.
Flavor or sensory focus:
You'll notice the comforting aroma first – that warm, baked-bread and butter scent. Then, the texture: the slight resistance as you pull a slider apart, followed by the soft, chewy, gooey interior.
You Must Know
-
The type of roll matters! Hawaiian rolls provide a sweetness that is key to the classic flavor profile.
-
Don't skip the butter sauce on top – it’s what transforms them from simple sandwiches into a baked delicacy.
-
These are best served immediately, while the cheese is still molten and wonderful.
Frequently Asked Questions
→ Can I make these sliders ahead of time?
Absolutely. You can assemble them completely, cover tightly, and refrigerate for up to 24 hours before baking. You might need to add a few extra minutes to the baking time if you're starting with a cold tray from the fridge.
→ What's the best way to reheat leftovers?
Reheating in the oven or a toaster oven is best to keep the rolls from getting soggy. Cover with foil and warm at 300°F for about 10 minutes. The microwave will make them soft, but not crispy.
→ Can I use different types of cheese?
Of course! Provolone, cheddar, mozzarella, or even a pepper jack for a little spice all work wonderfully. Just make sure it's a good melting cheese.
→ What can I serve with these sliders?
They're fantastic with a simple side salad, a bowl of tomato soup, or some pickles and potato chips. For a sweet end to the meal, a slice of something like carrot apple zucchini bread would be lovely.
→ How do I prevent the bottom from getting soggy?
Assembling them just before baking helps. Also, don't oversaturate the bottom layer with any wet condiments. A thin layer of mustard or mayo is plenty.
→ Can I freeze baked sliders?
Yes, they freeze quite well. Let them cool completely, then wrap individual sliders or the whole tray tightly in plastic wrap and foil. Reheat from frozen in a 350°F oven until warm throughout.

Nutrition Facts
per serving
280
Calories
14g
Protein
22g
Carbs
15g
Fat
Taste Profile
A savory, buttery, and slightly sweet comfort combination.
Ingredient Substitutions
Don't have an ingredient? Try these alternatives
The flavor will be less sweet, but the method remains the same.
Any good melting cheese will work beautifully.
Recipe Variations
Try these delicious twists on the original
Pizza Sliders
Use pepperoni, mozzarella cheese, and a brush of marinara sauce mixed into the butter topping.
Rueben Sliders
Layer corned beef, Swiss cheese, and sauerkraut with a Thousand Island dressing spread.
Common Mistakes to Avoid
Learn from others' mistakes for perfect results
- Separating the rolls individually before assembling – this makes it messy and time-consuming.
- Using too much mustard or sauce, which can make the bottom roll soggy.
- Skipping the foil cover, which can lead to over-browned tops before the inside is hot.
Meal Prep & Storage
Make Ahead Tips
You can fully assemble the sliders, cover the baking dish tightly with plastic wrap and then foil, and refrigerate for up to 24 hours before baking. Add a few extra minutes to the baking time.
Leftover Ideas
Reheat leftovers in a 300°F oven, covered with foil, for about 10-15 minutes until warm. This helps restore the texture better than a microwave.
Perfect Pairings
Serve this with...
Cooking Timeline
Preheat oven. Slice the rolls and place the bottom layer in the dish.
Spread mustard, layer turkey ham and cheese, and replace the top of the rolls.
Whisk together the butter topping mixture and brush it generously over the rolls.
Bake covered for 15 minutes, then uncovered for 5-7 minutes until golden.
Let the sliders rest for 5 minutes before slicing and serving.
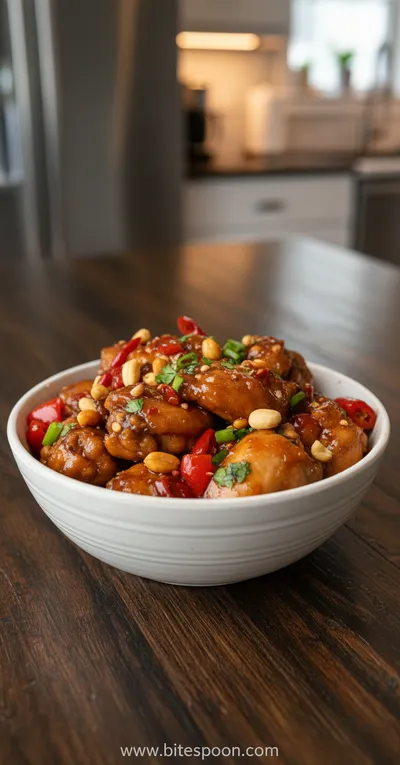
Ham and Cheese Sliders Recipe
These warm, melty ham and cheese sliders are the definition of cozy comfort food, perfect for feeding a crowd or just treating yourself. Honestly, there's something so satisfying about pulling apart that soft, buttery roll to reveal layers of savory turkey ham and gooey cheese.
Timing
Prep Time
15 Minutes
Cook Time
20 Minutes
Total Time
35 Minutes
Recipe Details
Ingredients
For the Sliders
-
01
1 package (12 count) Hawaiian sweet rolls
-
02
12 slices turkey ham
-
03
12 slices Swiss cheese
-
04
2 tablespoons Dijon mustard
For the Butter Topping
-
01
1/2 cup (1 stick) unsalted butter, melted
-
02
1 tablespoon finely minced onion
-
03
1 teaspoon Worcestershire sauce
-
04
1/2 teaspoon poppy seeds (optional)
-
05
1/4 teaspoon garlic powder
-
06
Salt and pepper to taste
Instructions
Preheat your oven to 350°F (175°C). Without separating the individual rolls, slice the entire sheet of Hawaiian rolls in half horizontally, creating a top and bottom layer. Place the bottom half in a 9x13 inch baking dish.
Spread the Dijon mustard evenly over the bottom layer of rolls. Then, layer the turkey ham slices evenly across the rolls, followed by the slices of Swiss cheese. Gently place the top half of the rolls back on.
In a small bowl, whisk together the melted butter, minced onion, Worcestershire sauce, poppy seeds (if using), garlic powder, and a pinch of salt and pepper.
Using a pastry brush, generously brush the entire butter mixture over the tops of the rolls, making sure to get some in the cracks between the rolls.
Cover the baking dish with aluminum foil and bake for 15 minutes. Then, remove the foil and continue baking for another 5-7 minutes, or until the tops are golden brown and the cheese is completely melted and bubbly.
Remove from the oven and let the sliders rest for about 5 minutes. This helps them set. Then, use a sharp knife to slice along the pre-scored lines to separate them into individual sliders. Serve warm.
Notes & Tips
-
1
You can assemble these the night before, cover, and refrigerate. Add a few extra minutes to the baking time if starting from cold.
-
2
For a different flavor, try using cheddar cheese and adding a thin layer of mayonnaise instead of mustard.
-
3
These are perfect for potlucks and parties – they travel well and are always a hit.
Tools You'll Need
-
9x13 inch baking dish
-
Sharp serrated knife
-
Pastry brush
-
Small mixing bowl
-
Whisk
Must-Know Tips
-
Don't separate the rolls before slicing – it's much easier to slice the whole block at once.
-
Press down lightly after adding the filling so the sliders hold their shape.
-
Let them rest for 5 minutes after baking for cleaner cutting.
Professional Secrets
-
Room temperature butter mixes more evenly with the seasonings for the topping.
-
Covering with foil for the first part of baking ensures the cheese melts without the tops burning.
-
A serrated knife is essential for cutting the rolls neatly without squishing them.

Recipe by
Mia CollinsSmall bites, big happiness 😋✨ Fun snacks, tasty treats, and flavor in every bite 🧆
Get Delicious Recipes Weekly
Join 25,000+ home cooks getting our best recipes straight to their inbox.
Free forever • No spam • Unsubscribe anytime