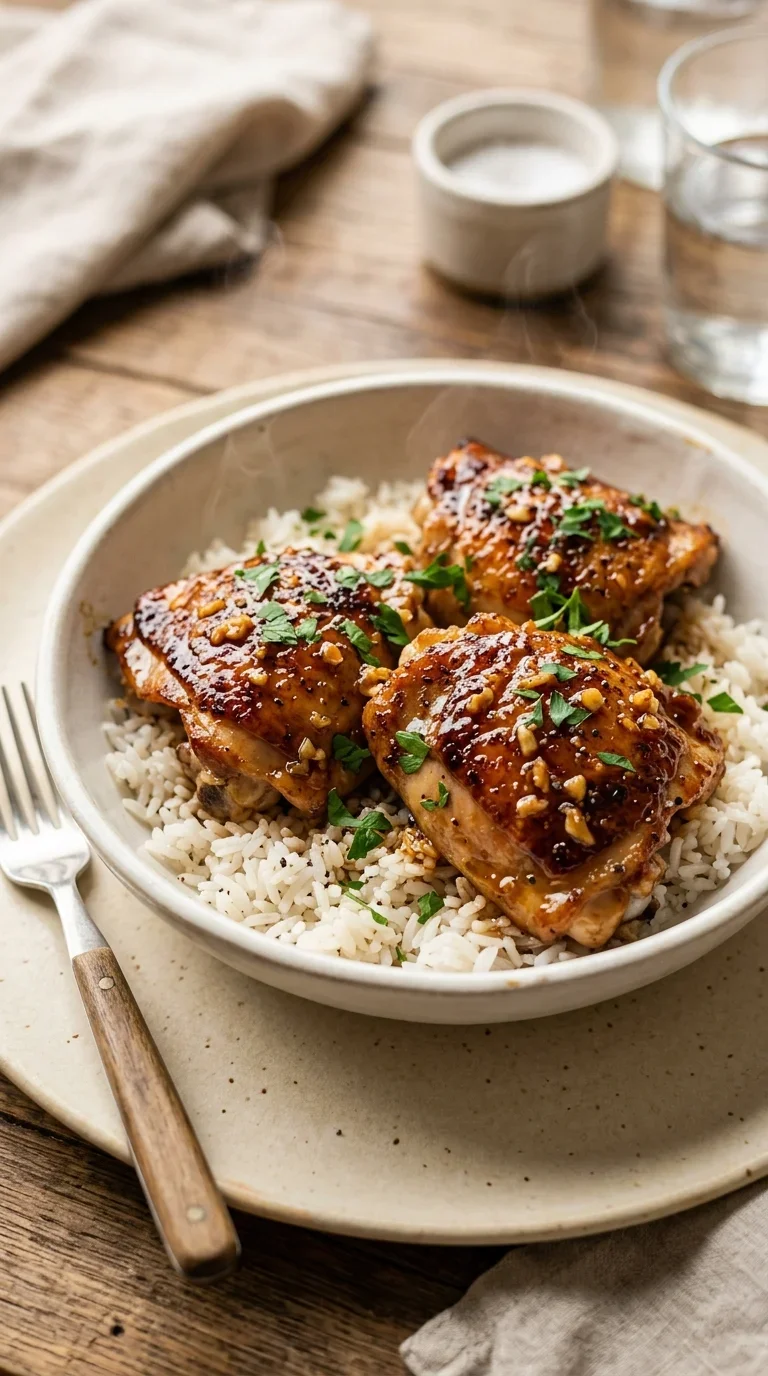
The combination of honey and garlic is a timeless pairing that transcends borders, blending the rustic sweetness of the hive with the pungent, earthy depth of alliums. In many East Asian culinary traditions, the use of honey or similar sweeteners balanced with soy sauce and ginger creates a profile known for its 'umami'—that savory, satisfying quality that lingers on the palate. These honey garlic chicken thighs reflect a modern adaptation of those ancestral flavor balances.
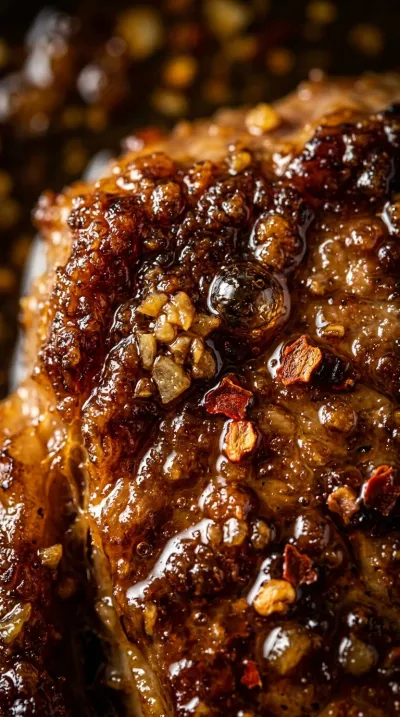
Historically, honey was one of the earliest sweeteners used in glazes to preserve meats and add a lustrous sheen. When paired with the acidic brightness of rice vinegar and the sharp bite of Dijon mustard, the sugar in the honey undergoes a chemical transformation called caramelization. This process creates the deep, amber hue and the complex, slightly nutty flavor that defines the dish.
In the home kitchen, this style of cooking represents a bridge between quick everyday meals and slow-cooked traditions. By searing the skin first and then finishing in the oven, the chicken retains its moisture while the glaze reduces into a concentrated syrup. It is a technique that values both efficiency and the sensory pleasure of a perfectly sticky, savory coating.
Why You'll Love It
-
- Honestly, there is something so comforting about that sticky, golden glaze clinging to the chicken. It just makes the whole house smell like a warm hug.
-
- I mean, who doesn't love a meal that feels fancy but only takes a little bit of effort? It's just so easy to pull together on a Tuesday.
-
- Those 8 bone‑in, skin‑on chicken thighs get this wonderful crispiness before they hit the oven, so you get that lovely crunch and tender meat.
-
- Well, look, the balance of 1 cup honey and 1/4 cup soy sauce is just spot on—sweet, salty, and just a little bit soulful.
"Finally, a dinner the kids actually ask for! Those honey garlic chicken thighs are so tender, and that glaze is just divine."
Essential Ingredient Guide
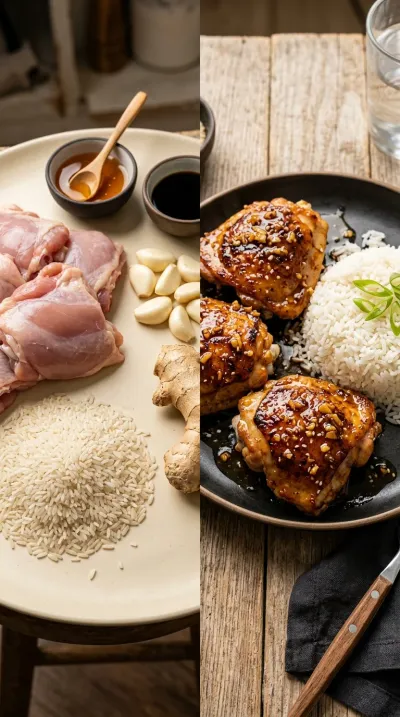
- 8 bone‑in, skin‑on chicken thighs (about 1 ½ lbs): I always go for bone-in because it stays so much juicier. Just make sure to pat them really dry with paper towels, or you won't get that golden sear.
- 4 garlic cloves, minced: Fresh is always best here, yeah. I remember when I tried using the jarred kind, and it just wasn't the same—mincing them by hand gives you that sharp, bright aroma.
- 1 tsp sesame seeds (optional, for garnish): These are just a little something extra for the eyes. They add a tiny bit of nuttiness and make the plate look like you spent hours on it.
- 1 tsp smoked paprika: This is my little secret for a deeper color. It adds a gentle, woody warmth that plays so nicely with the sweetness of the honey.
- 1 tbsp rice vinegar: You might wonder why it's in there, but it just cuts through the richness. It's that little zing that keeps the glaze from feeling too heavy.
- 1 cup honey: This is what gives us that beautiful, shiny coat. I find it creates a lovely caramelization in the oven that is just... wow.

Complete Cooking Process
-
Getting Ready:
First, we get the oven warmed up and the chicken prepped. I like to have my 4 garlic cloves, minced and my 1 tsp fresh ginger, grated sitting ready so I'm not rushing.
-
Building the Base:
The real magic starts in the skillet with the vegetable oil. Searing the skin side down first is where that deep, savory flavor begins to bloom.
-
Perfecting the Texture:
By basting the thighs halfway through baking, we get that thick, lacquered finish. It's all about that balance between the crisp skin and the tender meat inside.
-
The Final Glaze:
Once they come out of the oven, I just drizzle any leftover sauce from the pan over the top. It's the finishing touch that makes everything look so glossy.
-
The Patient Wait:
I know it's hard, but letting them rest for 5 minutes is key. It lets the juices settle so every bite is perfectly moist.
-
Dry the chicken skin before searing to ensure a crisp texture.
-
Use a thermometer to verify doneness; overcooking can dry out the meat.
-
If you prefer a thicker glaze, simmer the sauce in a small saucepan for an additional minute until it coats the back of a spoon.
-
Be sure to use a basting brush to re-coat the thighs after 10 minutes in the oven for that shiny layer.
Pro Tips
You've got this, just take your time and enjoy the process!
Better For You Treats
I love that this dish is packed with protein and healthy fats. If you're watching your sugar, you can honestly just reduce the 1 cup honey or use a low-sugar sweetener to keep it mindful.
Ways to Make it Your Own
Feel free to play around! You could try adding 2 tbsp peach preserves and 1 tsp red pepper flakes for a spicy twist, or replace the rice vinegar with fresh lemon juice and extra ginger for something zingy.
Serving Suggestions
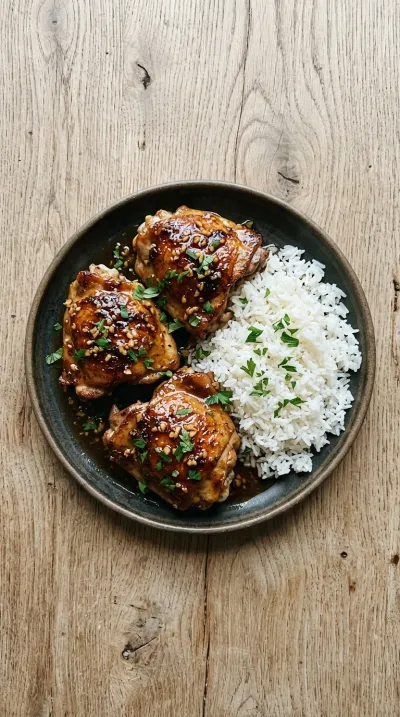
I usually serve these over a bed of fluffy jasmine rice with some steamed broccoli. If you're feeling fancy, a squeeze of fresh lime juice and some red pepper flakes on top really wakes up the flavors.
Frequently Asked Questions
→ Can I use chicken breasts instead of thighs?
You can, but ugh, they dry out so much faster. If you do, just keep a very close eye on the oven time so they stay tender.
→ What if my sauce isn't thickening enough?
No worries at all! Just simmer the glaze in a small saucepan for a minute or two longer until it's thick enough to coat a spoon.
→ How do I know when the chicken is actually done?
The safest way is using a thermometer to hit 165°F (74°C). It takes the guesswork out of it, so you don't have to worry.
Nutrition Facts
per serving
430
Calories
27g
Protein
34g
Carbs
22g
Fat
Taste Profile
A balanced harmony of sweet honey and savory soy with a warm garlic finish.
Ingredient Substitutions
Don't have an ingredient? Try these alternatives
Gives it a slightly more earthy, autumnal sweetness.
A great alternative for a lower sodium or soy-free option.
Adds a bit more texture to the glaze.
Recipe Variations
Try these delicious twists on the original
Spicy Peach Honey Garlic Chicken
For those who like a little kick, stir 2 tbsp peach preserves and 1 tsp red pepper flakes into your glaze.
Lemon‑Ginger Honey Garlic Chicken
To brighten things up, replace the rice vinegar with fresh lemon juice and bump the ginger up to 2 tsp.
Common Mistakes to Avoid
Learn from others' mistakes for perfect results
- Searing damp chicken, which prevents the skin from getting truly crisp.
- Skipping the resting period, which can lead to losing the juices.
- Overcooking the meat by not using a thermometer.
Meal Prep & Storage
Make Ahead Tips
You can prepare the glaze a few days in advance and keep it in the fridge. The chicken is best cooked fresh, but can be frozen after cooking for up to 3 months.
Leftover Ideas
Store in an airtight container in the fridge. To reheat, pop them in the oven or a skillet until they reach 165°F to keep the skin from getting too soggy.
Perfect Pairings
Serve this with...
Cooking Timeline
Preheat oven and prep the chicken skin.
Sear the chicken thighs on both sides.
Whisk glaze and simmer with chicken on stovetop.
Bake in oven with a mid-way basting.
Rest the meat and garnish for serving.
Honey Garlic Chicken Thighs Recipe
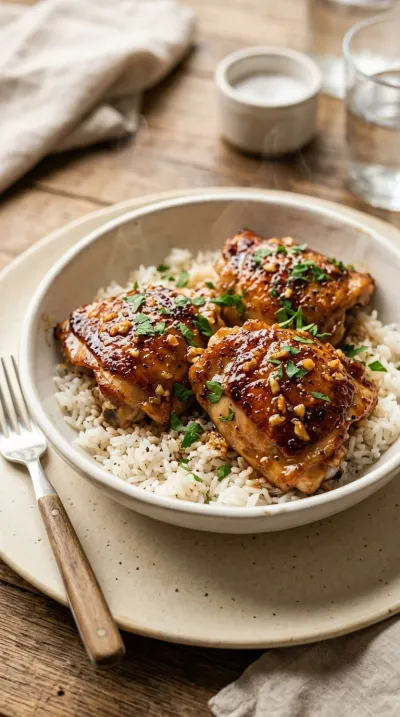
Tender chicken thighs glazed in a sticky, sweet, and savory sauce that clings to every bite. These honey garlic chicken thighs bring a comforting warmth and a beautiful golden shine to your dinner table.
Timing
Prep Time
10 Minutes
Cook Time
25 Minutes
Total Time
35 Minutes
Recipe Details
Ingredients
Main Ingredients
-
01
8 bone‑in, skin‑on chicken thighs (about 1 ½₠lbs)
-
02
2 tbsp vegetable oil
-
03
1 tsp smoked paprika
-
04
1 tsp kosher salt
-
05
1/2 tsp black pepper
For the Glaze
-
01
1 cup honey
-
02
1/4 cup soy sauce
-
03
2 tbsp ketchup
-
04
3 tbsp Dijon mustard
-
05
1 tbsp rice vinegar
-
06
4 garlic cloves, minced
-
07
1 tsp fresh ginger, grated
-
08
1 tbsp water (for glaze)
Garnish
-
01
Fresh cilantro, chopped (for garnish)
-
02
1 tsp sesame seeds (optional, for garnish)
Instructions
First things first, let's get the oven warming up. Preheat it to 400°F (200°C) so it's ready when we are.
Now, honestly, the secret to good skin is dryness. Pat the 8 bone‑in, skin‑on chicken thighs dry with some paper towels, then go ahead and season all sides with that smoked paprika, salt, and pepper.
Heat your 2 tbsp vegetable oil in a large oven‑proof skillet over medium‑high heat. Lay the thighs in skin side down and just let them sear until they're golden brown and crisp‑usually takes about 4‑5 minutes. Flip them over and sear the other side for another 2 minutes.
While those are browning, let's make the sauce. In a bowl, whisk together the 1 cup honey, 1/4 cup soy sauce, 2 tbsp ketchup, 3 tbsp Dijon mustard, 1 tbsp rice vinegar, 4 garlic cloves, minced, 1 tsp fresh ginger, grated, and 1 tbsp water until it's all smooth.
Pour that lovely glaze right over the seared thighs, making sure to spoon it onto the skin so they're coated evenly. Turn the heat down to medium and let it simmer for about 2 minutes until it thickens just a bit.
Slide the whole skillet into the oven and bake, covered, for 18‑20 minutes. Now, here is a little trick: after 10 minutes, take them out quickly and use a basting brush to re‑coat the thighs with the glaze. It gives them such a beautiful, shiny finish.
I always suggest using a thermometer to be safe. Check that the internal temperature has reached 165°F (74°C). If they're not quite there, just give them another 2‑3 minutes.
Take the skillet out of the oven, drizzle any remaining glaze from the pan over the chicken, and let them rest for 5 minutes. Patience is key here!
Move the thighs to a platter and sprinkle on the chopped cilantro and toasted sesame seeds for a bit of color.
And that's it! Serve them immediately with some steamed rice or roasted vegetables.
Notes & Tips
-
1
Make sure to pat the skin completely dry before searing for the best crunch.
-
2
Using an oven-proof skillet saves you from dirtying extra pots and pans.
-
3
Allowing the meat to rest for 5 minutes keeps the juices inside where they belong.
Tools You'll Need
-
Large oven‑proof skillet (like a cast iron, which holds heat so beautifully)
-
Whisk for getting the glaze smooth
-
Measuring spoons and cups for accuracy
-
Small saucepan for thickening sauce if needed
-
Meat thermometer to ensure everything is cooked safely
-
Basting brush for that caramelized glaze
Must-Know Tips
-
Dry the skin, This ensures you get a crisp texture rather than steamed skin.
-
Verify doneness, Use a thermometer because overcooking can dry out the meat quite quickly.
-
Thicken the glaze, If you like a thicker sauce, simmer it in a saucepan until it coats the back of a spoon.
Professional Secrets
-
The double-glaze method during baking creates a professional, lacquered finish.
-
Searing skin-side down first renders the fat and creates a flavor base for the sauce.
-
Resting the meat allows the fibers to relax, resulting in a more tender bite.
What readers are saying
Community reviews from home cooks like you
Can't believe how simple this was. I really liked how the 8 bone‑in, skin‑on chicken thighs (about 1 ½₠lbs) and 2 tbsp vegetable oil came together. Highly recommend giving it a try.
I was surprised how good this turned out. I really liked how the 8 bone‑in, skin‑on chicken thighs (about 1 ½₠lbs) and 2 tbsp vegetable oil came together. Great addition to my recipe rotation.
This exceeded my expectations. I really liked how the 8 bone‑in, skin‑on chicken thighs (about 1 ½₠lbs) and 2 tbsp vegetable oil came together. Perfect as written.
Perfect for a busy weeknight. I really liked how the 8 bone‑in, skin‑on chicken thighs (about 1 ½₠lbs) and 2 tbsp vegetable oil came together. My oven needed an extra 5 minutes. Great addition to my recipe rotation.
Will definitely make this again. I really liked how the 8 bone‑in, skin‑on chicken thighs (about 1 ½₠lbs) and 2 tbsp vegetable oil came together. Will be making this regularly.
Will definitely make this again. I really liked how the 8 bone‑in, skin‑on chicken thighs (about 1 ½₠lbs) and 2 tbsp vegetable oil came together. Highly recommend giving it a try.
Can't believe how simple this was. I really liked how the 8 bone‑in, skin‑on chicken thighs (about 1 ½₠lbs) and 2 tbsp vegetable oil came together. Saving this for later.
Pretty good overall. The 1 ½₠lbs) flavor was nice, but i would reduce the salt a little. I might try it again with some adjustments.
I was surprised how good this turned out. I really liked how the 8 bone‑in, skin‑on chicken thighs (about 1 ½₠lbs) and 2 tbsp vegetable oil came together. The texture was a touch off, but the flavor saved it. Highly recommend giving it a try.
I wanted to love this dish, but it didn't quite work for me. My oven needed an extra 5 minutes. I think with some tweaks it could be really good.

Recipe by
Alexa CarterFast food, but smarter 🔥🍽️ Bold flavors, simple steps, and meals that always hit the spot 😎
Get Delicious Recipes Weekly
Join 25,000+ home cooks getting our best recipes straight to their inbox.
Free forever • No spam • Unsubscribe anytime