Cheesecake traces its roots back to ancient Greece, where it was served to athletes after competitions for its nourishing qualities. Over centuries it traveled across continents, evolving into the creamy desserts we love today. This mini version captures that legacy in a modern, bite‑size format, honoring tradition while fitting into today’s busy lives.
Why You'll Love It
-
- Easy to make with pantry staples
-
- No baking required, just chilling
-
- Perfect for portion control
-
- Looks elegant on any dessert platter
“These mini cheesecakes are the perfect balance of sweet and silky – a true comfort bite!”
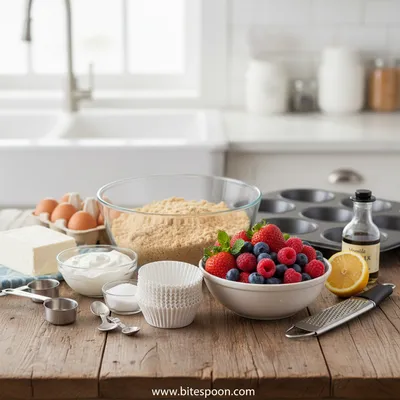
Essential Ingredient Guide
- Cream cheese: Choose full‑fat cream cheese for a luscious texture; let it soften at room temperature for smooth mixing.
- Graham cracker crumbs: Provides a buttery, slightly crunchy base; toast lightly for extra flavor.
- Powdered sugar: Adds sweetness without grainy texture; sift to avoid lumps.
- Vanilla extract: A small splash gives aromatic depth; use pure extract for best aroma.
- Lemon zest: Brightens the flavor with a subtle citrus note; grate finely.
- Fresh berries (optional): Adds a pop of color and tart contrast; gently fold in at the end.
Complete Cooking Process
-
Ingredient Readiness:
Soften the cream cheese, toast the crumbs, and zest the lemon before you start mixing. This ensures a silkier batter and a fragrant crust.
-
Flavor Development:
Mix the cream cheese with sugar and vanilla until it becomes glossy; the gentle whisk releases a sweet aroma that fills the kitchen.
-
Texture Control:
Press the crumb mixture firmly into each tin to create a stable base; avoid over‑packing to keep the crust light.
-
Finishing Touches:
Top each mini with a dollop of berries or a drizzle of melted white chocolate just before serving.
-
Serving Timing:
Chill the cakes for at least two hours; they are best enjoyed when the filling is set but still creamy.
-
Use a rubber spatula to fold in berries gently, keeping the mixture airy.
-
Line the mini tins with parchment for easy removal.
-
Add a pinch of sea salt to the sweet mixture to enhance flavor.
-
Let the finished cakes sit at room temperature for 5 minutes before serving for a softer bite.
Pro Tips
I find that a brief pause before plating lets the aromas settle, and you truly notice the buttery crust mingling with the creamy filling. So, when you finally lift each mini out of its tin, you’ll see a glossy surface that hints at the silky interior. It’s a small ritual that makes the whole experience feel more intentional, and honestly, that’s where the joy lives – in the quiet moments.
The essence of the dish:
A buttery crumb base topped with a velvety, vanilla‑kissed cream cheese filling, all served in petite portions that melt on the tongue.
A fun fact or historical angle:
Mini cheesecakes became popular in the 1990s as bite‑size desserts for cocktail parties, offering an elegant alternative to larger slices.
Flavor or sensory focus:
You’ll notice the gentle sweetness of powdered sugar, the warm perfume of vanilla, and a faint citrus spark from lemon zest, all balanced by the comforting crumb.
You Must Know
-
Keep the cream cheese at room temperature for a smooth blend.
-
Don’t over‑mix; stop once the mixture is glossy.
-
Chill long enough for the crust to set.
Frequently Asked Questions
→ Can I use a different crust?
Absolutely – try oat, almond, or even pretzel crumbs for a different flavor profile.
→ How long can they be stored?
Refrigerate in an airtight container for up to three days; they stay creamy and fresh.
→ Can I make them dairy‑free?
Yes, substitute cream cheese with a high‑quality dairy‑free alternative and use coconut sugar.
→ Do I need to bake them?
No baking is required; the chilling step sets the filling perfectly.
→ What toppings work best?
Fresh berries, caramel drizzle, or a sprinkle of cocoa powder add delightful contrast.
→ Can I double the recipe?
Sure, just ensure you have enough mini tins and increase all ingredients proportionally.
Nutrition Facts
per serving
210
Calories
4g
Protein
22g
Carbs
12g
Fat
Taste Profile
Creamy and gently sweet with a buttery crust
Ingredient Substitutions
Don't have an ingredient? Try these alternatives
Blend tofu with a bit of lemon juice for tang.
Provides a gluten‑free crust; add extra butter if needed.
Recipe Variations
Try these delicious twists on the original
Spicy Version
Add a pinch of cayenne and a drizzle of honey for a sweet‑heat twist.
Mediterranean Style
Top with crushed pistachios, a hint of orange zest, and a drizzle of honey.
Common Mistakes to Avoid
Learn from others' mistakes for perfect results
- Over‑mixing the filling, which can make it grainy.
- Pressing the crust too loosely, causing it to crumble.
- Skipping the chilling step, resulting in a runny texture.
Meal Prep & Storage
Make Ahead Tips
You can prepare the crust and filling up to 24 hours ahead; keep them separate and assemble just before serving.
Leftover Ideas
Enjoy a second serving chilled; if needed, warm gently in a microwave for 10 seconds for a softer texture.
Perfect Pairings
Serve this with...
Cooking Timeline
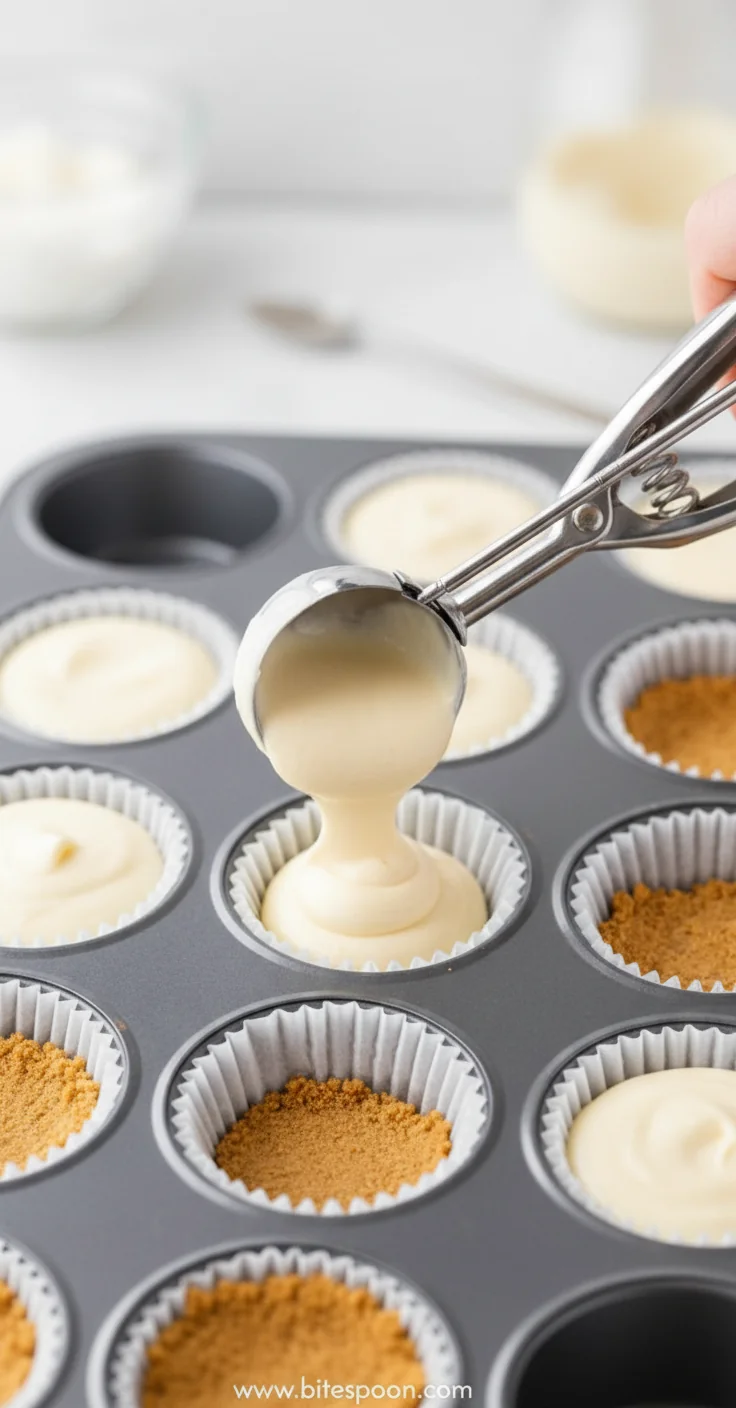
Prepare crust ingredients and press into mini tins.
Blend cream cheese, sugar, vanilla, lemon zest, and cream until smooth.
Spoon filling onto crusts and smooth tops.
Cover and refrigerate for at least two hours.
Add toppings and serve.

Mini Cheesecakes - Easy Sweet Snacks
Indulge in bite‑size mini cheesecakes that are quick to whisk together and perfect for any snack craving. These creamy treasures feel like a soft hug, with a buttery crust that crumbles gently under the tongue. Honestly, they’re the kind of treat you can pop in a cup or a mini tin and enjoy in a quiet moment.
Timing
Prep Time
15 Minutes
Cook Time
0 Minutes
Total Time
2 Hours
Recipe Details
Ingredients
Crust
-
01
1 cup graham cracker crumbs
-
02
2 tbsp melted butter
-
03
1 tbsp brown sugar
Filling
-
01
8 oz full‑fat cream cheese, softened
-
02
1/4 cup powdered sugar
-
03
1 tsp vanilla extract
-
04
1 tsp lemon zest
-
05
2 tbsp heavy cream
Topping
-
01
Fresh berries or fruit preserves
-
02
Optional: shaved chocolate or caramel drizzle
Instructions
In a bowl, combine graham cracker crumbs, melted butter, and brown sugar; press the mixture firmly into the bottom of each mini tin.
In a separate bowl, whisk softened cream cheese until smooth, then add powdered sugar, vanilla, lemon zest, and heavy cream; mix until glossy and well‑combined.
Spoon the creamy filling onto each crust, smoothing the tops with a spatula; cover with plastic wrap.
Place the tins in the refrigerator for at least two hours, or until the filling is set. Before serving, add your chosen topping.
Notes & Tips
-
1
For an extra silky texture, blend the filling in a food processor.
-
2
If the crust feels too dry, add a splash more melted butter.
-
3
Taste the filling before chilling; adjust sweetness if needed.

Tools You'll Need
-
Mini ramekins or silicone mini tart tins
-
Mixing bowls
-
Hand mixer or whisk
-
Measuring cups and spoons
-
Spatula
-
Plastic wrap
Must-Know Tips
-
Don't over‑mix the filling; stop once smooth.
-
Let the crust set in the fridge before adding filling.
-
Taste and adjust sweetness, especially if using flavored toppings.
Professional Secrets
-
Room temperature cream cheese ensures no lumps.
-
Press the crust evenly for a uniform bite.
-
Chill the finished mini cheesecakes to lock in texture.

Recipe by
Mia CollinsSmall bites, big happiness 😋✨ Fun snacks, tasty treats, and flavor in every bite 🧆
Get Delicious Recipes Weekly
Join 25,000+ home cooks getting our best recipes straight to their inbox.
Free forever • No spam • Unsubscribe anytime