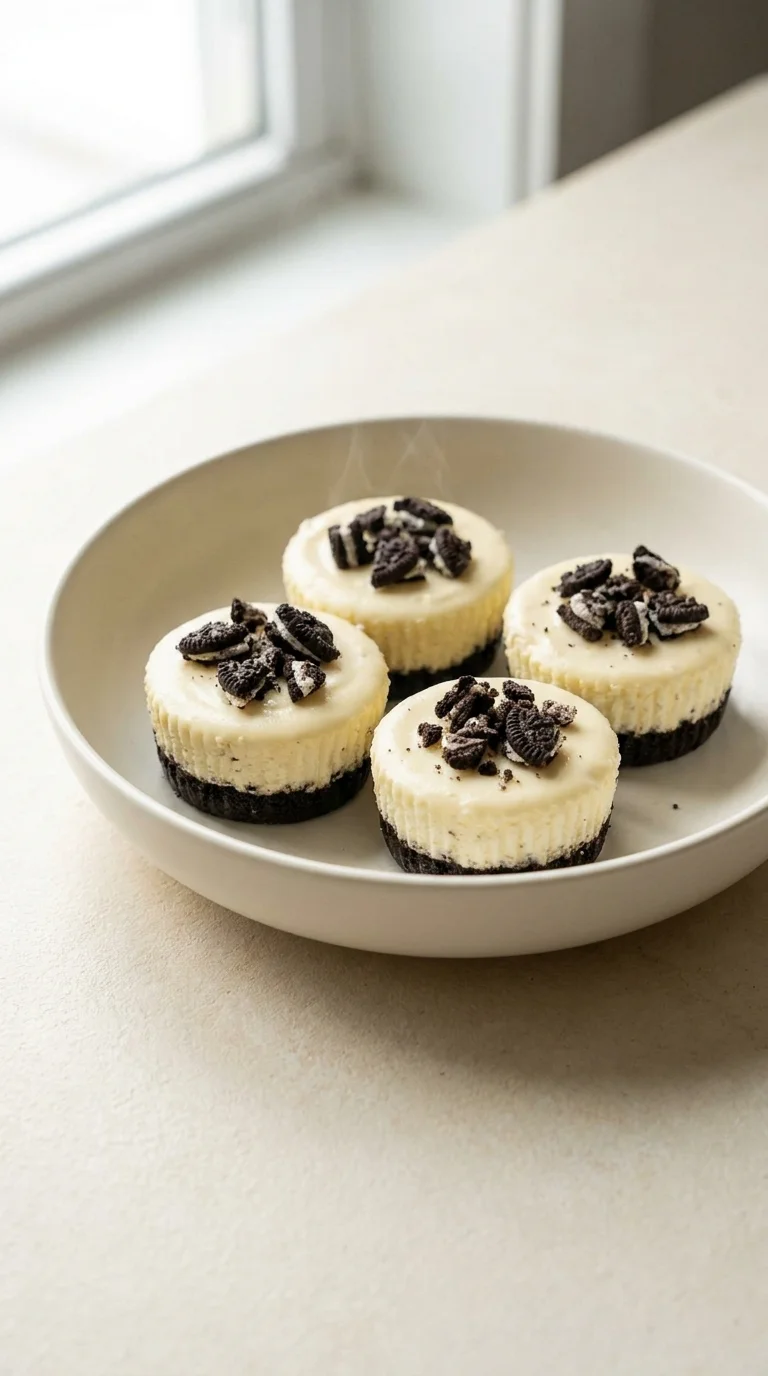
The concept of the no-bake cheesecake is a modern evolution of the traditional cream cheese tarts found in European baking. While classic cheesecakes rely on the slow heat of an oven to set the eggs, the no-bake version uses the chemistry of cold temperatures and whipped fats to create a stable, mousse-like texture. This approach transformed the dessert from a labor-intensive feat into a versatile, chilled delight.
Integrating the Oreo cookie—a cultural icon since 1912—into this format creates a bridge between nostalgic childhood snacking and sophisticated dessert presentation. These Oreo no-bake cheesecake cups reflect a shift toward individual portions, moving away from the large, heavy cakes of the past toward something more manageable and light.
Over the decades, this style of dessert has become a staple at summer potlucks and family gatherings across North America. The contrast of the deep, cocoa-heavy crust against the bright, tangy cream cheese filling mirrors the balance of flavors that have made the chocolate sandwich cookie a global phenomenon. It is a testament to how a few simple ingredients can be reimagined into a timeless treat.
Why You'll Love It
-
- Honestly, there is something so comforting about a treat that doesn't require the oven, and these little cups are just pure bliss.
-
- You get that lovely contrast of the crunchy Oreo cookie crumbs and the velvety smooth filling, wow, it's just a dream.
-
- I mean, they are individual servings, so no messy slicing or worrying if the center is set—just a perfect little bite for everyone.
-
- It reminds me of the treats I used to make for the kids, simple and sweet, but with a touch of decadence that feels special.
"Honestly, the texture is just heavenly. My grandkids absolutely love these little treats, and I love how easy they are!"
Essential Ingredient Guide
- 8 ounces (226g) cream cheese, softened: This is the heart of our filling. Please, let it sit out for a bit so it's truly soft, or you'll end up with little lumps, and ugh, we want it perfectly smooth.
- 1 cup (240ml) heavy cream, cold: Keeping this cold is the secret to those beautiful stiff peaks. It gives the cheesecake that airy, cloud-like feel that just melts in your mouth.
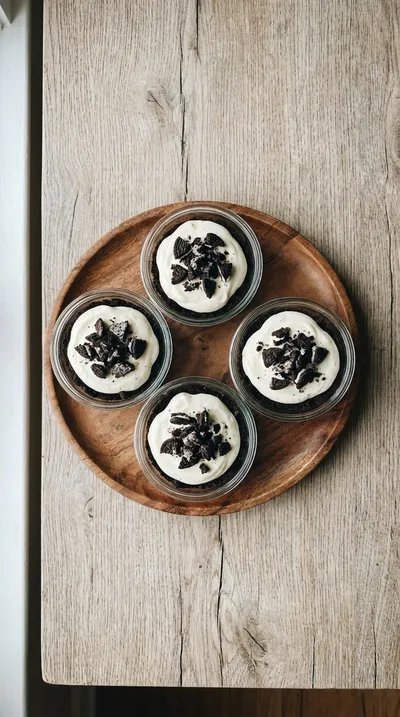
- ½ cup (60g) Oreo cookie pieces, roughly chopped: These are just for the top, but they add such a nice visual pop. I love the look of the irregular chunks resting on that creamy white top.
- 1 teaspoon vanilla extract: Just a splash, but it rounds out the sweetness so beautifully. It adds a warm, familiar scent that makes the whole kitchen feel cozy.
- 6 tablespoons (85g) unsalted butter, melted: This binds our crumbs together into a sturdy little base. Make sure it's melted but not boiling hot, so the crumbs stay just right.
- 1 cup (200g) granulated sugar: This provides that classic sweetness we all crave. I just beat it in slowly with the cream cheese until everything looks light and fluffy.
Complete Cooking Process
-
Ingredient Readiness:
I always start by letting the 8 ounces (226g) cream cheese, softened, reach room temperature. It's so important, because if it's too cold, the mixer just won't behave.
-
Flavor Development:
The magic happens when you beat the granulated sugar into the cream cheese and stir in that 1 teaspoon vanilla extract. That's when that rich, classic cheesecake flavor really begins to bloom.
-
Texture Control:
Now, look, the trick is in the folding. Gently stirring the whipped heavy cream into the cheese mixture ensures we keep all that air, giving us a light and airy texture instead of something dense.
-
Finishing Touches:
Just before the guests arrive, I sprinkle the ½ cup (60g) Oreo cookie pieces over the top. It's a simple touch, but it makes them look like they came from a fancy bakery.
-
Serving Timing:
Patience is key here, yeah. Let them chill for at least 4 hours—or even overnight—so they set firmly and stay cold and refreshing when you serve them.
-
Ensure your cream cheese is thoroughly softened to avoid lumps in the filling.
-
Whip the cold heavy cream to stiff peaks for that signature light and airy filling.
-
If you want an extra punch of flavor, fold 1-2 tablespoons of finely crushed Oreos into the filling.
-
Use paper liners in your muffin tin to make popping these little treats out much easier.
Pro Tips
You've got this, just take your time and enjoy the process!
Better For You Treats
Now, these are definitely a decadent treat with plenty of sugar and fat, so I usually suggest enjoying them in moderation. A little bit of sweetness goes a long way when it's this rich!
Ways to Make it Your Own
If you're feeling adventurous, try adding 2 tablespoons of creamy peanut butter for a nutty twist, or a ½ teaspoon of peppermint extract for something minty. I've found that a few mini chocolate chips on top also work beautifully.
Serving Suggestions
I love serving these with a little drizzle of chocolate sauce for extra indulgence, or perhaps a whole Oreo cookie tucked into a dollop of whipped cream. They are just lovely paired with a warm cup of coffee or tea.
Frequently Asked Questions
→ Can I make these ahead of time?
Oh, absolutely! In fact, I prefer making them overnight so they have plenty of time to set in the fridge.
→ What if my filling isn't stiff enough?
Well, make sure your heavy cream was cold and whipped to stiff peaks before folding. If they're still too soft, just give them a few more hours in the chiller.
→ Can I freeze these for later?
Yes, you can freeze them for up to a month! Just wrap each cup individually in plastic wrap and thaw them in the fridge before you're ready to eat.
Nutrition Facts
per serving
410
Calories
6g
Protein
34g
Carbs
26g
Fat
Taste Profile
A rich, sweet, and creamy chocolate-vanilla experience.
Ingredient Substitutions
Don't have an ingredient? Try these alternatives
Use any chocolate sandwich cookie you prefer.
You can substitute some cream for more mascarpone for a denser feel, though it won't be as airy.
Powdered sugar dissolves faster into the cream cheese.
Recipe Variations
Try these delicious twists on the original
Peanut Butter Oreo Cheesecake Cups
For a delicious peanut butter twist, just stir 2 tablespoons of creamy peanut butter into your cream cheese mixture.
Mint Chocolate Oreo Cheesecake Cups
Give it a refreshing change by adding ½ teaspoon of peppermint extract to the cream cheese and garnishing with mini chocolate chips.
Common Mistakes to Avoid
Learn from others' mistakes for perfect results
- Using cold cream cheese, which leads to those pesky lumps in the filling.
- Over-beating the heavy cream and turning it into butter.
- Stirring too vigorously when combining the cream and cheese, which deflates the air.
Meal Prep & Storage
Make Ahead Tips
These are actually better when made ahead! Refrigerate for 4 hours or overnight to let them set perfectly.
Leftover Ideas
Store any remaining cups in the refrigerator. If you want to keep them longer, wrap them individually and freeze for up to a month.
Perfect Pairings
Serve this with...
Cooking Timeline
Mix Oreo crumbs with melted butter and press into muffin tin.
Beat cream cheese and sugar until light and smooth; stir in vanilla.
Whip cold heavy cream to stiff peaks.
Fold cream into cheese mixture and fill the cups.
Chill in the refrigerator until set completely.

Oreo No-Bake Cheesecake Cups
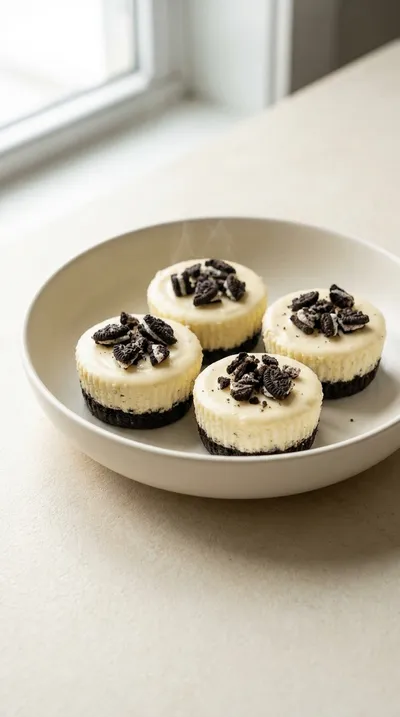
These Oreo no-bake cheesecake cups bring together a buttery, dark cookie crust and a cloud-like filling. It is a velvety, sweet treat that feels like a celebration in every single bite.
Timing
Prep Time
20 Minutes
Cook Time
0 Minutes
Total Time
20 Minutes
Recipe Details
Ingredients
Crust
-
01
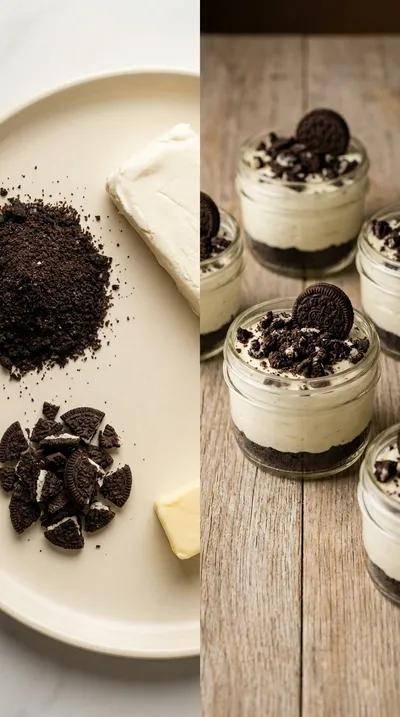
1 ½ cups (180g) Oreo cookie crumbs (about 30 Oreos, finely crushed)
-
02
6 tablespoons (85g) unsalted butter, melted
Cheesecake Filling
-
01
8 ounces (226g) cream cheese, softened
-
02
1 cup (200g) granulated sugar
-
03
1 teaspoon vanilla extract
-
04
1 cup (240ml) heavy cream, cold
Garnish
-
01
½ cup (60g) Oreo cookie pieces, roughly chopped (for topping)
Instructions
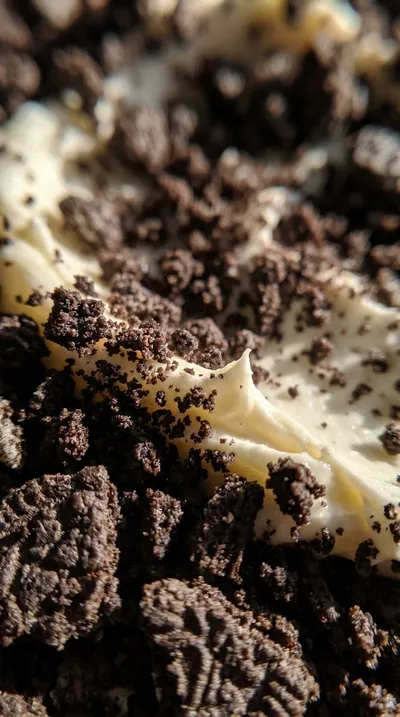
Start by getting your crust ready. In a medium bowl, just stir together those 1 ½ cups (180g) Oreo cookie crumbs and the 6 tablespoons (85g) unsalted butter, melted. Mix it well until the crumbs are all evenly moistened—it should look like wet sand, honestly.
Now, let's get them into the tin. Line your 12-cup muffin tin with paper liners if you're using them. Gently press about 2 tablespoons of that Oreo crumb mixture into the bottom of each cup. Give it a firm pack down so the crust stays together, yeah?
Time for the creamy part. In a large mixing bowl, beat your 8 ounces (226g) cream cheese, softened, with your electric mixer until it's just smooth and creamy. Gradually add in the 1 cup (200g) granulated sugar and keep beating until the mixture looks a bit lighter in color.
Stir in that 1 teaspoon vanilla extract until it's all incorporated. It smells so wonderful at this stage, doesn't it?
In a separate large bowl, take your 1 cup (240ml) heavy cream, cold, and whip it with your beaters until stiff peaks form. Just be careful not to overwhip it, or you'll end up with butter—oops!
Now we combine. Gently fold about 1/3 of your whipped cream into the cream cheese mixture just to lighten things up. Then, slowly fold in the rest of the whipped cream. I mean, really be gentle here so you don't deflate all that lovely air.
Spoon that velvety cheesecake filling evenly over your Oreo crusts in the muffin tin. Go ahead and fill each cup right up to the top.
Patience is key here. Cover the muffin tin with some plastic wrap and pop it in the refrigerator for at least 4 hours, though I'd honestly suggest overnight to let them set completely.
Just before you're ready to serve, sprinkle those ½ cup (60g) Oreo cookie pieces, roughly chopped, evenly over the top of each cup for a little crunch.
Carefully lift the Oreo no-bake cheesecake cups out of the muffin tin and liners, and serve them chilled. Enjoy!
Notes & Tips
-
1
Make sure the cream cheese is truly softened to avoid any lumps.
-
2
Don't skip whipping the cream to stiff peaks; it's what makes it airy.
-
3
Using paper liners makes removing the cups so much easier.
Tools You'll Need
-
Food processor (optional, for crushing those Oreos into a fine crumb)
-
Mixing bowls (2 large, 1 medium for the various stages)
-
Electric mixer (either handheld or a stand mixer works great)
-
12-cup muffin tin (the base for our little treats)
-
Paper liners for muffin tin (highly recommended for a clean release)
-
Rubber spatula (perfect for folding in the cream)
Must-Know Tips
-
Softened Cream Cheese, Let it sit at room temperature for 30 minutes to ensure a smooth filling.
-
Stiff Peaks, Whip the heavy cream until firm to maintain the light texture of the cheesecake.
-
Folding Technique, Use a gentle folding motion to keep the air in the whipped cream.
Professional Secrets
-
The 1/3rd rule: Folding in a small portion of whipped cream first prevents the heavier cheese from deflating the air.
-
Temperature control: Using cold heavy cream is the secret to getting those stable, stiff peaks.
-
Crumb compression: Firmly packing the crust prevents the cheesecake from seeping into the bottom.
What readers are saying
Community reviews from home cooks like you
Nice base recipe. The crushed) flavor was nice, but i added a bit more seasoning next time. I might try it again with some adjustments.
Can't believe how simple this was. I really liked how the 1 ½ cups (180g) Oreo cookie crumbs (about 30 Oreos, finely crushed) and 6 tablespoons (85g) unsalted butter, melted came together. I would reduce the salt a little. Saving this for later.
My new favorite way to make Oreo No-Bake Cheesecake Cups. I really liked how the 1 ½ cups (180g) Oreo cookie crumbs (about 30 Oreos, finely crushed) and 6 tablespoons (85g) unsalted butter, melted came together. Already shared it with a friend.
Perfect for a busy weeknight. I really liked how the 1 ½ cups (180g) Oreo cookie crumbs (about 30 Oreos, finely crushed) and 6 tablespoons (85g) unsalted butter, melted came together. My kids even asked for seconds.
Perfect for a busy weeknight. I really liked how the 1 ½ cups (180g) Oreo cookie crumbs (about 30 Oreos, finely crushed) and 6 tablespoons (85g) unsalted butter, melted came together. My oven needed an extra 5 minutes. Will be making this regularly.
Good, but not amazing. The crushed) flavor was nice, but i would reduce the salt a little. I might try it again with some adjustments.
I wanted to love this dish, but it didn't quite work for me. I would reduce the salt a little. I think with some tweaks it could be really good.
My new favorite way to make Oreo No-Bake Cheesecake Cups. I really liked how the 1 ½ cups (180g) Oreo cookie crumbs (about 30 Oreos, finely crushed) and 6 tablespoons (85g) unsalted butter, melted came together. Saving this for later.
This exceeded my expectations. I really liked how the 1 ½ cups (180g) Oreo cookie crumbs (about 30 Oreos, finely crushed) and 6 tablespoons (85g) unsalted butter, melted came together. Thanks for sharing this one!
Will definitely make this again. I really liked how the 1 ½ cups (180g) Oreo cookie crumbs (about 30 Oreos, finely crushed) and 6 tablespoons (85g) unsalted butter, melted came together. It took slightly longer than the recipe said. Saving this for later.
I wanted to love this dish, but it didn't quite work for me. My oven needed an extra 5 minutes. I think with some tweaks it could be really good.
This exceeded my expectations. I really liked how the 1 ½ cups (180g) Oreo cookie crumbs (about 30 Oreos, finely crushed) and 6 tablespoons (85g) unsalted butter, melted came together. I would reduce the salt a little. Will be making this regularly.

Recipe by
Mia CollinsSmall bites, big happiness 😋✨ Fun snacks, tasty treats, and flavor in every bite 🧆
Get Delicious Recipes Weekly
Join 25,000+ home cooks getting our best recipes straight to their inbox.
Free forever • No spam • Unsubscribe anytime