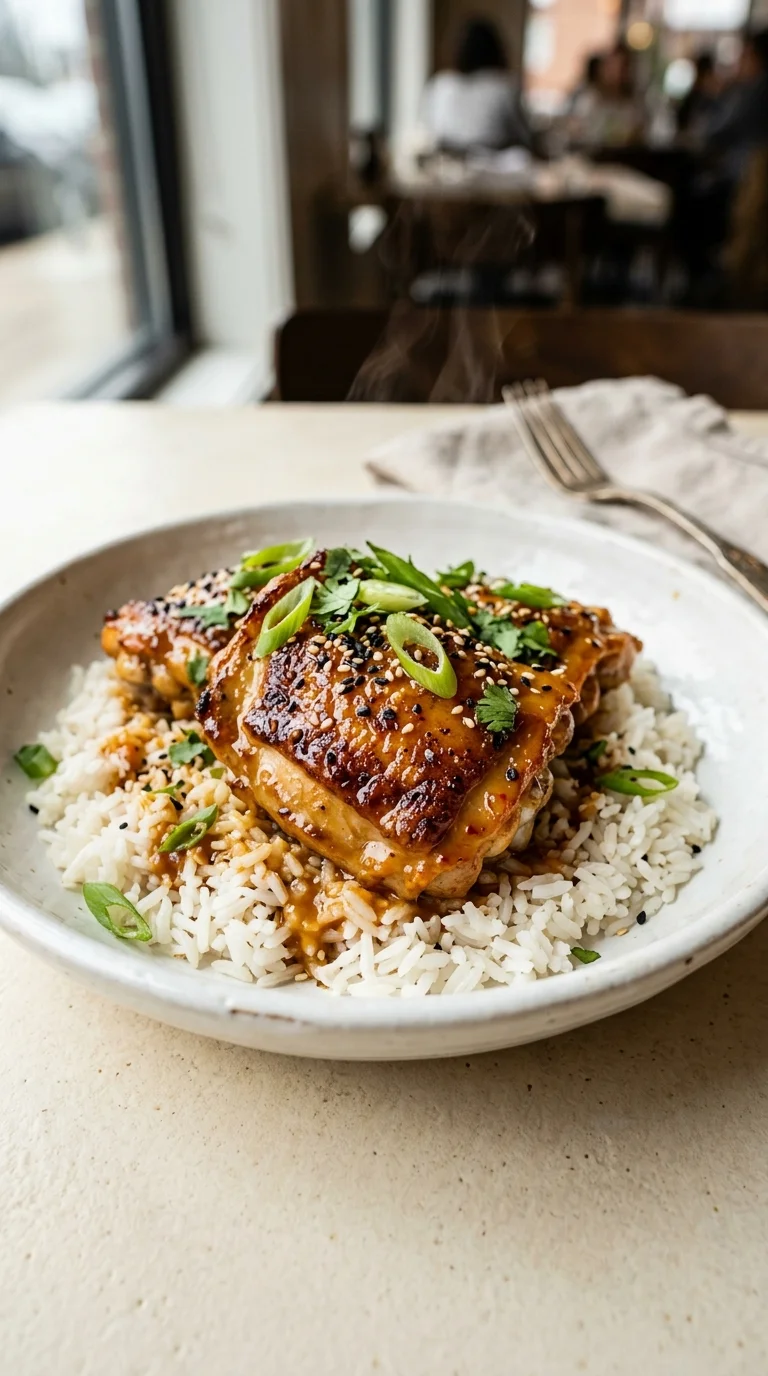
The concept of 'Bang Bang' flavors traces back to the fusion of East Asian ingredients and Western dining preferences, originally gaining popularity through creamy, spicy shrimp appetizers. The heart of the profile relies on the contrast between a sharp heat and a cooling, fatty element—historically achieved with mayonnaise, but evolved here with the rich depth of creamy peanut butter and soy sauce.
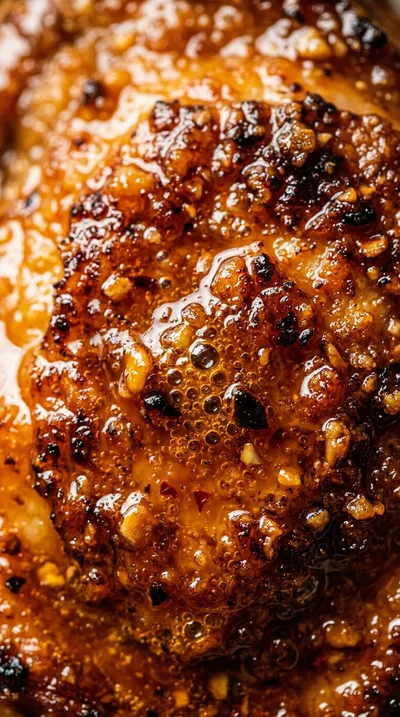
Using the skillet method for skillet bang bang chicken thighs emphasizes the Maillard reaction, where the skin of the chicken becomes deeply caramelized and crisp. This traditional searing technique ensures that the meat remains juicy while providing a sturdy base for the bold glaze to cling to.
Culturally, the addition of toasted sesame oil and lime juice reflects the balance of five flavors—sweet, sour, salty, bitter, and umami—which is central to many Asian culinary philosophies. It transforms a simple protein into a complex experience of temperature and taste.
Why You'll Love It
-
- Honestly, there is something so comforting about that golden, crispy skin meeting a glossy glaze; it just feels like a warm hug on a plate.
-
- Well, it is just so fast to pull together, meaning you get those deep, complex flavors without spending all evening in the kitchen.
-
- I mean, the way the creamy peanut butter and sriracha sauce cling to the juicy chicken is just... wow, it is absolute bliss.
-
- It has this lovely balance of sweet and heat that reminds me of the little hidden gem eateries I used to visit years ago.
"Honestly, the skin stayed so crispy even with all that sauce. My kids actually asked for seconds!"
Essential Ingredient Guide
- 6 bone‑in skin‑on chicken thighs: I always stick with bone-in thighs because they stay so juicy. Just make sure to pat them really dry with a paper towel so you get that beautiful sear.
- 2 tablespoons creamy peanut butter: This gives the sauce its heart and that nutty richness. I like to use a smooth brand so it whisks right into the other ingredients without any lumps.
- 1 tablespoon chopped fresh cilantro (optional garnish): It adds such a bright, herbaceous pop of color at the end. Honestly, it just wakes up the whole dish and makes it look so polished.
- 1 tablespoon kosher salt: I season generously on both sides before the chicken hits the pan. It is the secret to making those natural flavors really sing.
- 1 tablespoon freshly squeezed lime juice: That little bit of acid cuts right through the richness of the peanut butter. It adds a brightness that just makes everything feel fresh.
- 1 tablespoon raw honey: A touch of honey gives the sauce a lovely, sticky quality. It balances the heat of the sriracha just right, so it's a gentle glow rather than a burn.

Complete Cooking Process
-
Ingredient Readiness:
First, we get everything measured and ready. I always whisk the peanut butter, sriracha, and honey together beforehand so I'm not rushing while the chicken is searing.
-
Flavor Development:
The magic happens when the sauce simmers with the pan juices for a few minutes. It creates this deep, melded flavor that you just can't get from stirring alone.
-
Texture Control:
Searing the chicken skin-side down for about 5-6 minutes is key. You want that skin to be crisp and golden, which provides a wonderful contrast to the glossy glaze.
-
Finishing Touches:
Basting the chicken for the last few minutes allows the sauce to thicken into a rich coating. I like to finish it off with a sprinkle of toasted sesame seeds for a little crunch.
-
Serving Timing:
Let the thighs rest for about 3 minutes after they come off the heat. It's a little wait, but it lets the juices settle so every bite is perfectly tender.
-
Pat chicken dry before seasoning to ensure the skin gets truly crispy.
-
Use a cast‑iron skillet for the most even heat and a superior sear.
-
If the sauce feels too sweet, add a splash of rice vinegar or lime zest to brighten it up.
-
Ensure the chicken reaches 165°F internal temperature for a safe and juicy result.
Pro Tips
Just take your time and enjoy the wonderful smells filling your kitchen!
Better For You Treats
I like to keep things balanced, so I often serve this with brown rice for a bit more fiber. You can also lower the heat by using a tiny bit less sriracha sauce if you're cooking for little ones.
Ways to Make it Your Own
If you're feeling adventurous, you could swap the peanut butter for a coconut-based sauce. Or, if you have someone avoiding meat, roasted chickpeas tossed in the same sauce are just lovely.
Serving Suggestions
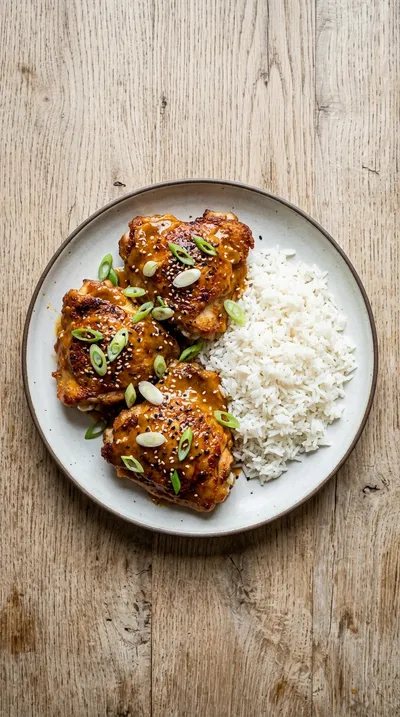
This is just wonderful over fluffy jasmine rice with the sauce swirled in. I also love a side of steamed broccoli or a crisp cucumber salad to cut through that rich, nutty glaze.
Frequently Asked Questions
→ What if I don't have a cast-iron skillet?
Oh, don't worry! A stainless-steel skillet works just fine, though you might need to keep a closer eye on the heat.
→ Can I use boneless thighs instead?
You sure can, though they cook much faster. Just be careful not to overcook them so they stay nice and juicy.
→ How do I store the leftovers?
Just pop them in an airtight container in the fridge for up to 3 days. They reheat quite nicely in a pan or oven.
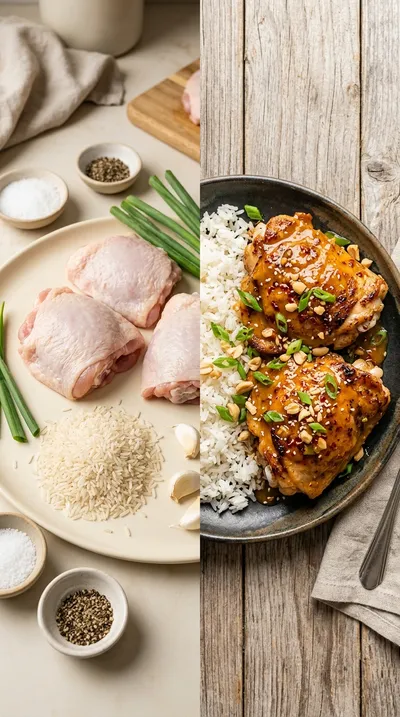
Nutrition Facts
per serving
420
Calories
31g
Protein
14g
Carbs
28g
Fat
Taste Profile
A harmonious balance of nutty peanut butter, spicy sriracha, and savory soy.
Ingredient Substitutions
Don't have an ingredient? Try these alternatives
Maintains sweetness but adds a slight earthy tone.
Provides a similar heat but with a more chunky, chili-forward taste.
A great alternative for those who prefer a milder nut flavor.
Recipe Variations
Try these delicious twists on the original
Vegetarian Bang Bang Chickpeas
If you're cooking for someone plant-based, just replace the chicken with roasted chickpeas. Toss them in the same peanut-sriracha sauce for a version that still delivers that signature crunch and zing.
Ginger‑Coconut Bang Bang Chicken
For something a bit more tropical, swap out the peanut butter for a coconut-based sauce and add an extra pinch of ginger. It's a wonderful little twist on the classic spicy glaze.
Common Mistakes to Avoid
Learn from others' mistakes for perfect results
- Adding chicken to the pan while it's still wet, which leads to steaming instead of searing.
- Overcooking the sauce until it burns; keep the heat controlled during the final simmer.
- Skipping the resting period, which can lead to losing those precious juices.
Meal Prep & Storage
Make Ahead Tips
You can prepare the sauce in advance and store it in the fridge. The chicken must be cooked fresh for the best skin, but you can store leftovers for up to 3 days.
Leftover Ideas
Store in an airtight container in the refrigerator. Reheat gently in a skillet or oven to help the skin regain some of its crispness.
Perfect Pairings
Serve this with...
Cooking Timeline
Pat chicken dry and season with salt and pepper.
Sear chicken skin-side down, then flip and sear the other side.
Whisk the sauce ingredients while the chicken is searing.
Simmer the sauce and baste the chicken until it reaches 165°F.
Rest the chicken for 3 minutes and garnish for serving.
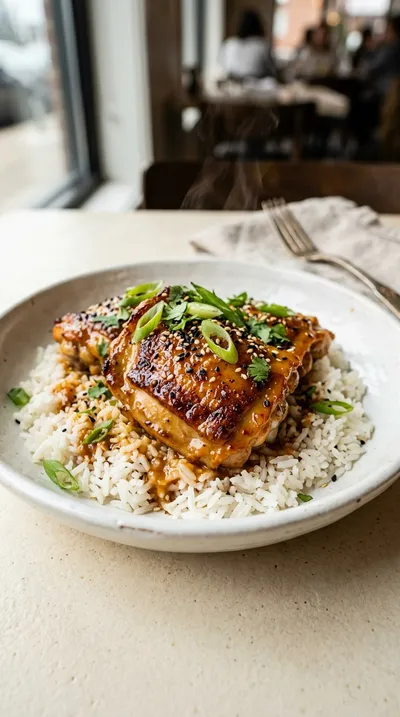
Skillet Bang Bang Chicken Thighs
These skillet bang bang chicken thighs bring together a smoky sear and a glossy, nutty glaze. It is a cozy dinner that balances the heat of sriracha sauce with the creaminess of peanut butter for a comforting meal.
Timing
Prep Time
15 Minutes
Cook Time
25 Minutes
Total Time
40 Minutes
Recipe Details
Ingredients
The Chicken
-
01
6 bone‑in skin‑on chicken thighs
-
02
1 tablespoon kosher salt
-
03
1 teaspoon freshly ground black pepper
-
04
2 tablespoons vegetable oil
The Bang Bang Sauce
-
01
2 tablespoons creamy peanut butter
-
02
1 tablespoon sriracha sauce
-
03
2 tablespoons low‑sodium soy sauce
-
04
1 tablespoon raw honey
-
05
1 tablespoon freshly squeezed lime juice
-
06
1 garlic clove minced
-
07
1 teaspoon freshly grated ginger
-
08
1 teaspoon toasted sesame oil
-
09
2 tablespoons water
Optional Garnish
-
01
1 tablespoon chopped fresh cilantro (optional garnish)
-
02
1 tablespoon toasted sesame seeds (optional garnish)
-
03
1/2 cup sliced green onions (optional garnish)
Instructions
First things first, take a few paper towels and pat those chicken thighs really dry. It takes a minute, but it's the only way to get that skin just right. Then, go ahead and season both sides generously with your 1 tablespoon kosher salt and 1 teaspoon freshly ground black pepper.
Set your skillet over medium‑high heat and pour in the 2 tablespoons vegetable oil. Give it a little swirl so the whole surface is coated and ready for the meat.
Carefully place the thighs skin side down. Let them sear for 5–6 minutes—you're looking for that beautiful, crisp, golden skin. Once they've reached that point, flip them over and sear the other side for another 4 minutes.
While the chicken is doing its thing, grab a small bowl. Whisk together your 2 tablespoons creamy peanut butter, 1 tablespoon sriracha sauce, 2 tablespoons low‑sodium soy sauce, 1 tablespoon raw honey, 1 tablespoon freshly squeezed lime juice, 1 garlic clove minced, 1 teaspoon freshly grated ginger, 1 teaspoon toasted sesame oil, and 2 tablespoons water until everything is smooth and glossy.
Pour that lovely sauce right into the skillet. Stir it around so it picks up all those savory pan juices, and let it simmer for about 2–3 minutes just so the flavors can really get to know each other.
Now, nestle the chicken back into the skillet. Spoon that thickening sauce over the top and let it cook uncovered for another 4–5 minutes. Keep basting them occasionally until the sauce is thick and your instant‑read thermometer tells you the chicken has reached 165°F internal temperature.
Remove the skillet from the heat. I usually slosh off any excess sauce from the edges, and then I let the thighs rest for 3 minutes. It's hard to wait, I know, but it lets those juices redistribute so the meat stays tender.
Transfer your chicken to a serving platter and spoon a bit more of that remaining sauce over the top for a glossy finish.
For a little pop of color, sprinkle on your 1 tablespoon chopped fresh cilantro (optional garnish), 1 tablespoon toasted sesame seeds (optional garnish), and 1/2 cup sliced green onions (optional garnish).
Serve them up immediately over some steamed jasmine rice or maybe a crisp cucumber salad for a meal that feels complete.
Notes & Tips
-
1
Make sure the chicken is bone-in and skin-on for the best flavor and texture.
-
2
The sauce thickens quickly, so keep an eye on the heat during the final basting.
-
3
Resting the meat is a small step that makes a big difference in juiciness.
Tools You'll Need
-
Large cast‑iron skillet or stainless‑steel skillet for a perfect sear
-
Measuring spoons for accuracy
-
Whisk to get the peanut butter smooth
-
Mixing bowl for the sauce
-
Sharp chef’s knife for the aromatics
-
Cutting board to keep things organized
-
Tongs for flipping the chicken
-
Instant‑read thermometer to ensure safety
Must-Know Tips
-
Dry the meat, Patting chicken dry before seasoning prevents moisture from steaming the meat, which yields a crispier skin.
-
Choose cast-iron, Using a cast‑iron skillet provides even heat distribution and a superior sear.
-
Brighten the finish, Adding a splash of rice vinegar or lime zest after simmering cuts the sweetness and adds brightness.
Professional Secrets
-
The pan-sauce method uses the fond (browned bits) from the chicken to deepen the sauce's flavor.
-
Basting the chicken in the final minutes creates a glazed lacquer effect that looks professional.
-
Resting the meat for 3 minutes prevents the juices from running out onto the platter.
What readers are saying
Community reviews from home cooks like you
Nice base recipe. The thighs flavor was nice, but it took slightly longer than the recipe said. I might try it again with some adjustments.
I was surprised how good this turned out. I really liked how the 6 bone‑in skin‑on chicken thighs and 1 tablespoon kosher salt came together. I would reduce the salt a little. Great addition to my recipe rotation.
My new favorite way to make Skillet Bang Bang Chicken Thighs. I really liked how the 6 bone‑in skin‑on chicken thighs and 1 tablespoon kosher salt came together. The texture was a touch off, but the flavor saved it. Perfect as written.
Decent result for the effort. The thighs flavor was nice, but i added a bit more seasoning next time. I might try it again with some adjustments.
Nice base recipe. The thighs flavor was nice, but the texture was a touch off, but the flavor saved it. I might try it again with some adjustments.
Decent result for the effort. The thighs flavor was nice, but it took slightly longer than the recipe said. I might try it again with some adjustments.
Nice base recipe. The thighs flavor was nice, but it took slightly longer than the recipe said. I might try it again with some adjustments.
I was surprised how good this turned out. I really liked how the 6 bone‑in skin‑on chicken thighs and 1 tablespoon kosher salt came together. My oven needed an extra 5 minutes. Already shared it with a friend.
Will definitely make this again. I really liked how the 6 bone‑in skin‑on chicken thighs and 1 tablespoon kosher salt came together. Thanks for sharing this one!
Can't believe how simple this was. I really liked how the 6 bone‑in skin‑on chicken thighs and 1 tablespoon kosher salt came together. Saving this for later.

Recipe by
Alexa CarterFast food, but smarter 🔥🍽️ Bold flavors, simple steps, and meals that always hit the spot 😎
Get Delicious Recipes Weekly
Join 25,000+ home cooks getting our best recipes straight to their inbox.
Free forever • No spam • Unsubscribe anytime