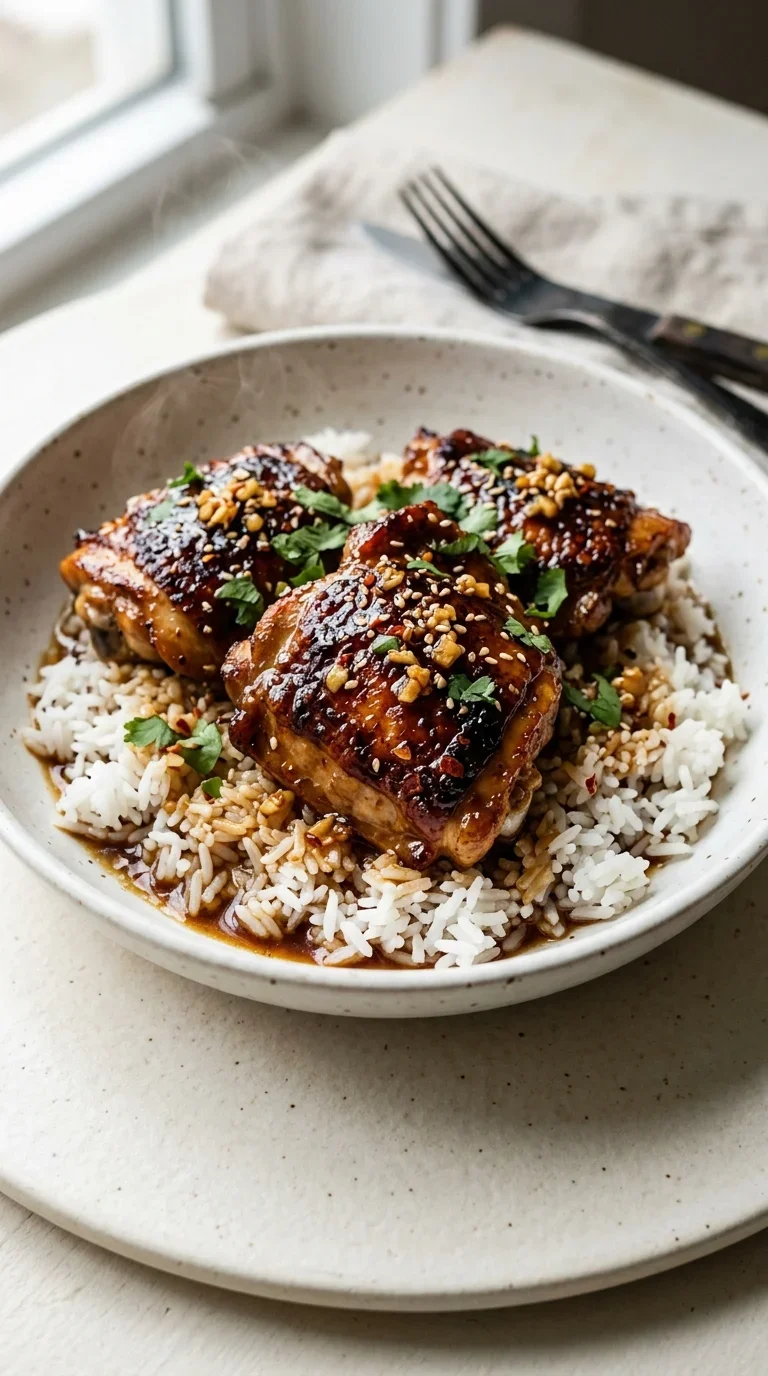
The marriage of honey and garlic is a timeless combination found in various forms across many cultures, blending the deep umami of East Asian flavors with a natural sweetness. Sticky honey garlic chicken thighs draw inspiration from traditional stir-fry techniques, where the goal is to achieve a balance of salty and sweet through a process called glazing.
Historically, the use of honey as a glaze dates back centuries, used to preserve meats and add a luxurious sheen to festive dishes. By combining it with low-sodium soy sauce and a touch of rice vinegar, the flavor profile transforms into something that hits every taste bud—sweet, salty, and slightly tangy.
In modern home cooking, this dish represents the shift toward quick, high-impact meals. The addition of a cornstarch slurry is a classic culinary trick used to thicken the sauce, ensuring that the honey and garlic cling to the meat rather than pooling at the bottom of the plate, creating that signature sticky texture that defines the dish.
Why You'll Love It
-
- Honestly, there is something so comforting about that glossy, caramelized glaze clinging to the chicken; it just feels like a warm hug on a plate.
-
- It's just so quick to pull together, yeah, meaning you get that deep, slow-cooked flavor without actually spending all afternoon in the kitchen.
-
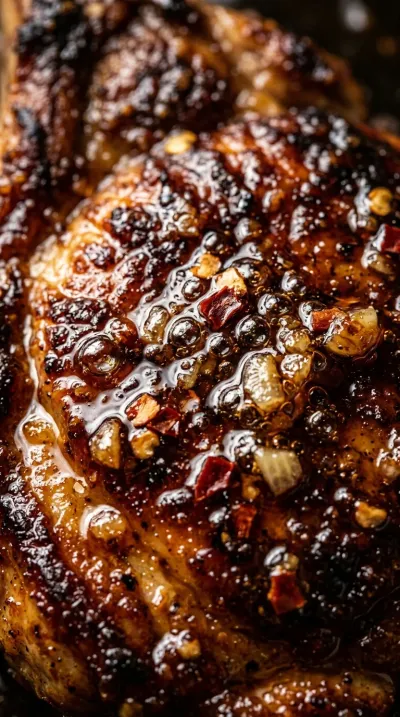
- I love how the skin gets that perfect, golden crunch before it meets the honey, creating this wonderful little contrast in every single bite.
-
- Well, look, it's one of those rare meals that feels fancy enough for guests but is simple enough for a rainy Tuesday night with the kids.
"Honestly, my kids usually pick at their dinner, but they absolutely loved these sticky thighs. So easy and just delicious!"
Essential Ingredient Guide
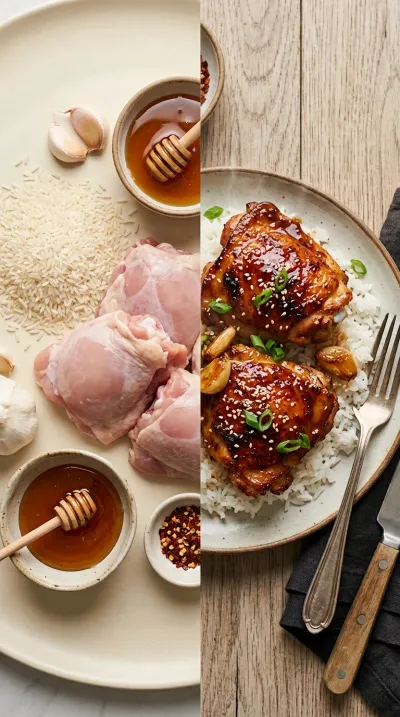
- 4 bone‑in, skin‑on chicken thighs (about 2 lbs): I always prefer bone-in thighs because they stay so juicy, you know? Just pat the skin dry with a paper towel so you get that lovely sear.
- 1 tablespoon minced garlic: Fresh is always best here. I mean, the smell when it hits the hot oil... wow, it just fills the whole house with a wonderful warmth.
- 1 tablespoon sesame seeds (optional): These are just a little extra touch, really. They add a tiny bit of nuttiness and make the plate look so polished and pretty.
- 1/4 teaspoon sea salt: A little pinch goes a long way. I like to season the chicken early so the flavor really sinks in before it hits the pan.
- 1 teaspoon rice vinegar: This is my little secret for balance. It adds a gentle brightness that cuts right through the sweetness of the honey.
- 1/4 cup honey: This gives us that beautiful, sticky gold color. Just make sure it's liquid and easy to pour so it swirls right into the pan.

Complete Cooking Process
-
Getting Ready:
I like to let my 4 bone‑in, skin‑on chicken thighs (about 2 lbs) sit out for a few minutes. It just helps them cook more evenly, so you don't end up with a chilly center.
-
Building the Flavor:
The magic happens when the 1 tablespoon minced garlic and 1 teaspoon freshly grated ginger hit the pan. You just cook them for a minute until they smell heavenly.
-
Perfecting the Texture:
The key is that cornstarch slurry. Whisking 1 tablespoon cornstarch with 2 tablespoons cold water turns the sauce from a liquid into a thick, syrupy glaze.
-
The Final Glaze:
Spooning that thickened sauce over the chicken is the best part. It coats every nook and cranny, making everything look so glossy and inviting.
-
The Resting Moment:
I know it's tempting to dive in, but let it rest for 5 minutes. The glaze actually tightens up and the juices settle, which makes it much tastier.
-
For extra crunch, leave the chicken skin-side down for another 1-2 minutes after flipping before you add any sauce.
-
If you're feeling bold, stir in a pinch of red pepper flakes or sriracha with your garlic for a little kick.
-
Don't skip the resting period; it's how you get that professional, sticky coat that's easy to scoop.
-
Make sure your pan is shimmering hot before adding the chicken to ensure the skin doesn't stick.
Pro Tips
You've got this, just take your time and enjoy the aromas!

Better For You Treats
This dish is a lovely balance of protein and savory umami from the 1/4 cup low‑sodium soy sauce. If you're watching your fats, you can simply remove the skin before serving, and it's still just as delicious.
Ways to Make it Your Own
I sometimes swap the honey for maple syrup and a pinch of cinnamon for a cozy feel. Or, ugh, I love adding a tablespoon of orange juice and some zest for a bright, citrusy twist.
Serving Suggestions
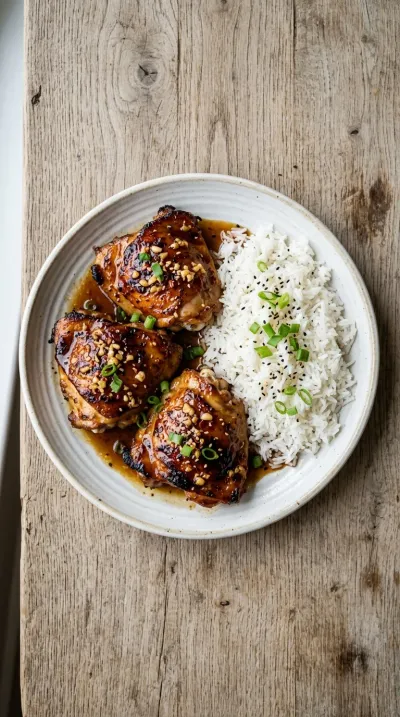
I usually pile these over some steamed jasmine rice to soak up every drop of sauce. A side of steamed broccoli or some sliced green onions on top adds a lovely pop of color.
Frequently Asked Questions
→ Can I use chicken breasts instead of thighs?
You can, but honestly, breasts can dry out so quickly. If you do, just keep a very close eye on the timer so they stay tender.
→ My sauce isn't thickening, what did I do wrong?
Oops, you might have added the slurry too fast! Just keep simmering it for another minute or two while stirring, and it should tighten right up.
→ How do I store the leftovers?
Just pop them in an airtight container in the fridge. They stay good for a few days, and you can even freeze them for up to 2 months if you're planning ahead.
Nutrition Facts
per serving
410
Calories
31g
Protein
24g
Carbs
22g
Fat
Taste Profile
A harmonious balance of sweet honey and savory soy with a warm garlic punch.
Ingredient Substitutions
Don't have an ingredient? Try these alternatives
Adjust sweetness to taste as maple is slightly less intense.
A great option for those avoiding soy, though it is slightly sweeter.
Works similarly to thicken the sauce.
Recipe Variations
Try these delicious twists on the original
Maple‑Glazed Honey Garlic Chicken Thighs
Swap honey for an equal amount of pure maple syrup and add a pinch of ground cinnamon for a warm, slightly sweet flavor profile that pairs wonderfully with roasted sweet potatoes.
Spicy Orange Honey Garlic Chicken Thighs
Incorporate 1 tablespoon freshly squeezed orange juice and a teaspoon of orange zest into the sauce, and add a pinch of red pepper flakes for citrusy heat that brightens the dish.
Common Mistakes to Avoid
Learn from others' mistakes for perfect results
- Burning the garlic: Adding the garlic too early or using heat that is too high can ruin the flavor.
- Crowding the pan: If thighs are too close, they will steam instead of searing, losing that crisp skin.
- Skipping the rest: Cutting into the chicken too soon lets the juices escape and the glaze stays thinner.
Meal Prep & Storage
Make Ahead Tips
You can prep the glaze in a jar up to 3 days in advance. However, for the best skin texture, sear and glaze the chicken just before serving.
Leftover Ideas
Store leftovers in an airtight container. Reheat gently in a skillet with a splash of water or in the oven to maintain the glaze's consistency.
Perfect Pairings
Serve this with...
Cooking Timeline
Season chicken and let it rest at room temperature.
Sear chicken skin-side down, then flip and brown the other side.
Sauté garlic and ginger, then simmer with honey, soy, and vinegar.
Stir in cornstarch slurry and glaze the chicken until thickened.
Rest the meat for 5 minutes and garnish for serving.
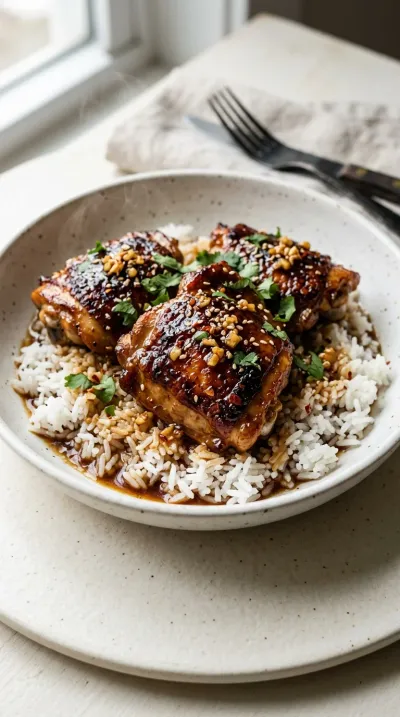
Sticky Honey Garlic Chicken Thighs
These sticky honey garlic chicken thighs are pan-seared to a golden crisp and finished in a glossy, sweet-savory glaze. The scent of minced garlic and freshly grated ginger fills the kitchen, creating a dinner that feels like a warm hug.
Timing
Prep Time
15 Minutes
Cook Time
20 Minutes
Total Time
35 Minutes
Recipe Details
Ingredients
The Chicken
-
01
4 bone‑in, skin‑on chicken thighs (about 2 lbs)
-
02
1/4 teaspoon sea salt
-
03
1/8 teaspoon freshly ground black pepper
-
04
1 tablespoon vegetable or sesame oil
The Sticky Glaze
-
01
1/4 cup honey
-
02
1/4 cup low‑sodium soy sauce
-
03
1 tablespoon minced garlic
-
04
1 teaspoon freshly grated ginger
-
05
1 teaspoon rice vinegar
-
06
1 tablespoon cornstarch
-
07
2 tablespoons cold water
Optional Garnish
-
01
1 tablespoon sesame seeds (optional)
-
02
2 green onions, sliced (optional)
Instructions
Start by seasoning your 4 bone‑in, skin‑on chicken thighs all over with sea salt and black pepper. I like to let them rest at room temperature for about 5 minutes; it just brings them slightly warmer so they cook more evenly. Honestly, it makes a difference.
Heat your skillet over medium‑high heat and add that tablespoon of vegetable or sesame oil, swirling it around to coat the pan. Once the oil starts to shimmer, place the chicken thighs skin‑side down. Just make sure to leave a little room between each piece so they don't crowd.
Sear the thighs until the skin is a beautiful golden and crisp, which usually takes about 4–5 minutes. Flip them over and brown the other side for another 4 minutes. Wow, the smell is already wonderful.
Reduce the heat to medium now. Stir in the minced garlic and grated ginger, cooking for just 30‑60 seconds until it smells fragrant. You have to be careful here; we don't want to burn the garlic, or it'll turn bitter.
Pour in the honey, low‑sodium soy sauce, and rice vinegar. Swirl everything together to coat the chicken. Let the mixture simmer for about 2 minutes; it's so satisfying watching the sauce bubble up around the chicken.
In a small bowl, whisk together the cornstarch and cold water to create a slurry. Slowly pour this into the pan while stirring continuously. You'll see the sauce thicken and brighten into a lovely syrupy glaze.
Cook for another 2–3 minutes, spooning that thickened sauce right over the chicken thighs so they're well‑coated. Just double-check that the chicken’s internal temperature reaches 165°F (74°C).
Remove the pan from the heat. Now, we wait. Let the thighs rest for 5 minutes so the juices redistribute and that glaze continues to thicken up slightly. I know it's hard, but it's worth it.
Transfer the chicken to a serving platter and spoon any remaining sauce over the top. If you're feeling fancy, sprinkle with toasted sesame seeds and sliced green onions.
Serve it immediately over some steamed rice or fluffy quinoa. I think a side of stir‑fried greens or a fresh cucumber salad balances the sweetness perfectly.
Notes & Tips
-
1
Allow the chicken to reach room temperature slightly before cooking for a more even sear.
-
2
The sauce continues to thicken as it cools, which is key for that glossy finish.
-
3
Spooning the sauce over the meat during the final minutes ensures a deep, caramelized flavor.
Tools You'll Need
-
1 large skillet or stainless‑steel pan (stainless steel is great for getting those brown bits)
Must-Know Tips
-
The Resting Period, Don't skip the 5-minute rest; the sauce thickens as it cools, giving the thighs a glossy, sticky coat.
-
Garlic Timing, Add garlic and ginger only after browning the meat to prevent burning.
-
Slurry Technique, Always whisk cornstarch with cold water first to avoid lumps in your glaze.
Professional Secrets
-
The Extra Crunch, Lay the chicken skin‑side down for an additional 1–2 minutes after flipping but before adding sauce to lock in crispness.
-
The Glaze Brightener, The addition of rice vinegar cuts through the honey's sweetness to brighten the overall profile.
-
Internal Temp, Using a thermometer to hit exactly 165°F (74°C) prevents the meat from drying out.
What readers are saying
Community reviews from home cooks like you
I was surprised how good this turned out. I really liked how the 4 bone‑in, skin‑on chicken thighs (about 2 lbs) and 1/4 teaspoon sea salt came together. Saving this for later.
I was surprised how good this turned out. I really liked how the 4 bone‑in, skin‑on chicken thighs (about 2 lbs) and 1/4 teaspoon sea salt came together. Thanks for sharing this one!
Absolutely loved this recipe! I really liked how the 4 bone‑in, skin‑on chicken thighs (about 2 lbs) and 1/4 teaspoon sea salt came together. Will be making this regularly.
So easy and delicious. I really liked how the 4 bone‑in, skin‑on chicken thighs (about 2 lbs) and 1/4 teaspoon sea salt came together. Will be making this regularly.
Good, but not amazing. The lbs) flavor was nice, but i would reduce the salt a little. I might try it again with some adjustments.
Pretty good overall. The lbs) flavor was nice, but my oven needed an extra 5 minutes. I might try it again with some adjustments.
Perfect for a busy weeknight. I really liked how the 4 bone‑in, skin‑on chicken thighs (about 2 lbs) and 1/4 teaspoon sea salt came together. It took slightly longer than the recipe said. Thanks for sharing this one!
My new favorite way to make Sticky Honey Garlic Chicken Thighs. I really liked how the 4 bone‑in, skin‑on chicken thighs (about 2 lbs) and 1/4 teaspoon sea salt came together. I added a bit more seasoning next time. Saving this for later.
My new favorite way to make Sticky Honey Garlic Chicken Thighs. I really liked how the 4 bone‑in, skin‑on chicken thighs (about 2 lbs) and 1/4 teaspoon sea salt came together. Highly recommend giving it a try.
I wanted to love this dish, but it didn't quite work for me. I found it a bit sweet for my taste. I think with some tweaks it could be really good.
I wanted to love this dish, but it didn't quite work for me. I added a bit more seasoning next time. I think with some tweaks it could be really good.

Recipe by
Alexa CarterFast food, but smarter 🔥🍽️ Bold flavors, simple steps, and meals that always hit the spot 😎
Get Delicious Recipes Weekly
Join 25,000+ home cooks getting our best recipes straight to their inbox.
Free forever • No spam • Unsubscribe anytime